

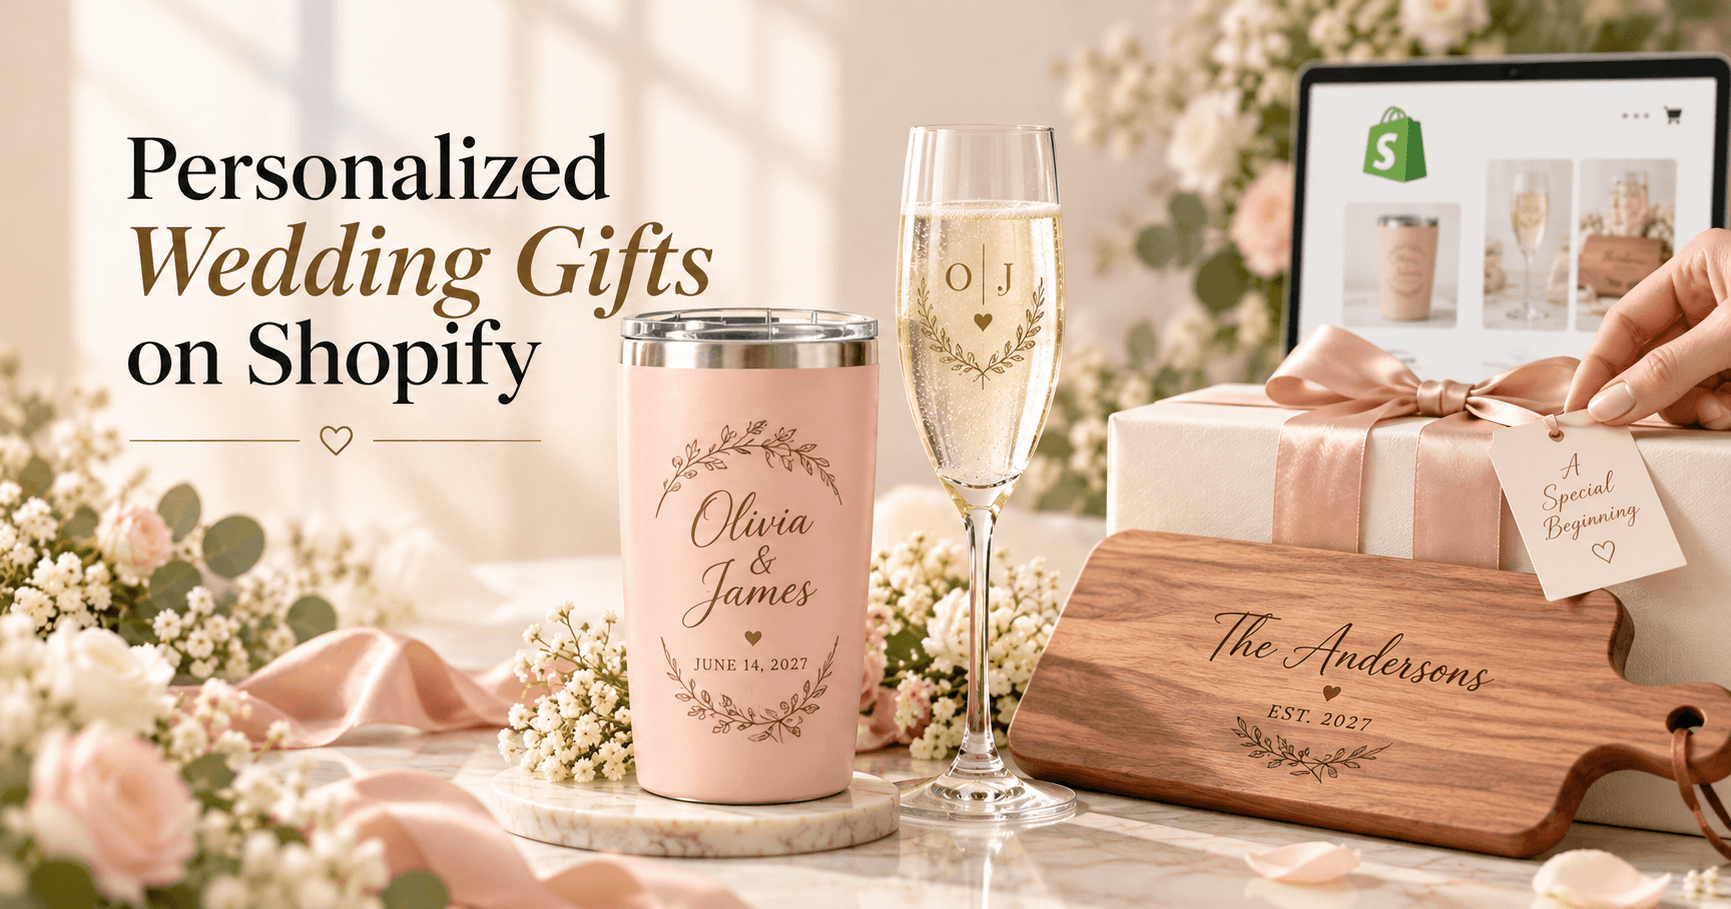
Wedding gifts create a deceptively complex personalization problem. One store may sell engraved cutting boards, bridesmaid tumblers, groomsmen wallets, robes, keepsake boxes, champagne flutes, photo gifts, and jewelry. The customization fields look similar, but the production rules are not.
The best Shopify setup gives each product the inputs it needs while keeping shared choices, such as names, wedding dates, fonts, and gift packaging, consistent where possible.
Quick answer
To sell personalized wedding gifts on Shopify, use Shopify variants for stock-tracked product choices and a product-options app for names, wedding dates, roles, engraving, uploaded photos, font choices, gift messages, paid packaging, conditional fields, and live preview. Build reusable option sets only when products share the same production rules, and test how multiple uniquely personalized items behave in the cart before promoting bulk bridal-party orders.
This guide uses WowOptions for the personalization layer. Its current Shopify App Store listing includes 25+ option types, file uploads, swatches, add-on pricing, conditional logic, reusable option sets, and a Live Customizer on the Advanced plan.
Start by grouping wedding gifts by personalization type
Do not build one giant form for every wedding product.
A better content and store architecture groups products by how they are customized.
Engraved gifts
Examples:
-
cutting boards;
-
flasks;
-
wallets;
-
jewelry;
-
glassware;
-
keepsake boxes.
Common inputs:
-
names or initials;
-
wedding date;
-
short message;
-
font;
-
design template;
-
optional second side.
Printed textile gifts
Examples:
-
robes;
-
tote bags;
-
T-shirts;
-
handkerchiefs.
Common inputs:
-
recipient name;
-
wedding-party role;
-
print or embroidery color;
-
font;
-
garment size;
-
optional date.
Photo gifts
Examples:
-
frames;
-
photo plaques;
-
ornaments;
-
printed keepsakes.
Common inputs:
-
image upload;
-
names;
-
date;
-
layout;
-
caption.
Gift-box products
Common inputs:
-
recipient name;
-
role;
-
selected contents;
-
card message;
-
packaging style.
This grouping makes it easier to reuse the right option set without forcing irrelevant fields onto unrelated products.
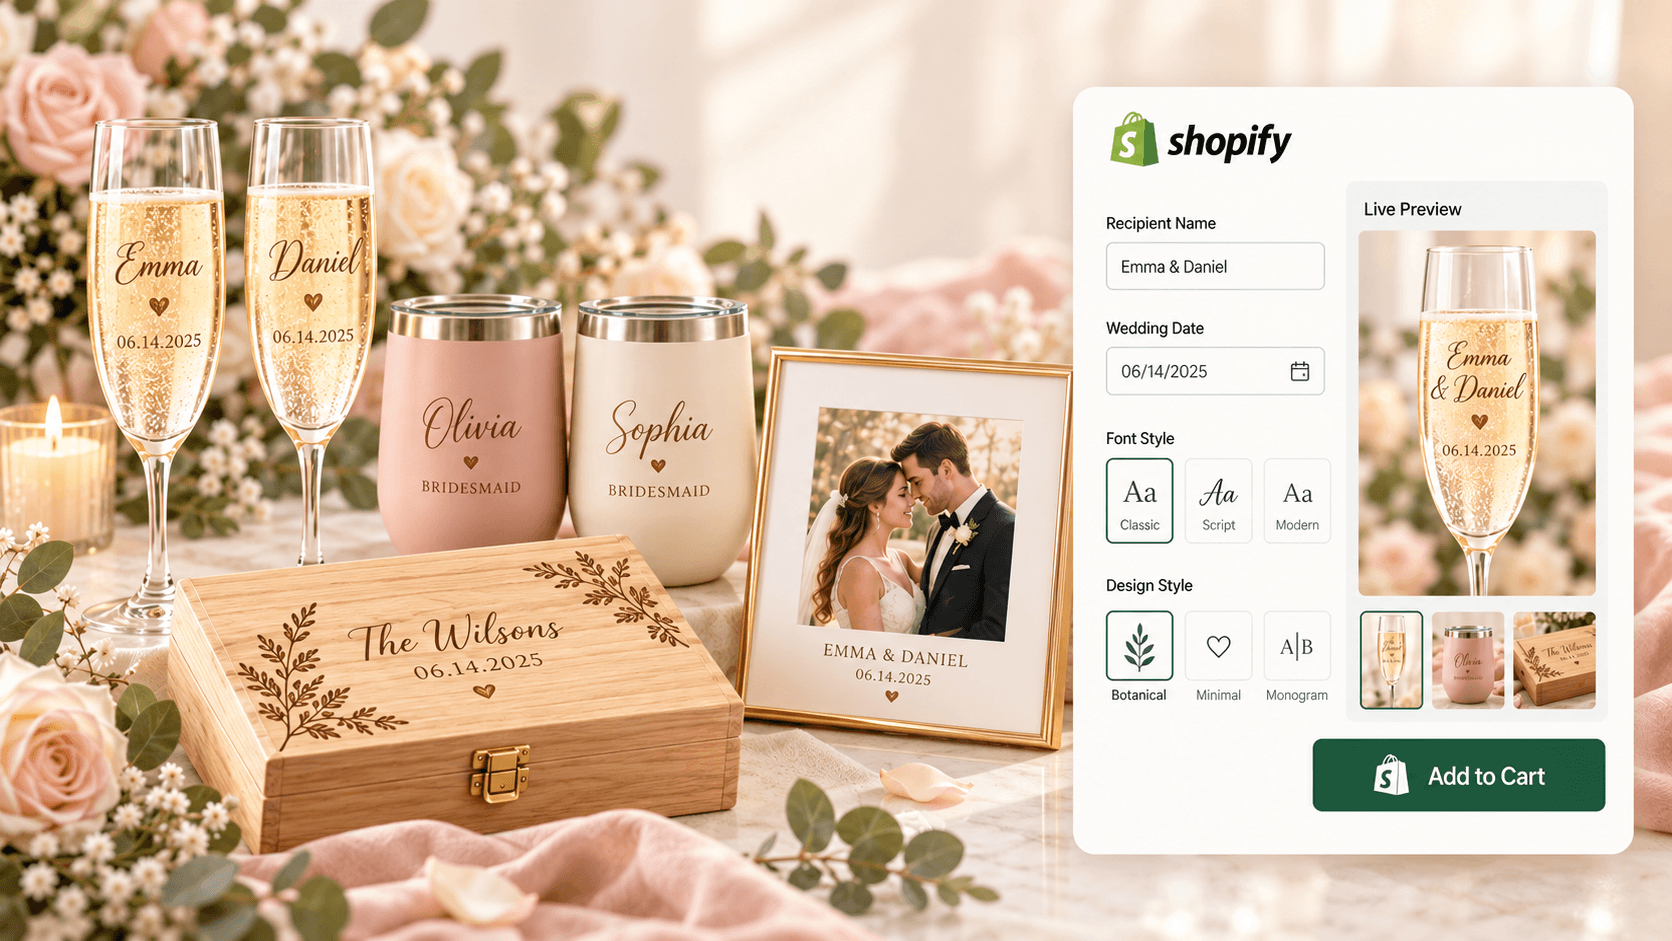
Decide which choices belong in Shopify variants
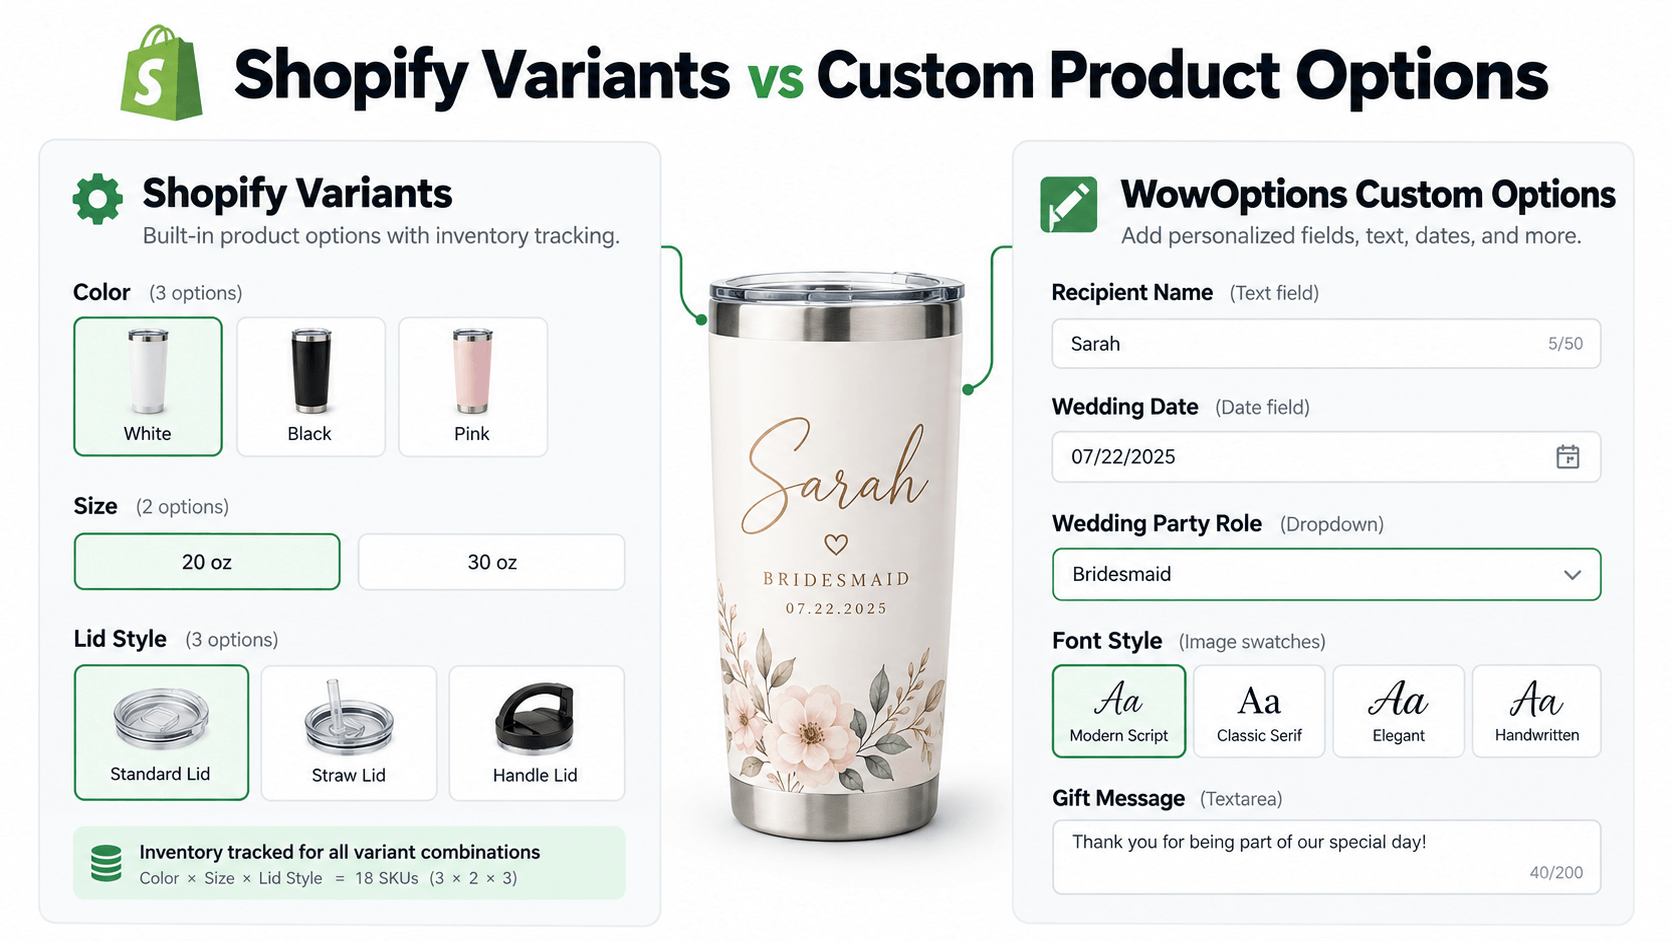
Shopify currently supports up to three product option dimensions and up to 2,048 variants per product. See Shopify’s variant guidance.
Use variants for choices that map to SKU or inventory, such as:
-
robe size;
-
tumbler color;
-
metal finish;
-
necklace length;
-
frame size.
Use custom product options for unique order information, such as:
-
bride/groom names;
-
wedding date;
-
recipient role;
-
engraving text;
-
uploaded photo;
-
gift message;
-
optional personalized packaging.
A name is not a variant. Neither is a wedding date.
Plan for single gifts and bridal-party quantities
Wedding orders often contain multiple items with different personalization.
For example, a customer may order six tumblers:
-
Emma, Bridesmaid;
-
Mia, Bridesmaid;
-
Ava, Bridesmaid;
-
Chloe, Maid of Honor;
-
Sofia, Bridesmaid;
-
Grace, Mother of the Bride.
One shared “Name” field cannot accurately describe six different units unless your app and fulfillment flow specifically supports per-unit personalization.
A safe storefront pattern is to have the customer configure one personalized item, add it to cart, then repeat for the next recipient. If you offer bulk personalization through a spreadsheet or dedicated bulk-order workflow, explain that separately rather than pretending a single product form handles unique data for every quantity automatically.
This is one of the most important wedding-gift tests to run before launch.
Step-by-step guide: sell personalized wedding gifts with WowOptions
Step 1: Create the base product and inventory variants
Start with one product, such as Personalized Bridesmaid Tumbler.
Use Shopify variants for stock choices such as:
-
tumbler color;
-
size;
-
lid style if separately stocked.
Keep the personalization outside the variant matrix.
Step 2: Create a reusable wedding-gift option set where appropriate
In WowOptions, create an option set such as Wedding Name + Role + Date.
Assign it only to products that truly share those fields and limits.
For example, bridesmaid tumblers and tote bags might share Name and Role, but an engraved compact mirror may need a much shorter character limit. In that case, create a separate set.
Reuse saves time only when the production rules remain accurate.
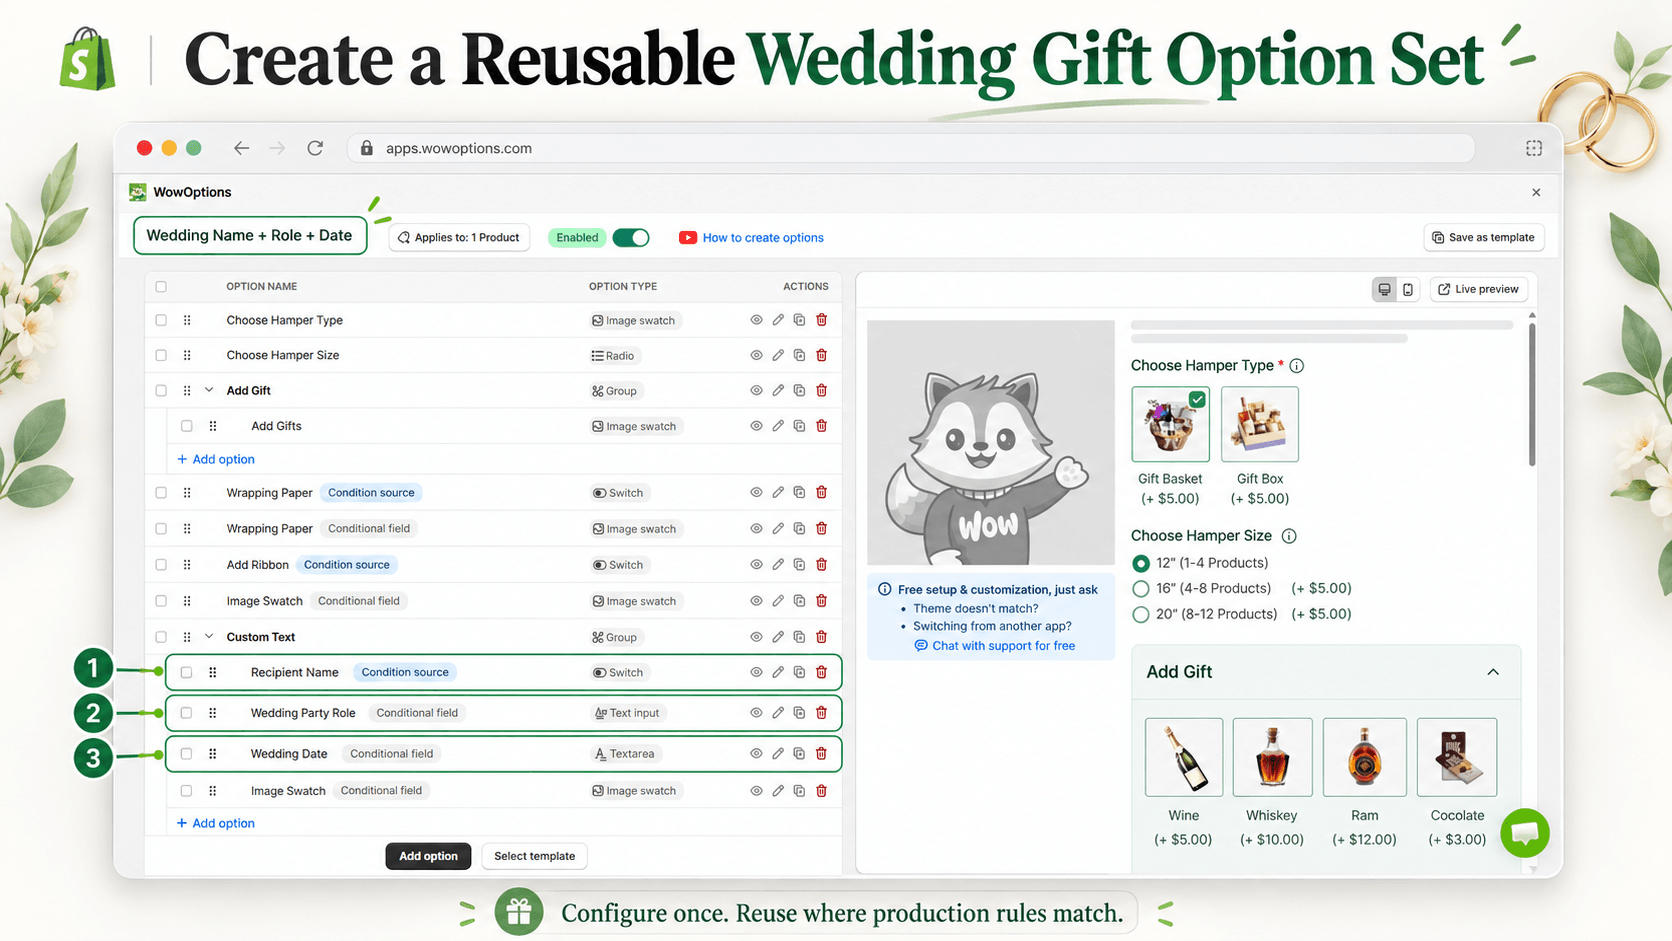
Step 3: Add the recipient name and role
Use clear field labels:
-
Recipient name
-
Wedding party role
For role, a dropdown or buttons can offer common choices such as:
-
Bride;
-
Groom;
-
Bridesmaid;
-
Maid of Honor;
-
Groomsman;
-
Best Man;
-
Mother of the Bride;
-
Father of the Groom;
-
Custom role.
If the shopper selects Custom role, reveal a text field using conditional logic.
This keeps the standard flow fast while still supporting unusual titles.
Step 4: Add the wedding date with a clear format
A date field can reduce ambiguity, but you still need to decide how the date will appear on the product.
For example:
-
June 14, 2027;
-
14.06.2027;
-
06.14.27;
-
XIV.VI.MMXXVII.
If you print exactly what the customer types, use a text input with an example. If you standardize the format internally, tell the shopper what the final format will be.
Step 5: Add font and design-template choices
Many wedding gifts use a fixed design system with a few style choices.
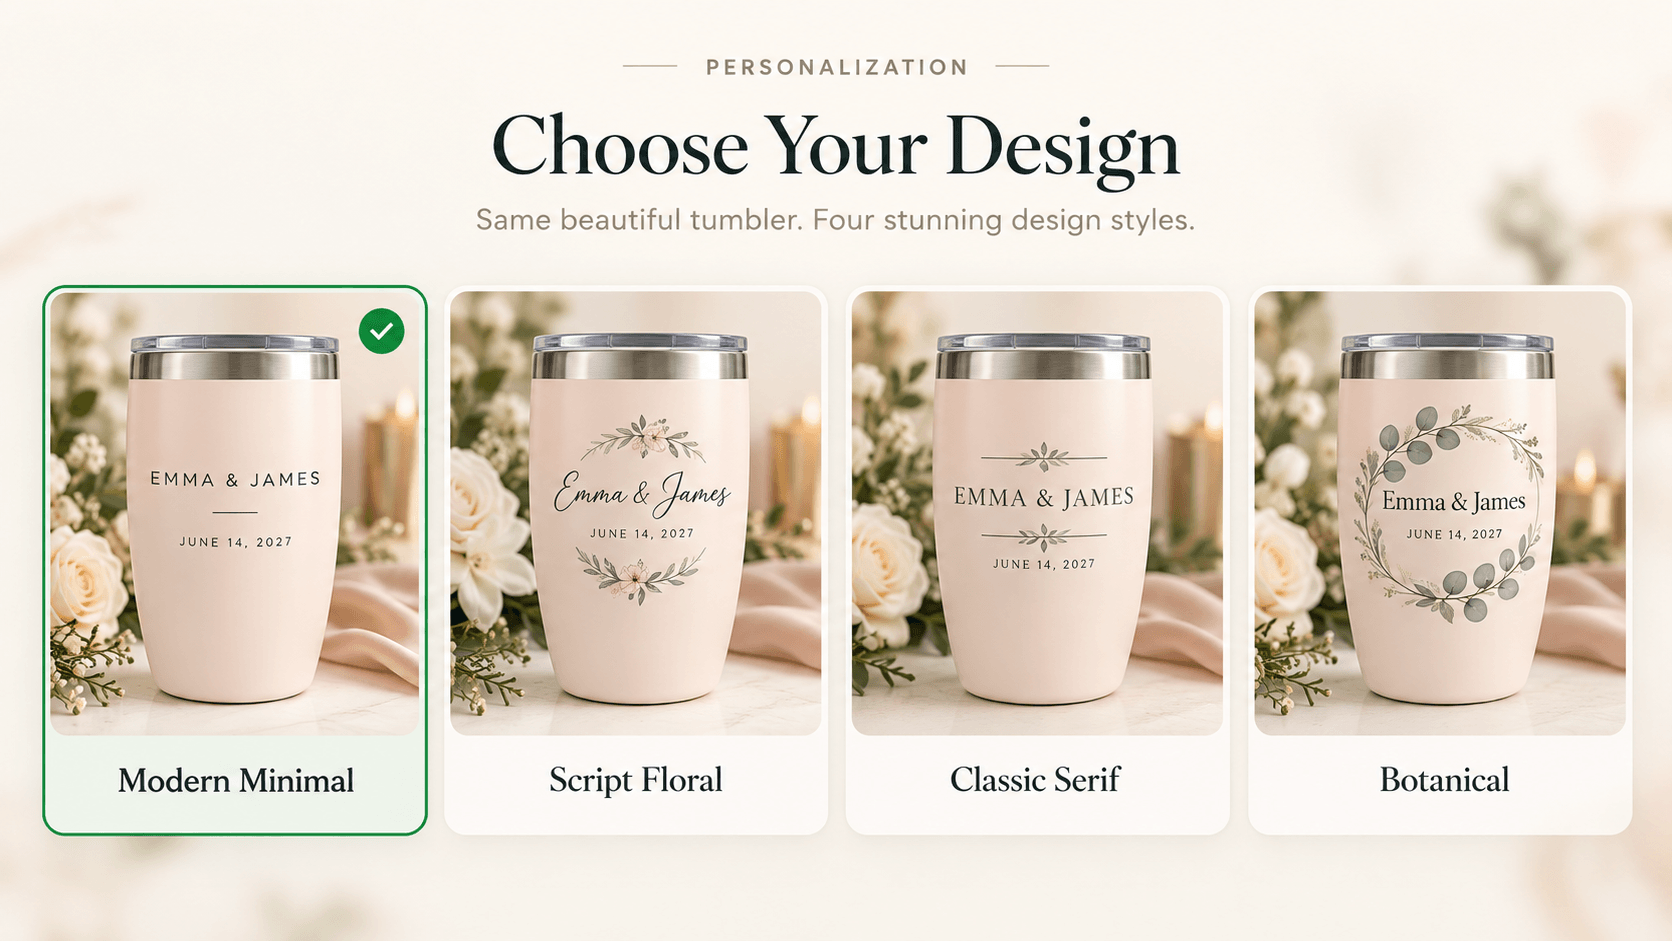
Use buttons or image swatches for templates such as:
-
Modern Minimal;
-
Script Floral;
-
Classic Serif;
-
Botanical;
-
Monogram.
Then offer only the fonts that work with the selected template, using conditional logic where helpful.
A controlled template is easier to fulfill than asking the customer to design every element from scratch.
Step 6: Add photo upload only for products designed for it
Photo gifts need a file upload field and a useful image-quality instruction.
Tell shoppers:
-
preferred file type;
-
whether portrait or landscape works better;
-
whether faces should stay away from the crop edge;
-
whether you remove backgrounds;
-
what happens if the image cannot be used.
Do not add an upload field to every wedding product just because the app supports it.
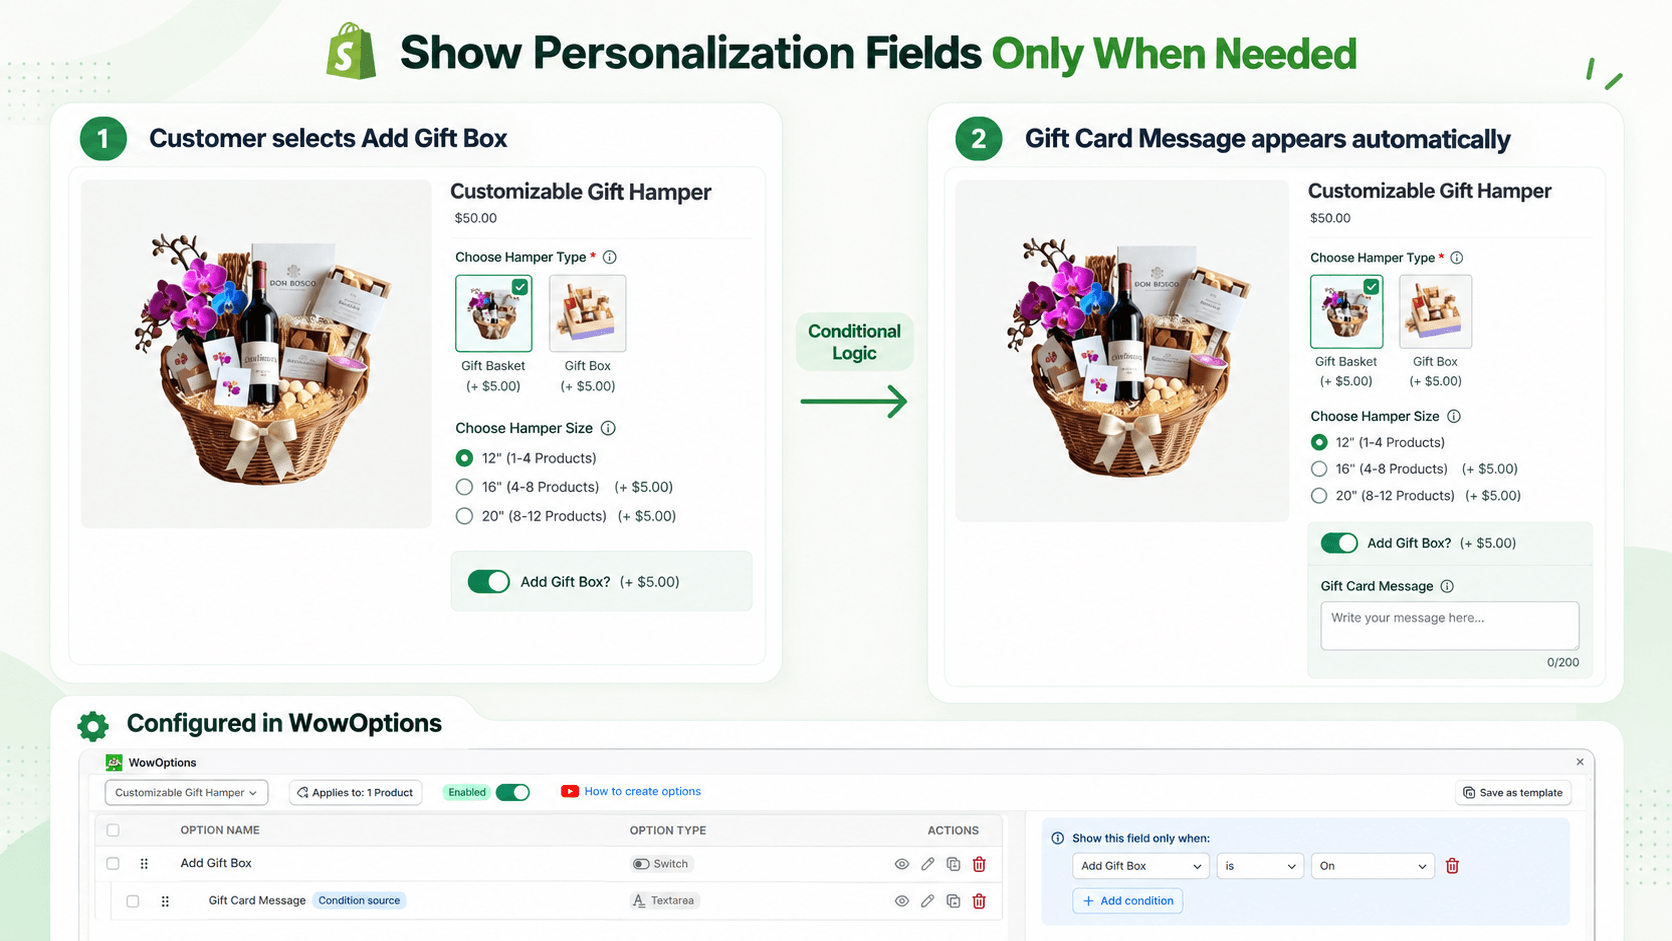
Step 7: Use conditional logic for optional personalization
Wedding products often have optional layers.
Examples:
-
Add wedding date? → reveal date field.
-
Add a custom message? → reveal message field.
-
Add personalization to the back? → reveal second-side field and surcharge.
-
Choose custom role? → reveal role text.
-
Add gift box? → reveal card message.
The product page becomes easier when the customer sees only the decisions they have asked to make.
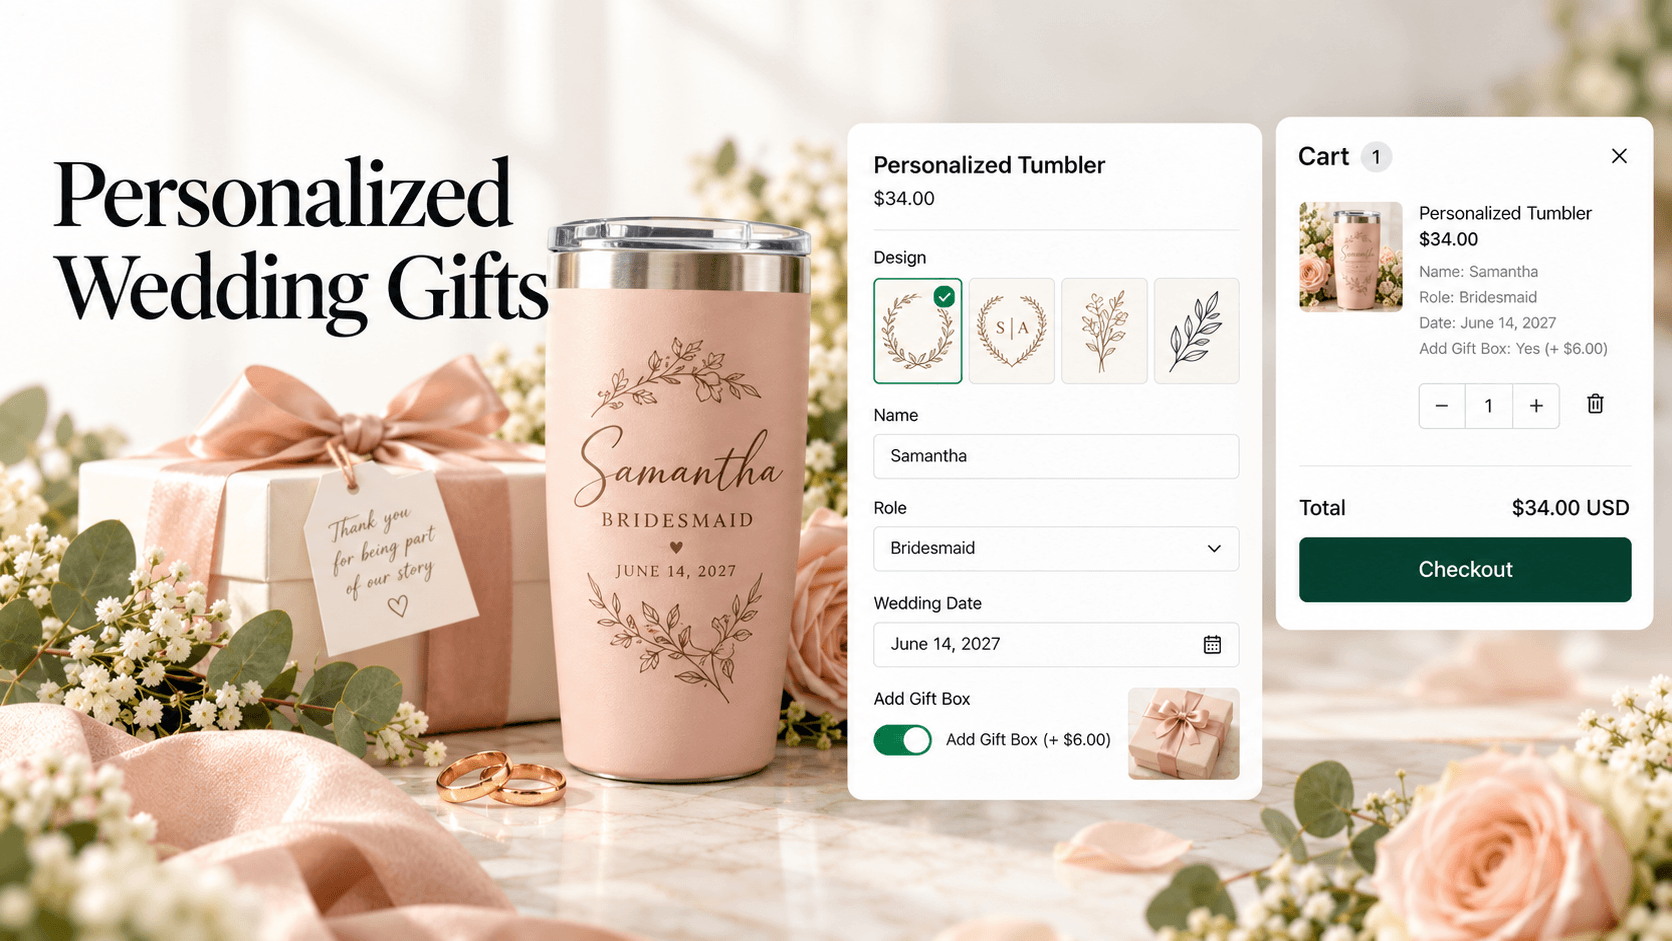
Step 8: Add paid packaging and upgrades carefully
Useful wedding-gift upgrades include:
-
premium gift box;
-
back engraving;
-
second printed side;
-
premium material;
-
matching card;
-
upgraded chain or accessory;
-
rush production when your operation can actually guarantee it.
Show the price change beside the option.
Wedding shoppers often buy multiple items, so even a small per-item surcharge can have a large cart impact. Price clarity matters.
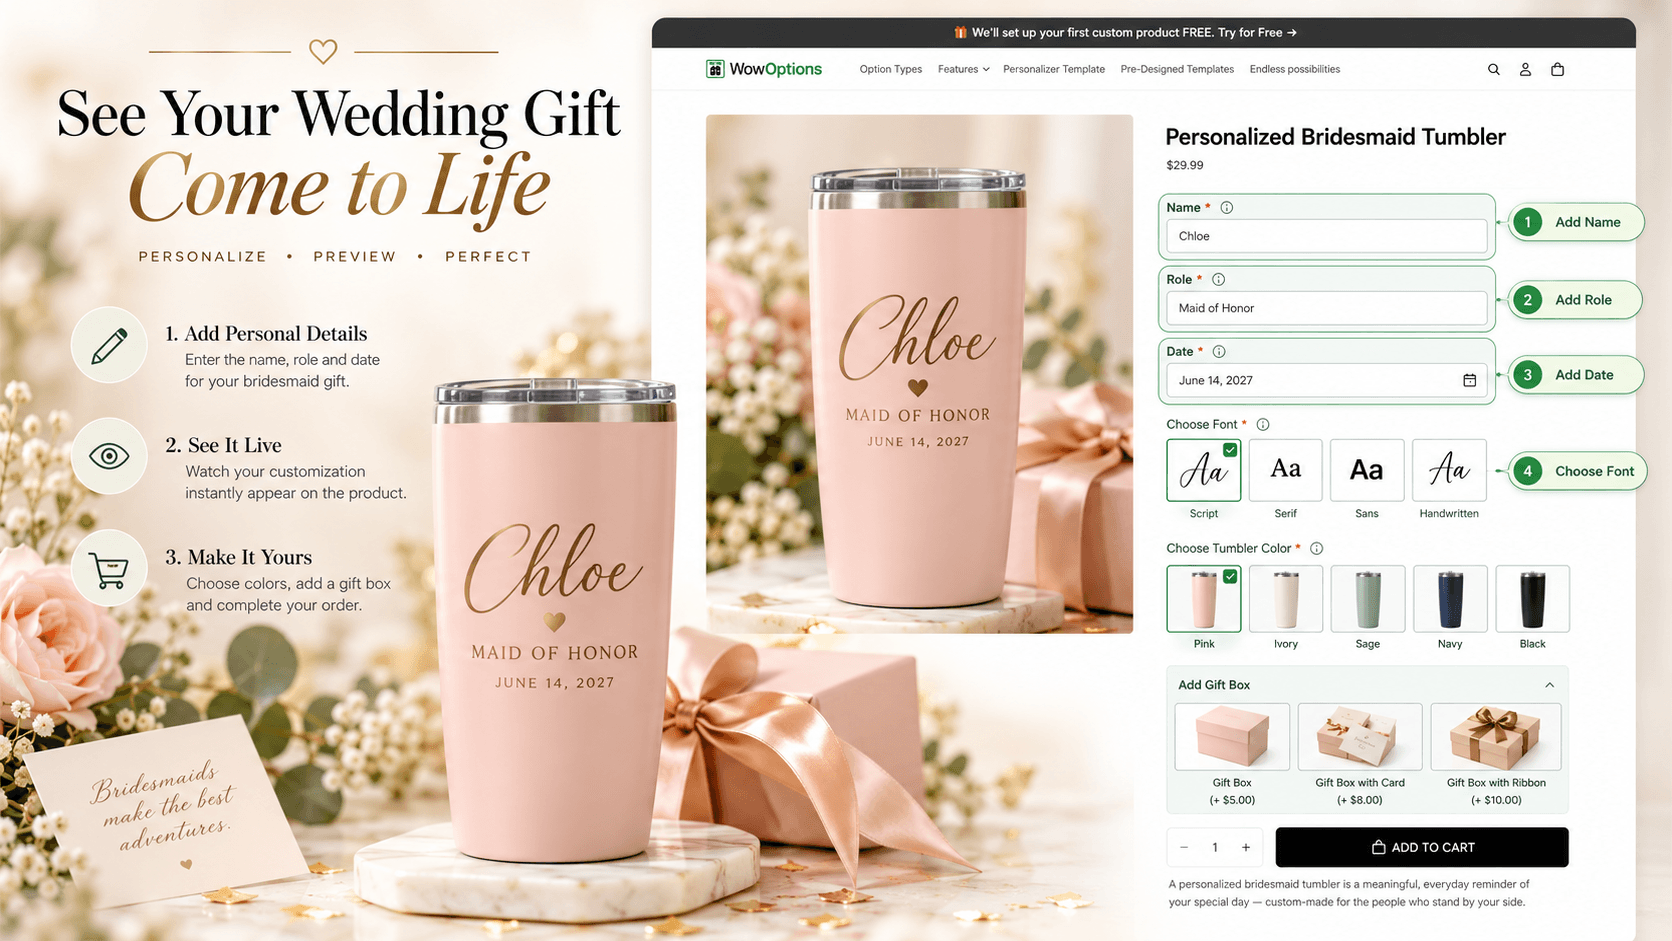
Step 9: Configure live preview when appearance matters
A live product personalizer is especially useful for:
-
engraved names;
-
monograms;
-
printed dates;
-
photo gifts;
-
wedding-party role text;
-
font and color choices.
WowOptions’ current Advanced plan includes Live Customizer. The supplied implementation supports compatible text and image layers, placement controls, and configurable visual boundaries.
Use the preview to help the customer understand layout and hierarchy. Do not call it a final production proof unless your real workflow treats it as one.
Step 10: Test multiple unique items in one cart
This is the wedding-specific QA step that is easy to miss.
Configure an item for Emma, add it to cart, then configure the same product for Mia and add that separately.
Check whether the cart and Shopify order clearly preserve the unique personalization for each line.
Then test quantity behavior. If changing quantity to 5 produces five identical personalized items, make sure the product page explains that. If the customer wants five different names, the workflow should tell them to configure and add each item separately or use your dedicated bulk-order process.
Step 11: Test the production handoff
Review the final Shopify order and make sure the production team can identify:
-
product and variant;
-
recipient name;
-
role;
-
date;
-
chosen design;
-
font;
-
uploaded image;
-
paid upgrades;
-
gift message.
If your team exports or copies this information into another system, test that transfer too.
Example setup: personalized bridesmaid tumbler
|
Decision |
Suggested control |
Notes |
|---|---|---|
|
Tumbler color |
Shopify variant |
Inventory-driven |
|
Recipient name |
Text input |
Unique per item |
|
Role |
Dropdown/buttons |
Custom role can reveal text field |
|
Wedding date |
Date/text |
State final format |
|
Design style |
Image swatch |
Visual comparison |
|
Font |
Font picker/buttons |
Keep list controlled |
|
Add gift box |
Checkbox |
Paid upgrade |
|
Card message |
Conditional textarea |
Only when gift box selected |
|
Preview |
Live Customizer |
Shows name/date layout |
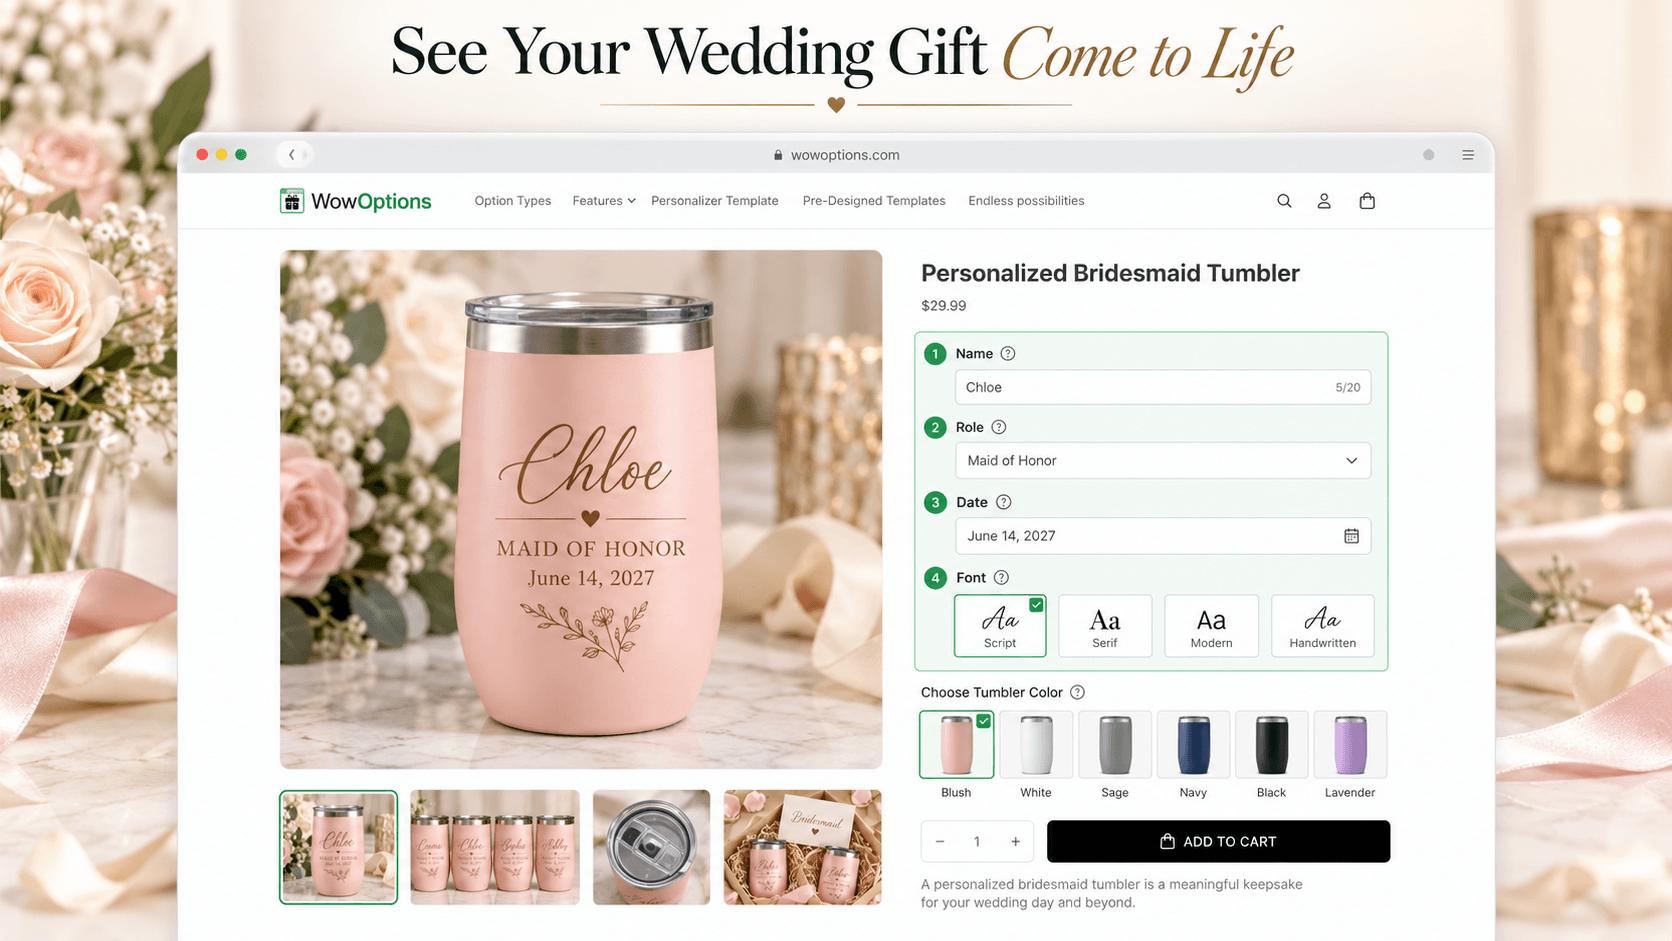
How to create reusable wedding personalization without losing accuracy
Create reusable option sets around shared production rules, not just shared marketing categories.
Good reuse:
-
several 20 oz tumblers with the same print area;
-
a collection of identical jewelry blanks in different finishes;
-
robes with the same embroidery area.
Bad reuse:
-
one engraving form applied to a ring, cutting board, and wine glass despite completely different text limits;
-
one photo-upload rule applied to products with different crop shapes;
-
one gift-message limit applied to cards with different printable space.
Consistency should make fulfillment easier, not create silent errors.
Where WowOptions fits
WowOptions fits personalized wedding stores that sell across several customization styles and want one product-options system for text, swatches, uploads, paid extras, conditional rules, and live preview.
The current Shopify App Store listing positions the app with 25+ option types and a Live Customizer on Advanced, currently $12.99/month at the time checked.
The all-in-one value is strongest when your catalog includes multiple product types and you want reusable option sets without combining separate apps for every field type and visual preview.
For high-volume bulk personalization, supplier-specific CSV workflows, or production automation, you may still need a specialized bulk-order or manufacturing process in addition to the storefront options.
Common wedding-gift mistakes
Treating quantity as multiple unique personalizations
Using one form for every gift category
Showing every optional field immediately
Promising event delivery without production capacity
Calling a visual mockup a proof
Frequently asked questions
What personalized wedding gifts can I sell on Shopify?
How do I collect different names for multiple bridesmaid gifts?
Can I charge extra for gift boxes or back engraving?
Should wedding date be a date picker or text field?
Can WowOptions create wedding gift previews?
Final takeaway
Wedding personalization works best when the storefront feels thoughtful but the fulfillment data stays structured.
Use variants for real product stock. Use custom fields for names, roles, dates, messages, and uploads. Reuse option sets only where production rules match. Most importantly, test multiple uniquely personalized items in the same cart before you market to bridal parties.
For merchants who want one flexible personalization layer across a wedding-gift catalog, WowOptions combines custom options, reusable sets, uploads, swatches, conditional logic, add-on pricing, and a Live Customizer in one Shopify app.