

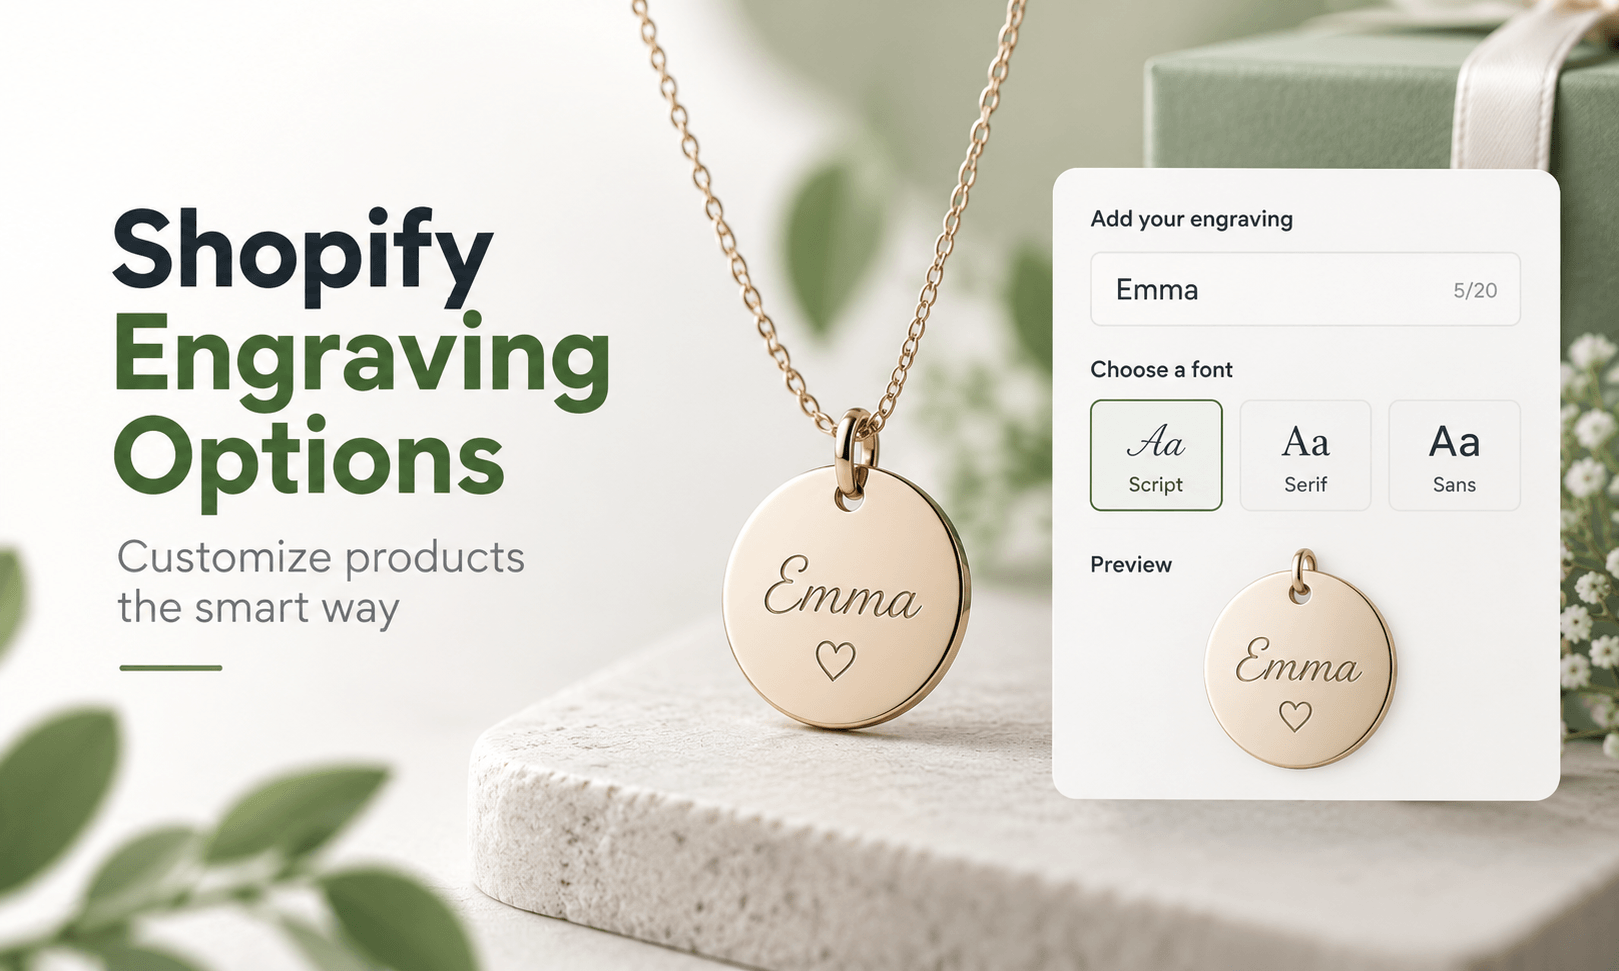
Engraving looks like a simple text field until you try to produce the order. The item has a physical engraving area, a maximum readable length, a limited set of fonts or symbols, and often an extra production charge. Some products can be engraved on one side, others on two. Those rules should be built into the product page before the customer pays.
For a very simple engraving request, Shopify theme code can collect text through line item properties. For a no-code workflow with character limits, font choices, conditional fields, add-on pricing, and live preview, a product-options app is usually more practical.
Quick answer
To add engraving options to a Shopify product:
- Define the real engraving area and maximum text length.
- Decide whether engraving is optional or included.
- Use Shopify variants only for stock-tracked choices such as material or size.
- Use a custom text field for the engraving wording.
- Add font, symbol, placement, or front/back choices only if your production process supports them.
- Charge for engraving visibly when it costs extra.
- Use conditional logic to hide engraving fields when the customer chooses no engraving.
- Add live preview when seeing the layout helps the shopper make a better decision.
- Test the final order data with the person or system that performs the engraving.
This guide demonstrates the workflow with WowOptions, while also comparing several current Shopify product-options apps so you can see the main differences before choosing a tool.
Why add engraving options to your Shopify store?
Engraving turns a standard product into a made-to-order product. A shopper buying a pendant, watch, wallet, pen, pet tag, or keepsake can add initials, a date, a name, or a short message that makes the item specific to the recipient.
The practical value comes from making that request structured.
Instead of receiving an open-ended note such as “please engrave this for my husband,” you can ask for exactly what production needs:
- Engraving: None / Front / Front + Back
- Front text: maximum 12 characters
- Back text: maximum 20 characters
- Font: Block / Serif / Script
- Symbol: Heart / Star / None
The customer gets clearer limits, and your production team receives less ambiguous order information.
A live preview can add another layer of confidence when font or layout materially changes the appearance. It should still be described as a visual guide. Screen rendering cannot promise exact engraving depth, reflectivity, material grain, laser burn, or physical scale.
Shopify theme code or an engraving options app?
Shopify documents line item properties for product-specific customization and explicitly gives monogram and engraving text as examples. If your store needs one small engraving field and your team can maintain theme code, that route may be enough.
An app is more useful when the engraving workflow includes several connected rules:
- required and optional text fields;
- character limits;
- paid engraving;
- front and back engraving;
- font or symbol choices;
- conditional visibility;
- reusable option sets;
- visual personalization.
Four Shopify product-options apps that can support engraving
| App | Engraving-relevant capability | Current upgrade path |
|---|---|---|
| WowOptions | Custom text, swatches, paid add-ons, conditional logic, live personalization; Pro listing includes character limits | Free plan; Pro $4.99/month; Advanced $12.99/month with Advanced Conditional Logic and Live Customizer |
| Qikify Custom Product Options | 30+ option types, text, swatches, conditional logic; paid plan adds price add-ons and Font Selector | Free plan; Unlimited $19.99/month |
| Easify Custom Product Options | Text options and conditional workflows; Pro lists per-character/one-time pricing; Premium lists Product Personalizer Live Preview | Free plan; Pro $9.99/month; Premium $19.99/month |
| Globo Product Options, Variant | Free listing includes text box and conditional logic; Premium adds price add-ons and character limits; Advanced adds live preview | Free plan; Premium $9.90/month; Advanced $19.90/month |
The table is documentary, based on current official App Store listings, not on a new end-to-end test of every app.
For this walkthrough, we will use WowOptions because the intended setup combines text, a character limit, conditional engraving choices, paid add-ons, and optional live preview in one product-options system.
Before you create the engraving fields
Use a real product sample or production proof and decide:
- engraving area width and height;
- maximum characters per line;
- maximum number of lines;
- accepted fonts;
- accepted symbols;
- whether emoji are rejected;
- front, back, inside, or outside placement;
- capitalization rules;
- whether blank spaces count toward the limit;
- engraving fee;
- whether each product size needs a different limit;
- how the request reaches the engraver.
Do not copy a competitor’s character limit without testing your own product. A 12-character name that fits on a wide tumbler may not fit on a small pendant.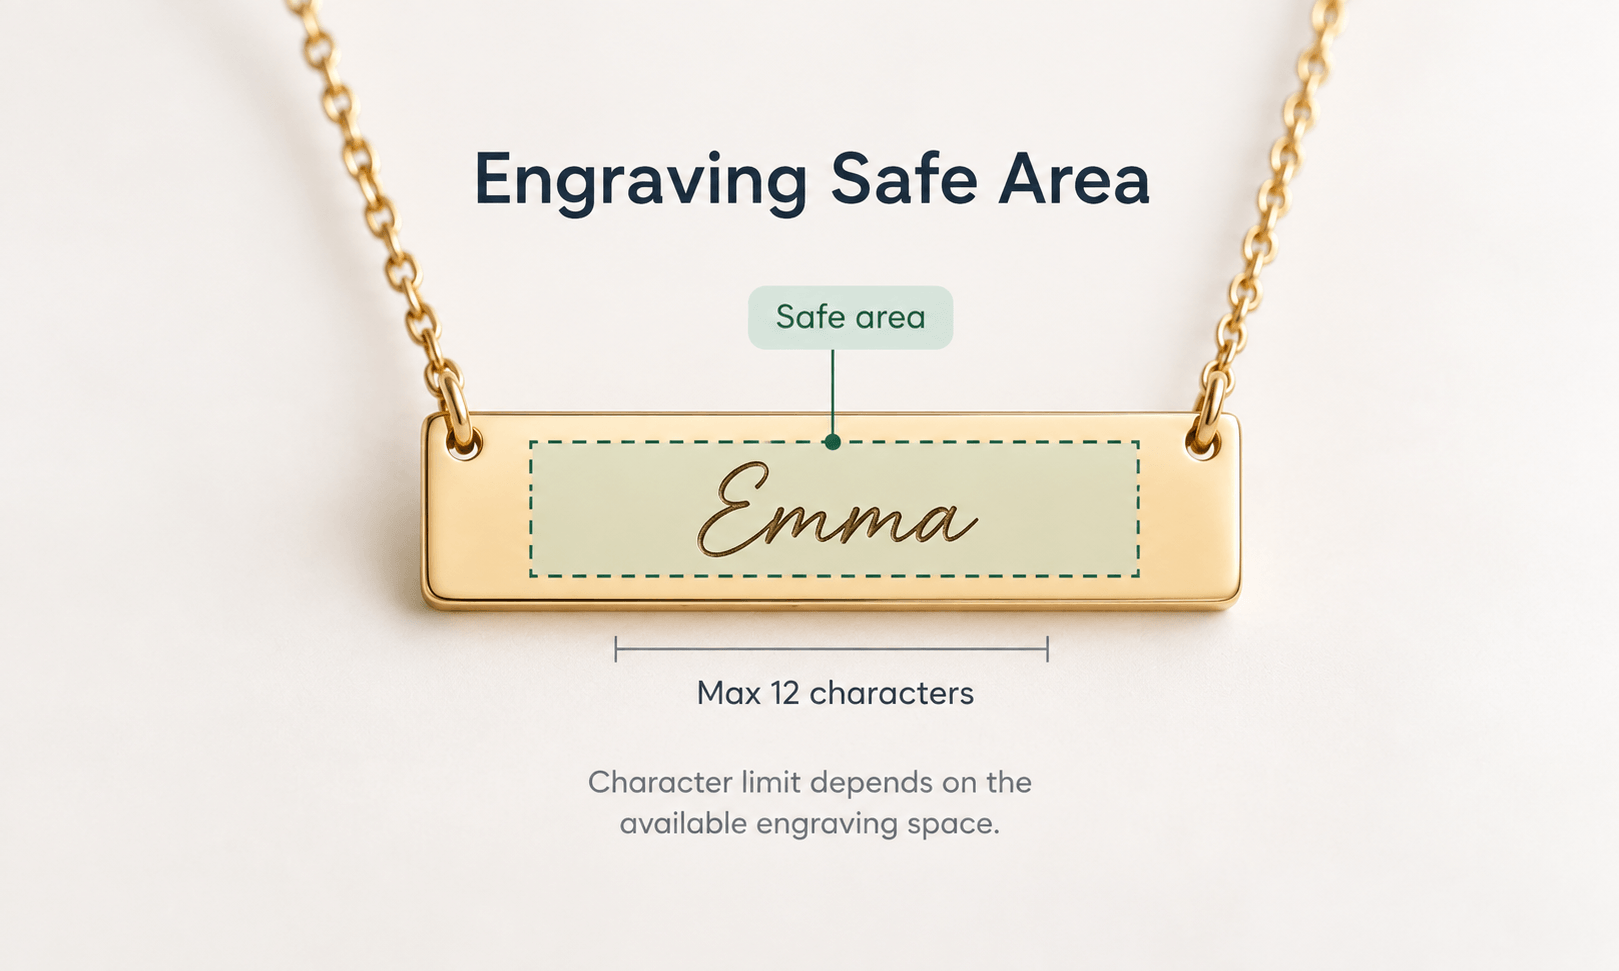
Step-by-step guide: add engraving options with WowOptions
We will use an engraved pendant as the example.
Step 1: Keep physical inventory in Shopify variants
Create variants for choices such as:
- Metal: Silver / Gold / Rose Gold
- Pendant size: Small / Large
Use variants when those choices map to real SKUs, inventory, cost, or fulfillment differences.
Do not create a new Shopify variant for every possible engraving word. The text is unique order information, not inventory.
Step 2: Create an engraving option set
In WowOptions, create an option set such as Pendant Engraving and assign it to the product.
If several jewelry products share exactly the same production rules, you can reuse the set. If the engraving area changes materially by product or size, separate option sets may be safer than one broad template.
Step 3: Ask whether the shopper wants engraving
Start with a clear trigger:
Add engraving? - No - Yes
If engraving has a fee, attach the price to the yes choice or to the engraving service in the way your current app setup supports.
Showing the charge at the moment the customer selects engraving is clearer than revealing it later.
Step 4: Show the text field only when engraving is selected
Add a Short Text field called:
Engraving text
Use conditional logic so it appears only after the shopper chooses Yes.
WowOptions currently lists Advanced Conditional Logic on the Advanced plan. This keeps the plain-product page simple while still supporting a deeper personalized path.
Step 5: Apply the production-tested character limit
The current WowOptions Pro listing includes Add Character Limit, and the Short Text builder contains Enable Character Limit, Min Character, and Max Character controls.
If the pendant supports 10 characters, set 10. If a larger pendant supports 16, use a size-specific workflow or rule that accurately represents the difference.
Do not set a higher number merely to avoid rejecting customer input. The field should prevent orders you cannot engrave legibly.
Step 6: Offer only fonts you have physically tested
A font picker is useful only when every offered font produces an acceptable result on the actual material and size.
For a small engraving area, three tested choices may be better than twenty decorative fonts.
Use plain labels such as:
- Block
- Serif
- Script
If the font can make some letters difficult to read, include a preview or a small sample rather than relying on the name alone.
Step 7: Add front and back engraving without creating a giant form
For products that support two sides, ask:
Engraving location - Front only - Front + back
Show the Back engraving text field only when the second option is selected.
If the second side costs more, make the price difference visible on that choice.
This is a better experience than showing two empty text boxes to every shopper and hoping they understand which one is optional.
Step 8: Add symbol choices only when production supports them
A small approved set of symbols can work well:
- Heart
- Star
- Infinity
- None
Use an image swatch if seeing the symbol shape matters. Avoid accepting arbitrary emoji unless your engraving software, font, and production process have been tested for them.
Step 9: Configure live preview for layout, not manufacturing promises
WowOptions currently lists Live Customizer on the Advanced plan. Use it to help the shopper understand placement, font, and relative text length on the product image.
The preview should answer questions such as:
- Does the name fit visually?
- Does Script or Block look better?
- Does a symbol crowd the wording?
- Is front and back personalization clearly separated?
Do not describe the preview as a precise proof of laser depth, metal reflection, or final color.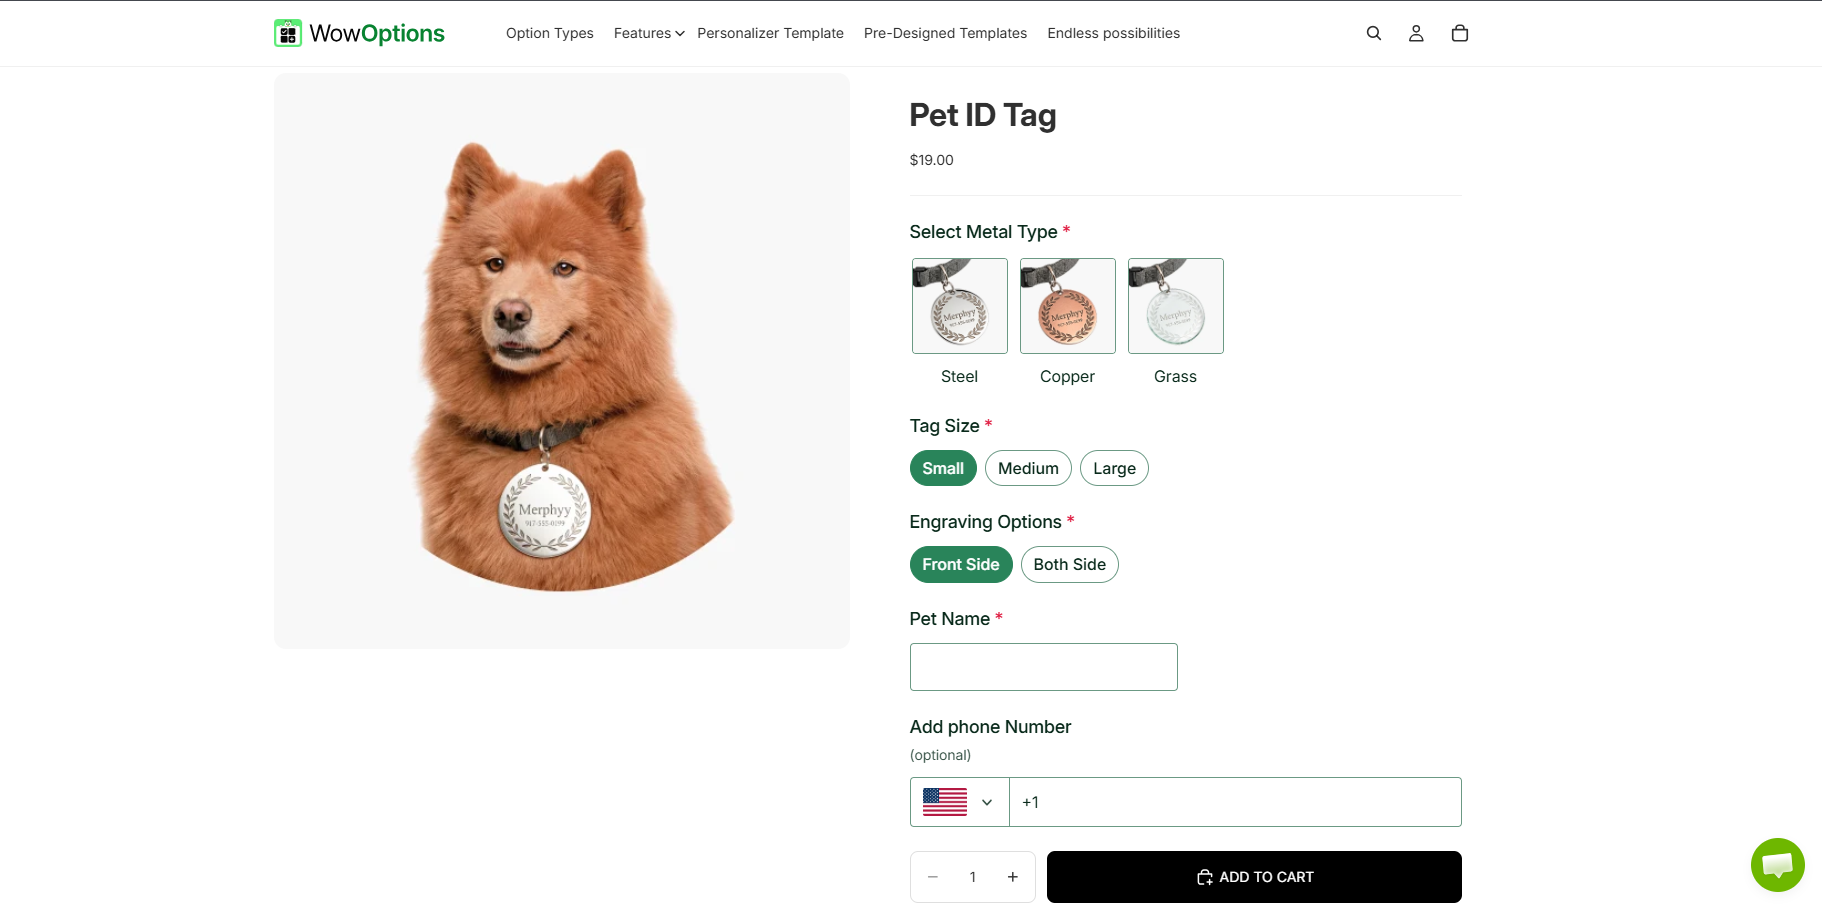
Step 10: Place a production test order
Use edge cases, not just a short sample such as “Ana.”
Test:
- maximum-length text;
- the widest letters in your font;
- spaces, apostrophes, ampersands, or punctuation you intend to allow;
- front + back engraving;
- each offered font;
- the smallest engravable item;
- paid engraving price;
- cart and checkout;
- Shopify order details;
- the exact handoff to your engraver.
The engraver should be able to answer “what do I engrave, where, in which font, and on which side?” without interpreting a vague note.
Example engraving setup
| Field | Control | Example |
|---|---|---|
| Metal | Shopify variant | Silver / Gold |
| Pendant size | Shopify variant | Small / Large |
| Add engraving | Button/radio | No / Yes |
| Engraving text | Short Text | “M + A” |
| Font | Font picker/buttons | Block / Serif / Script |
| Location | Button/radio | Front / Front + back |
| Back text | Conditional Short Text | Date |
| Symbol | Image swatch | Heart / Star / None |
| Engraving fee | Paid option | Visible before cart |
| Preview | Live Customizer | Layout guide |
Common engraving mistakes
Mixing production instructions into one giant note
Separate front text, back text, font, and symbol into their own fields. Structured inputs reduce ambiguity.
Showing an exact-looking preview and implying exact manufacturing output
Digital previews are useful for layout. Keep material and process variation visible in your product copy.
Forgetting the plain-product path
If engraving is optional, shoppers who do not want it should not have to clear or skip several engraving fields.
Can I charge extra for engraving?
Yes, with a product-options solution that supports add-on pricing. Show the charge alongside the engraving choice so customers understand the total before checkout.
Should engraving text be a variant?
No, not when the shopper creates the text. Use Shopify variants for predefined stock-tracked choices and custom fields for unique engraving requests.
How many characters should engraving allow?
There is no universal number. Set the limit from the real engraving area, font, material, and production method. Test the longest valid text on the smallest relevant product.
Do I need a live engraving preview?
Not always. If the engraving is a tiny hidden date, a clear text field may be enough. If font, placement, symbol, or line length meaningfully changes the appearance, a live preview is more useful.
Why WowOptions fits multi-step engraving products
WowOptions is most compelling when engraving is more than one text box. Its current public positioning combines custom product options with paid add-ons, conditional logic, swatches, and a live personalizer, while the Pro listing also calls out character limits.
That lets a merchant keep several personalization controls in one workflow rather than stitching together unrelated tools. The trade-off is that advanced logic and live preview sit on a paid plan, and the final production result still depends on your engraving process.
Next step: define the physical engraving rules first, then build only the choices your production team can reliably fulfill.