

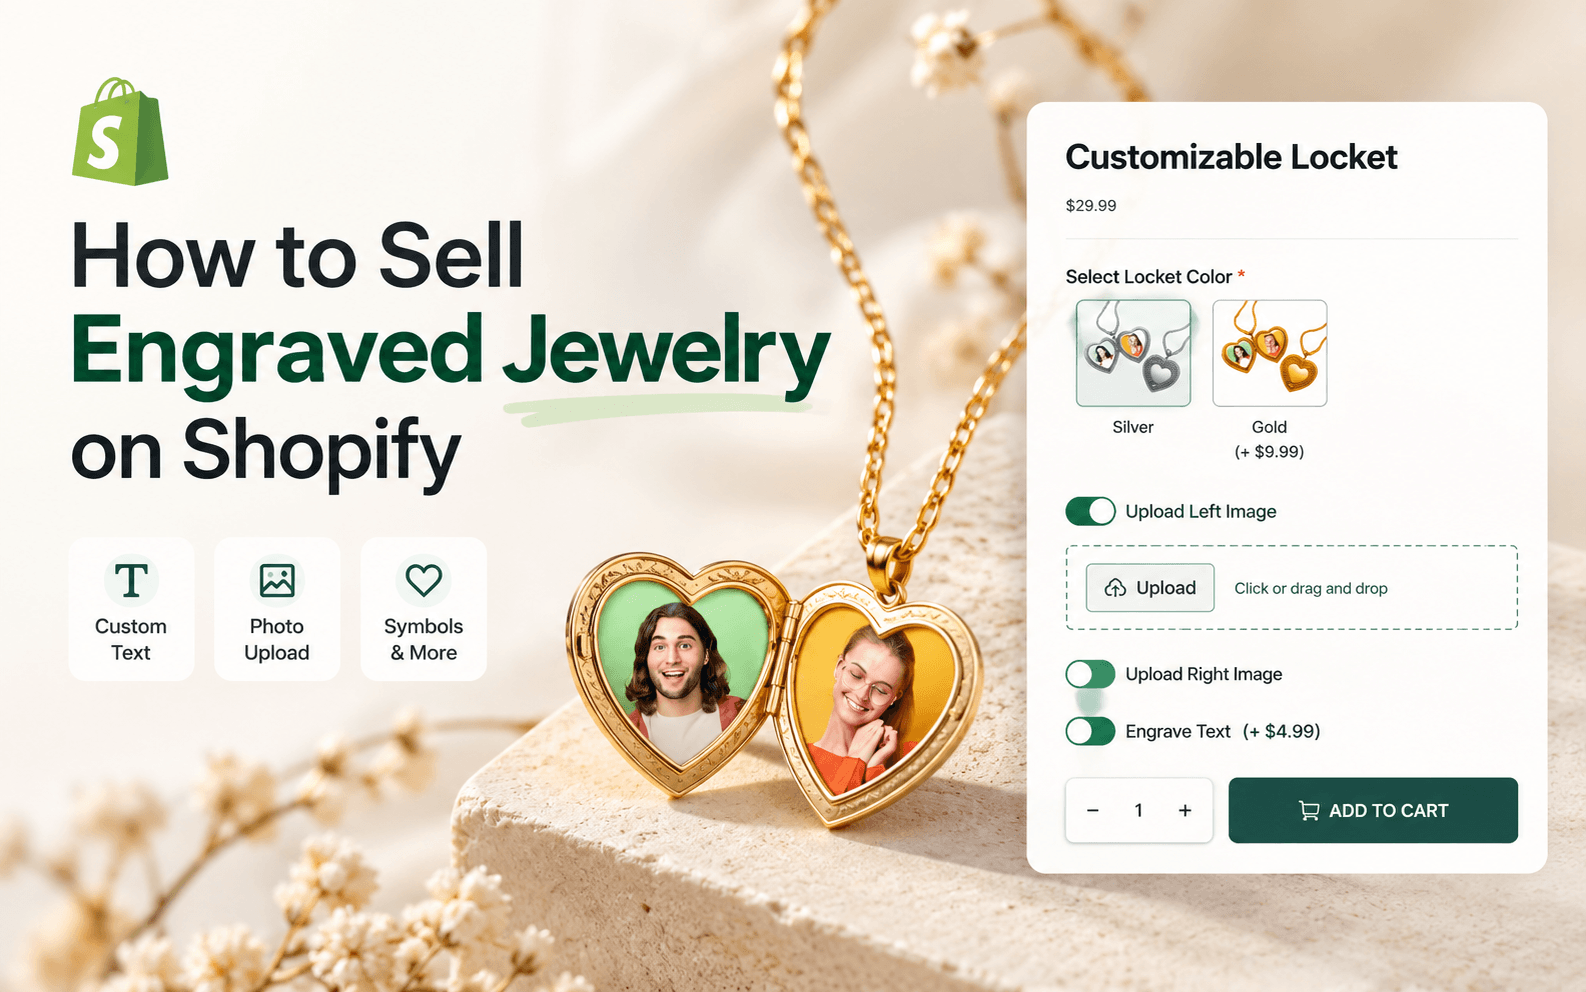
Personalized jewelry is a good example of why “more options” is not the same as a better product page. A necklace may support a metal finish, chain length, one or two names, a date, a symbol, a back engraving, and gift packaging. If every field is visible at once, the shopper has to decode your production process before they can buy.
The better approach is to separate stock choices from personalization, then reveal only the engraving fields that apply to the design the customer selected.
Quick answer
To sell personalized jewelry on Shopify, use Shopify variants for inventory-tracked choices such as metal finish, ring size, or chain length when those combinations have separate SKUs. Use a product-options app for engraving text, dates, fonts, symbols, photo uploads, optional back engraving, add-on pricing, conditional fields, and live preview. Set character and engraving-area limits from your actual manufacturing process, not from what the app can technically accept.
This guide uses WowOptions for the personalization layer. Its current Shopify App Store listing includes 25+ option types, swatches, file uploads, paid add-ons, conditional logic, and a Live Customizer on the Advanced plan.
Start with the jewelry production rules
Before building the Shopify page, document what the piece can physically hold.
For each personalized jewelry design, define:
- maximum characters per engraving area;
- whether spaces and punctuation count;
- available fonts;
- available symbols or icons;
- one-line versus multi-line engraving;
- front and back engraving rules;
- whether dates must follow a specific format;
- supported languages and character sets;
- whether a photo can be engraved;
- whether a manual artwork review is required;
- expected production time;
- any final-sale or personalization policy that applies in your market.
This is especially important for small pieces. A pendant that looks spacious in a product photo may only support a short name legibly.
What should be a variant and what should be a personalization option?
Shopify currently supports up to three product option dimensions and up to 2,048 variants per product. That is usually enough for core jewelry inventory such as material, size, and chain length. See Shopify’s variant guidance.
A practical split might be:
| Customer choice | Recommended setup | Why |
|---|---|---|
| Metal finish | Shopify variant | Often tied to SKU, cost, and inventory |
| Ring size | Shopify variant | Usually stock or production SKU |
| Chain length | Variant or option | Use a variant if stock-tracked |
| Engraved name | Text input | Unique order data |
| Date | Text or date field | Unique order data |
| Font | Font picker / buttons | Personalization choice |
| Symbol | Image swatch / buttons | Personalization choice |
| Back engraving | Conditional paid option | Only relevant when selected |
| Photo engraving | File upload | Unique file |
| Live engraving preview | Product personalizer | Helps with visual confidence |
Do not create variants for every possible name or date. Those choices do not represent inventory.
Choose one clear jewelry personalization model
Different jewelry products need different flows.
Name necklace
Customer chooses a finish and chain length, then enters one or more names.
Engraved pendant
Customer selects front text, optional back text, font, and possibly a small symbol.
Coordinates or date bracelet
Customer enters a date, coordinates, initials, or a short phrase within a strict length.
Photo locket or photo engraving
Customer uploads an image and may add text.
The option structure should match the product. Reusing a giant “jewelry personalization” form across every item usually creates irrelevant fields.
Step-by-step guide: sell personalized jewelry with WowOptions
Step 1: Create the base jewelry product in Shopify
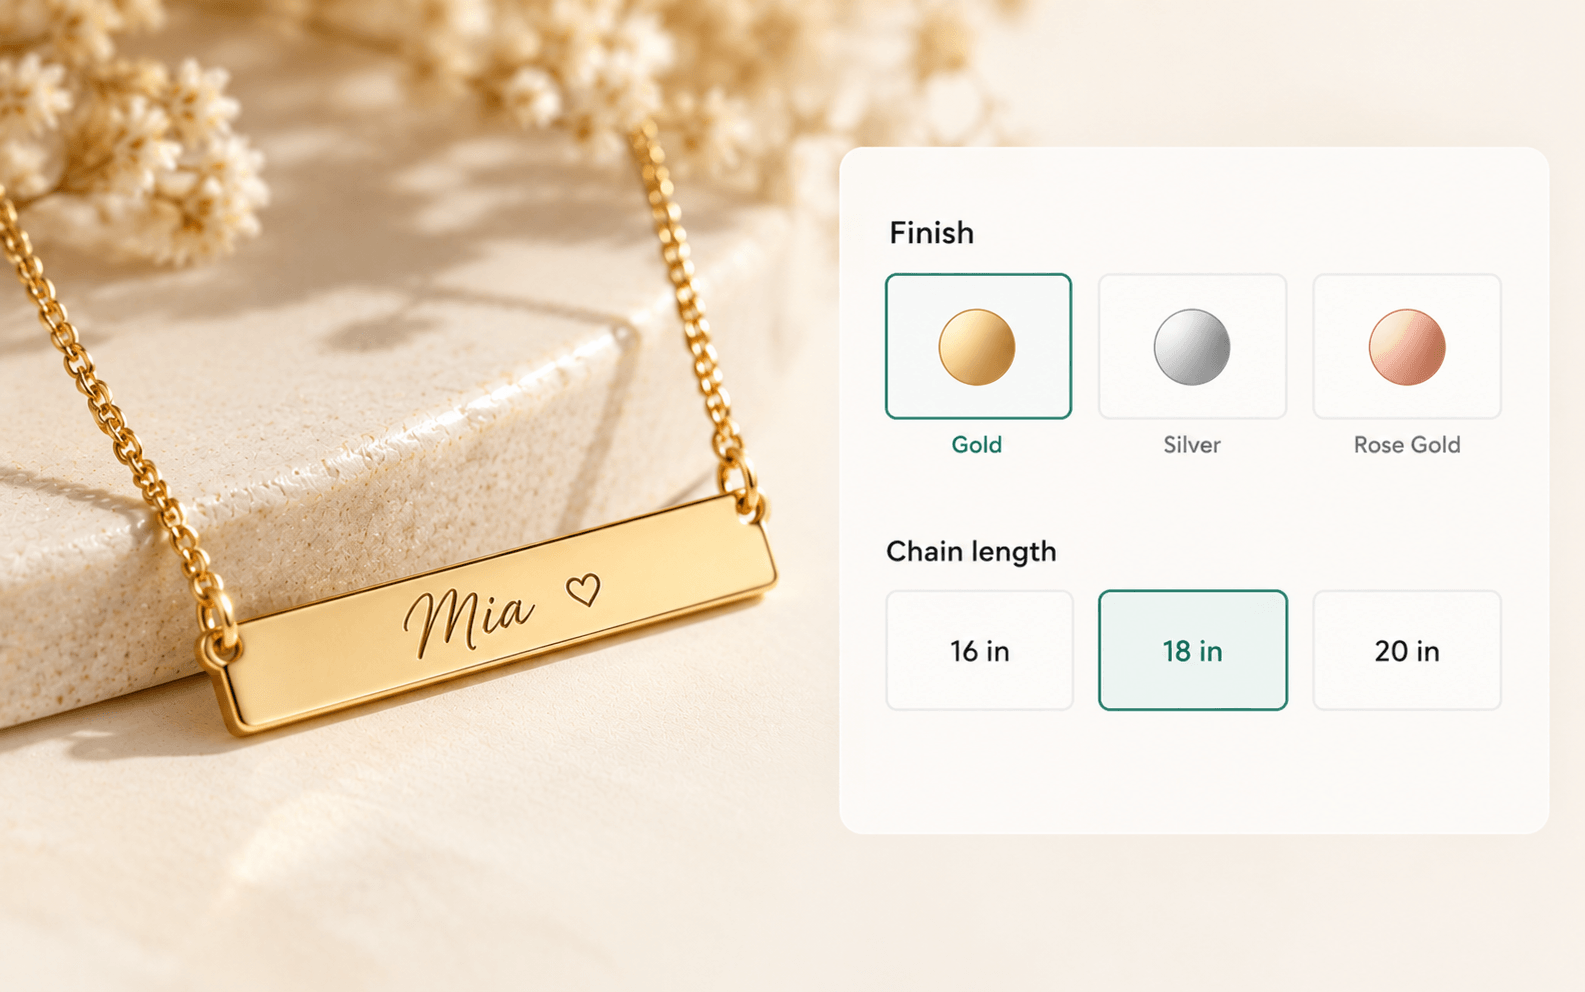
Set up the product and inventory-driven variants first.
For an engraved bar necklace, you might use:
- Finish: Gold, Silver, Rose Gold;
- Chain length: 16 in, 18 in, 20 in.
If a choice does not affect SKU or stock, consider keeping it out of the variant matrix and handling it as a custom option instead.
Step 2: Create a dedicated option set
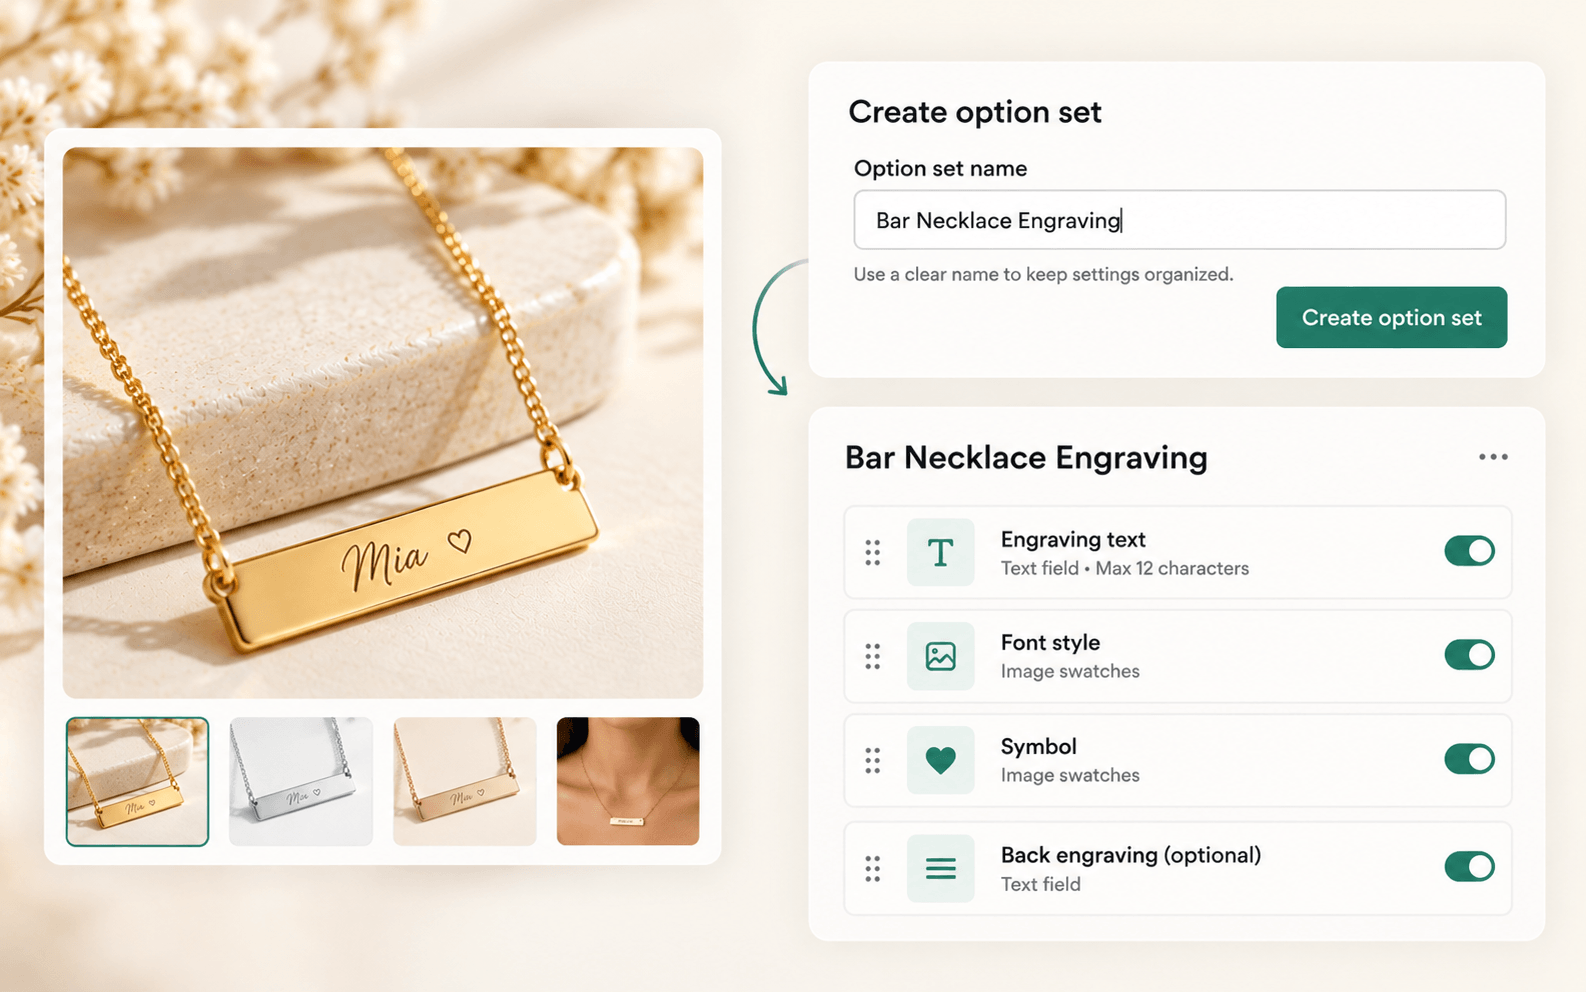
In WowOptions, create a new option set and assign it to the jewelry product.
Use a descriptive internal name such as Bar Necklace Engraving or Photo Locket Personalization.
A dedicated option set makes it easier to keep character limits, required fields, and pricing consistent for one manufacturing specification.
Step 3: Ask whether the shopper wants optional engraving
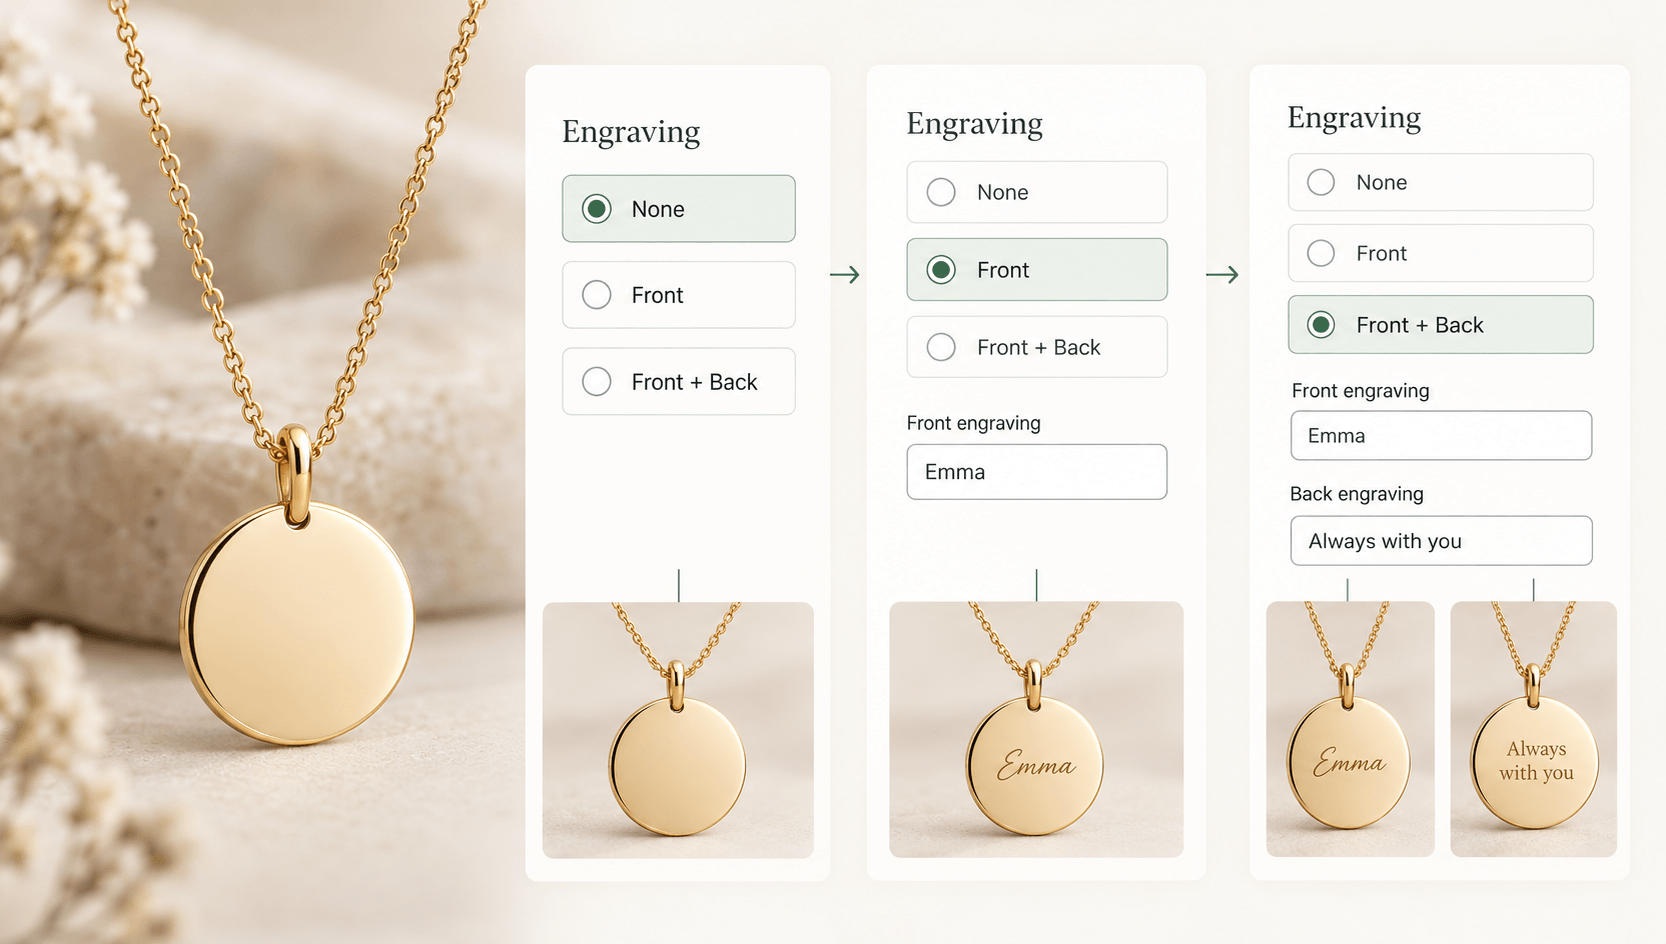
If personalization is optional, start with a simple switch or radio choice:
Add engraving? - No - Front only - Front + back
Then use conditional logic so the back-engraving field appears only when Front + back is selected.
This avoids showing a back-text box to customers who are not buying a back engraving.
Step 4: Add the engraving text with a real character limit
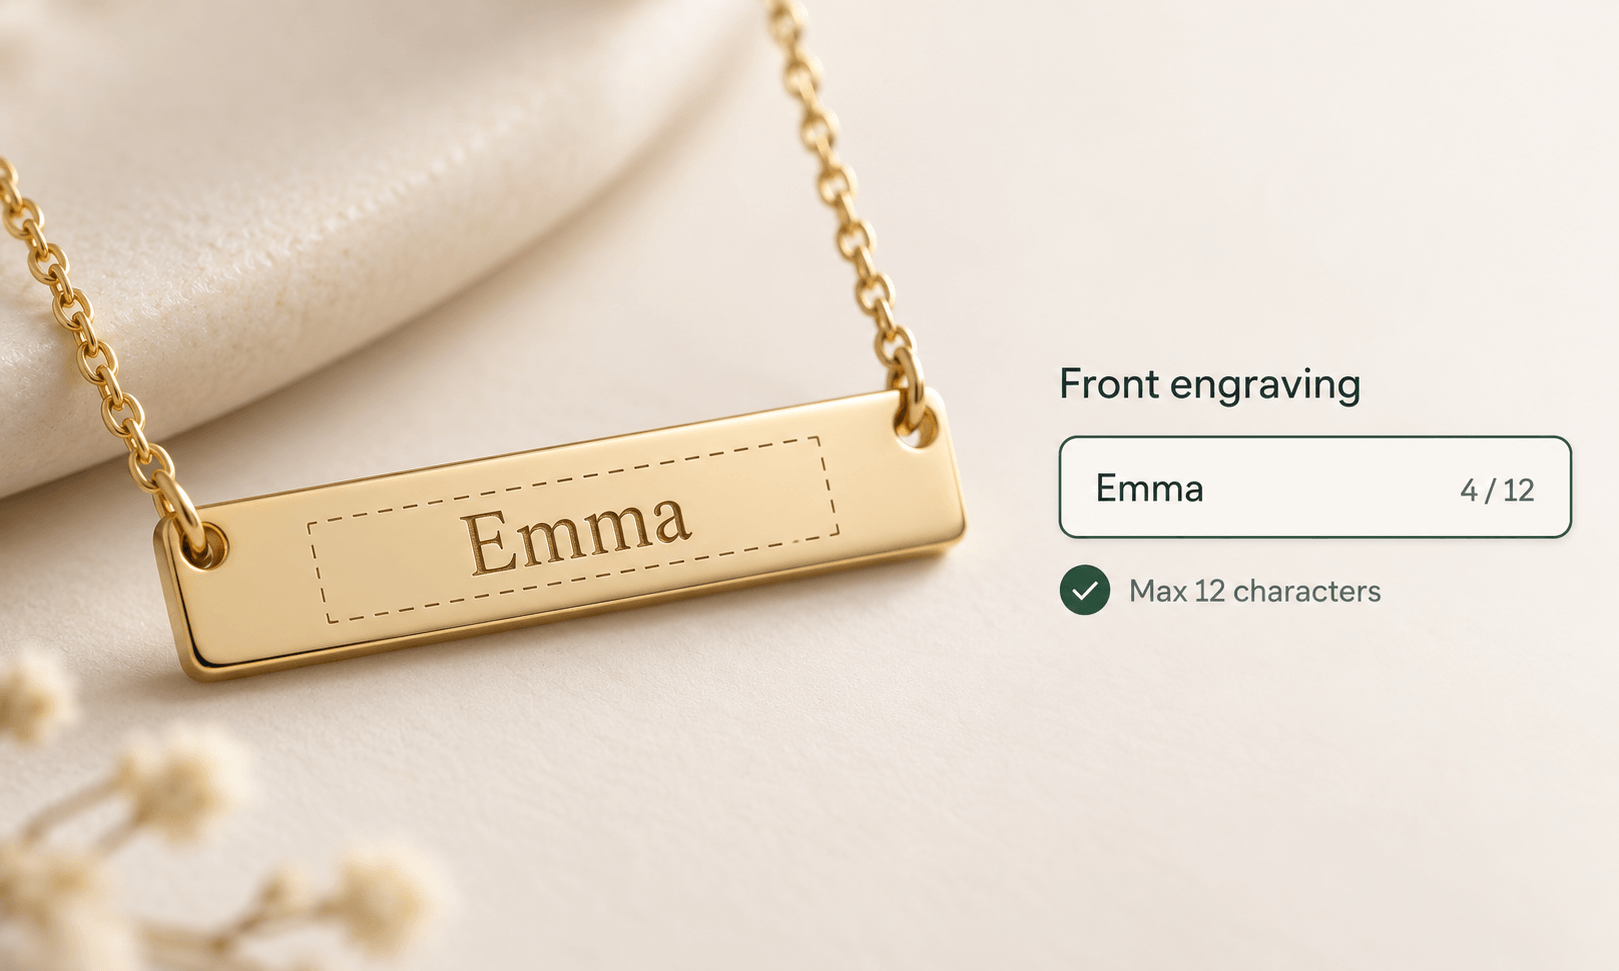
Use a text input for a short engraving and a textarea only when the design genuinely supports multiple lines.
A useful label is specific:
Front engraving, maximum 12 characters
rather than:
Custom text
If your engraver treats spaces, punctuation, or symbols differently, explain that beside the field.
Character limits should come from the physical engraving area and chosen font. A technically valid 30-character input is useless if the result has to be engraved at an unreadable size.
Step 5: Offer a controlled font list
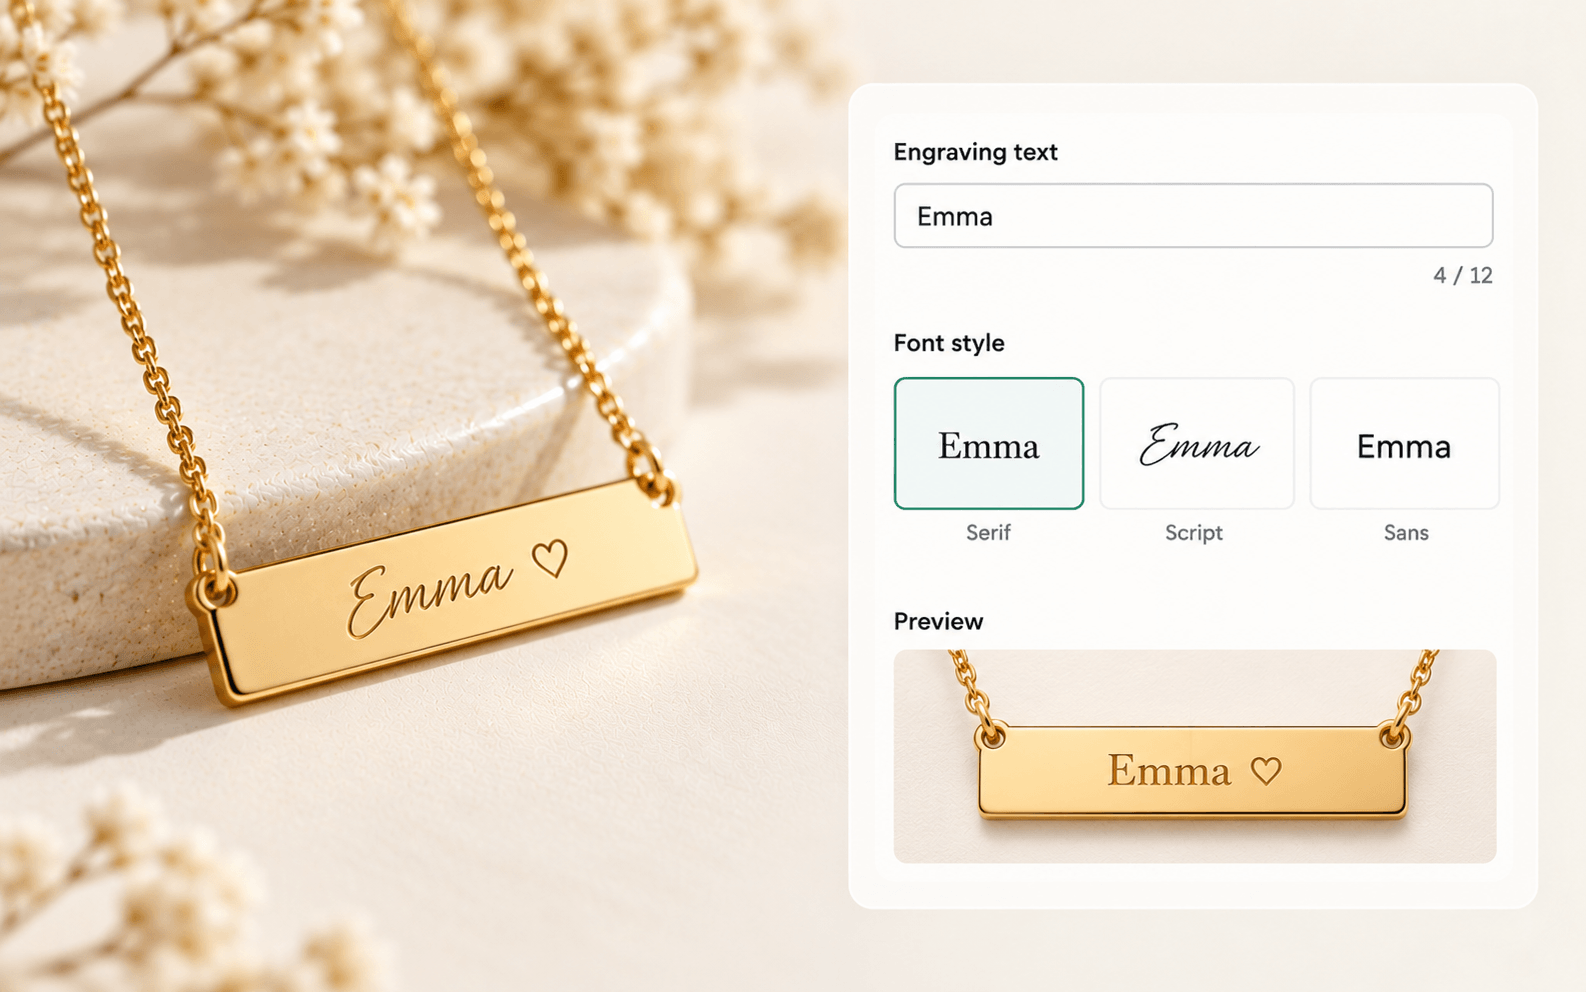
If the piece supports multiple fonts, keep the choices limited to fonts your production process has tested.
A font picker is helpful, but the list should not become a design catalog. Three to six dependable options are often easier for shoppers to compare and easier for your production team to reproduce consistently.
If the font changes how many characters fit, state that limitation clearly or use the strictest safe limit across all offered fonts.
Step 6: Add symbols as visual choices
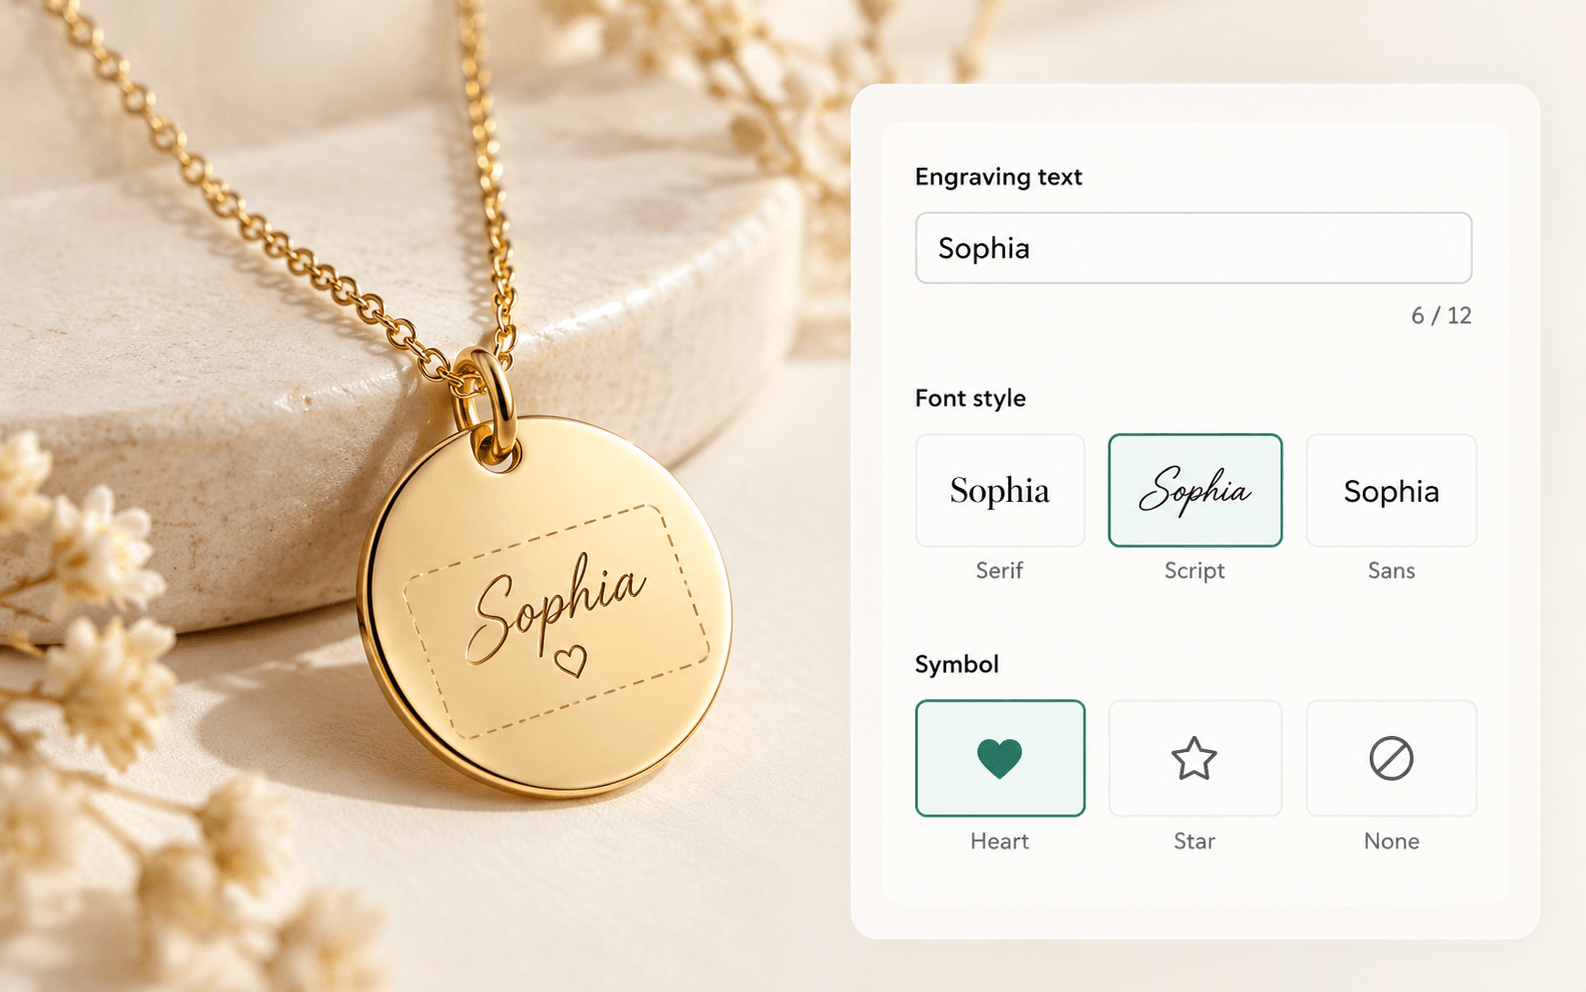
For hearts, stars, infinity symbols, birth flowers, or other engraving icons, image swatches can be clearer than text labels.
Use a small set of production-approved symbols and give each a plain label for accessibility and order clarity.
Do not rely on arbitrary emoji input if your engraving workflow cannot guarantee that the exact glyph will be available.
Step 7: Add optional photo upload only where you can process it
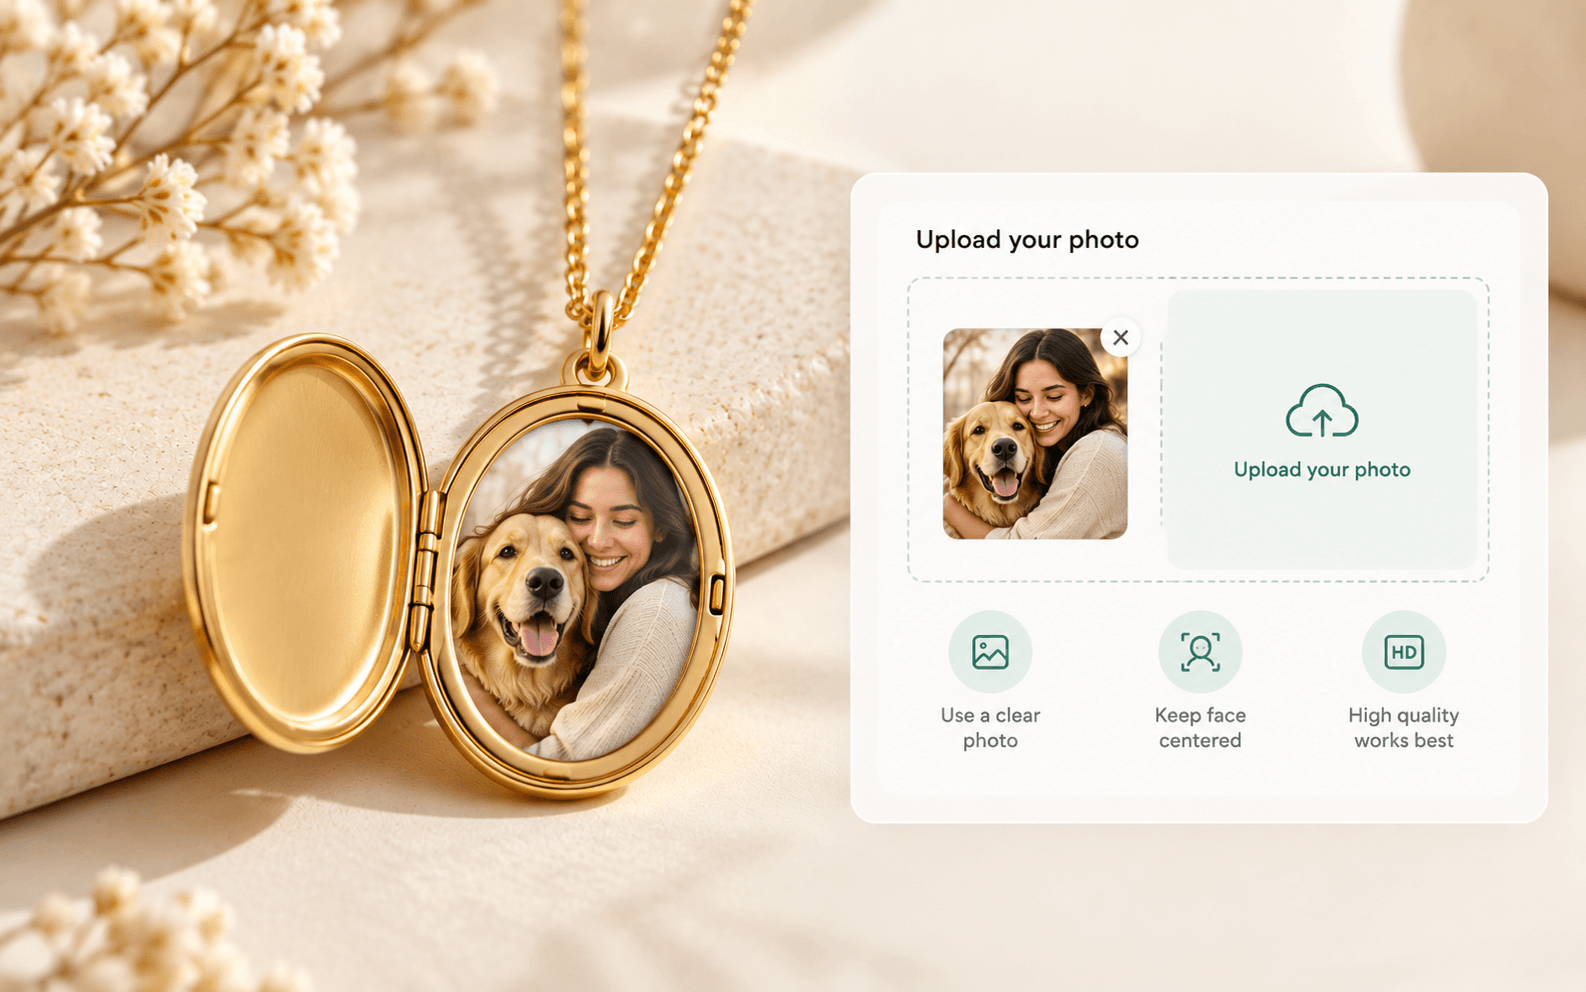
Photo jewelry can use a file upload field, but the upload control is only part of the workflow.
Tell shoppers:
- what kind of image works best;
- whether faces should be close-up;
- whether background removal is included;
- whether you will crop the image;
- whether a designer will contact them if the photo is unsuitable.
WowOptions’ current Pro and Advanced plans list file upload support, with higher file-count and size limits on Advanced. Most jewelry products need one image, so focus less on the maximum number of uploads and more on giving the customer useful image guidance.
Step 8: Add paid upgrades clearly
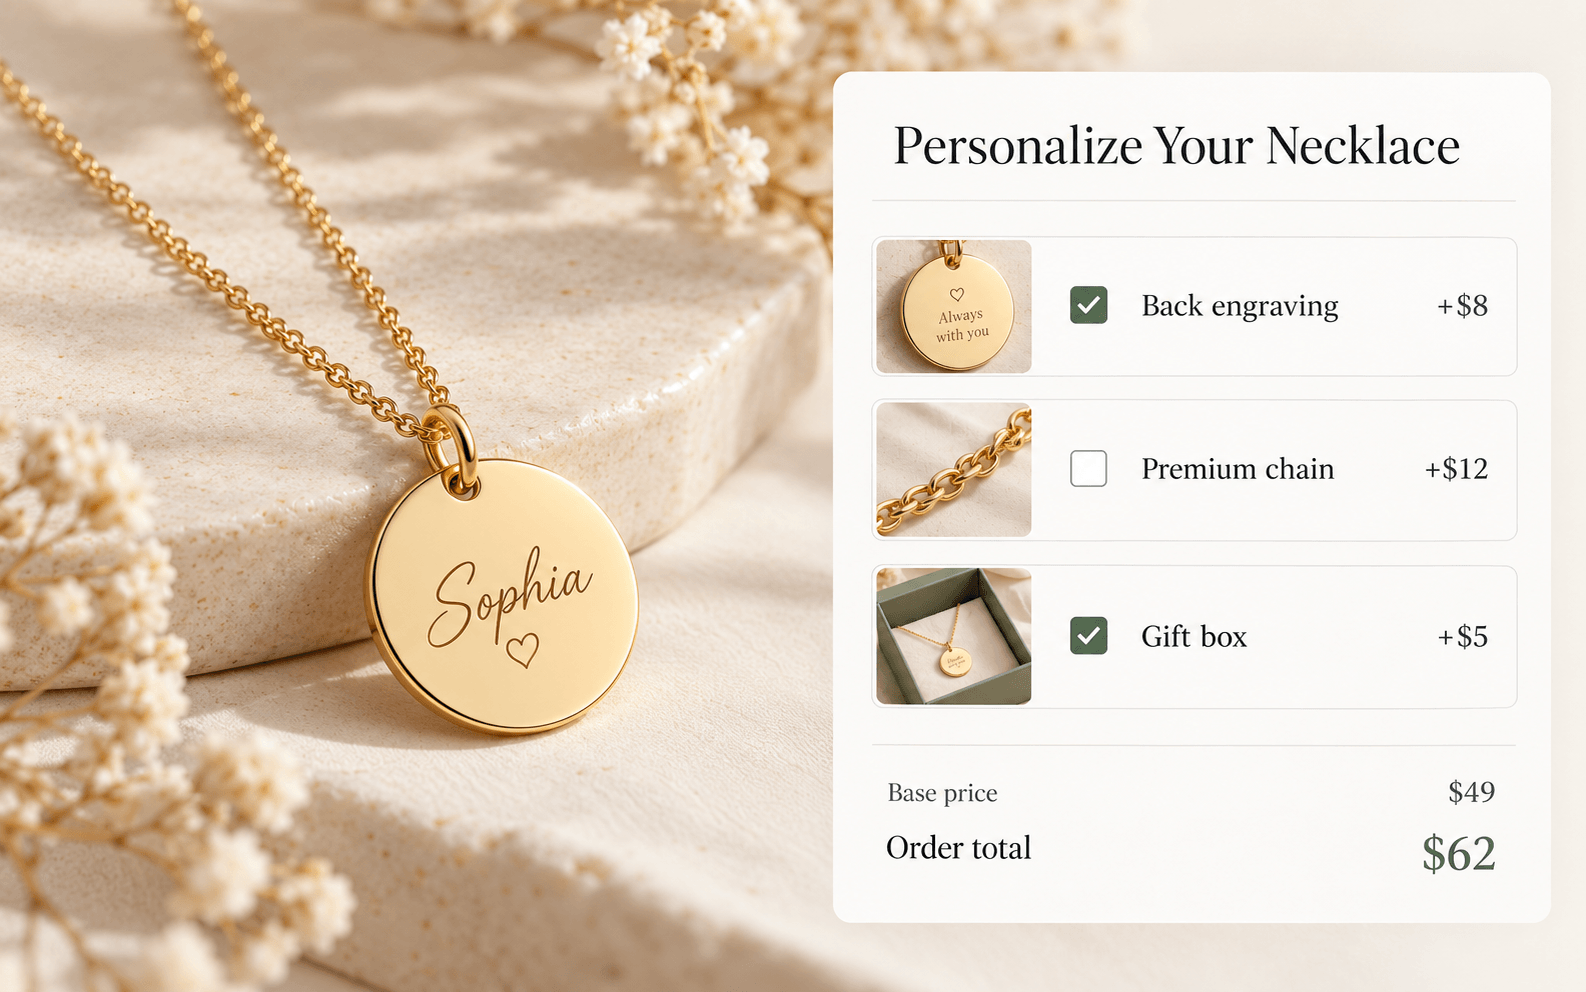
Common jewelry upgrades include:
- back engraving;
- a second name;
- a premium chain;
- a gift box;
- photo engraving;
- an extra charm.
Show the added price at the option, not as a surprise later in the cart.
If a choice materially changes the stocked product, such as a higher-grade chain with its own SKU, consider using a Shopify variant or a separate product relationship instead of treating it only as a fee.
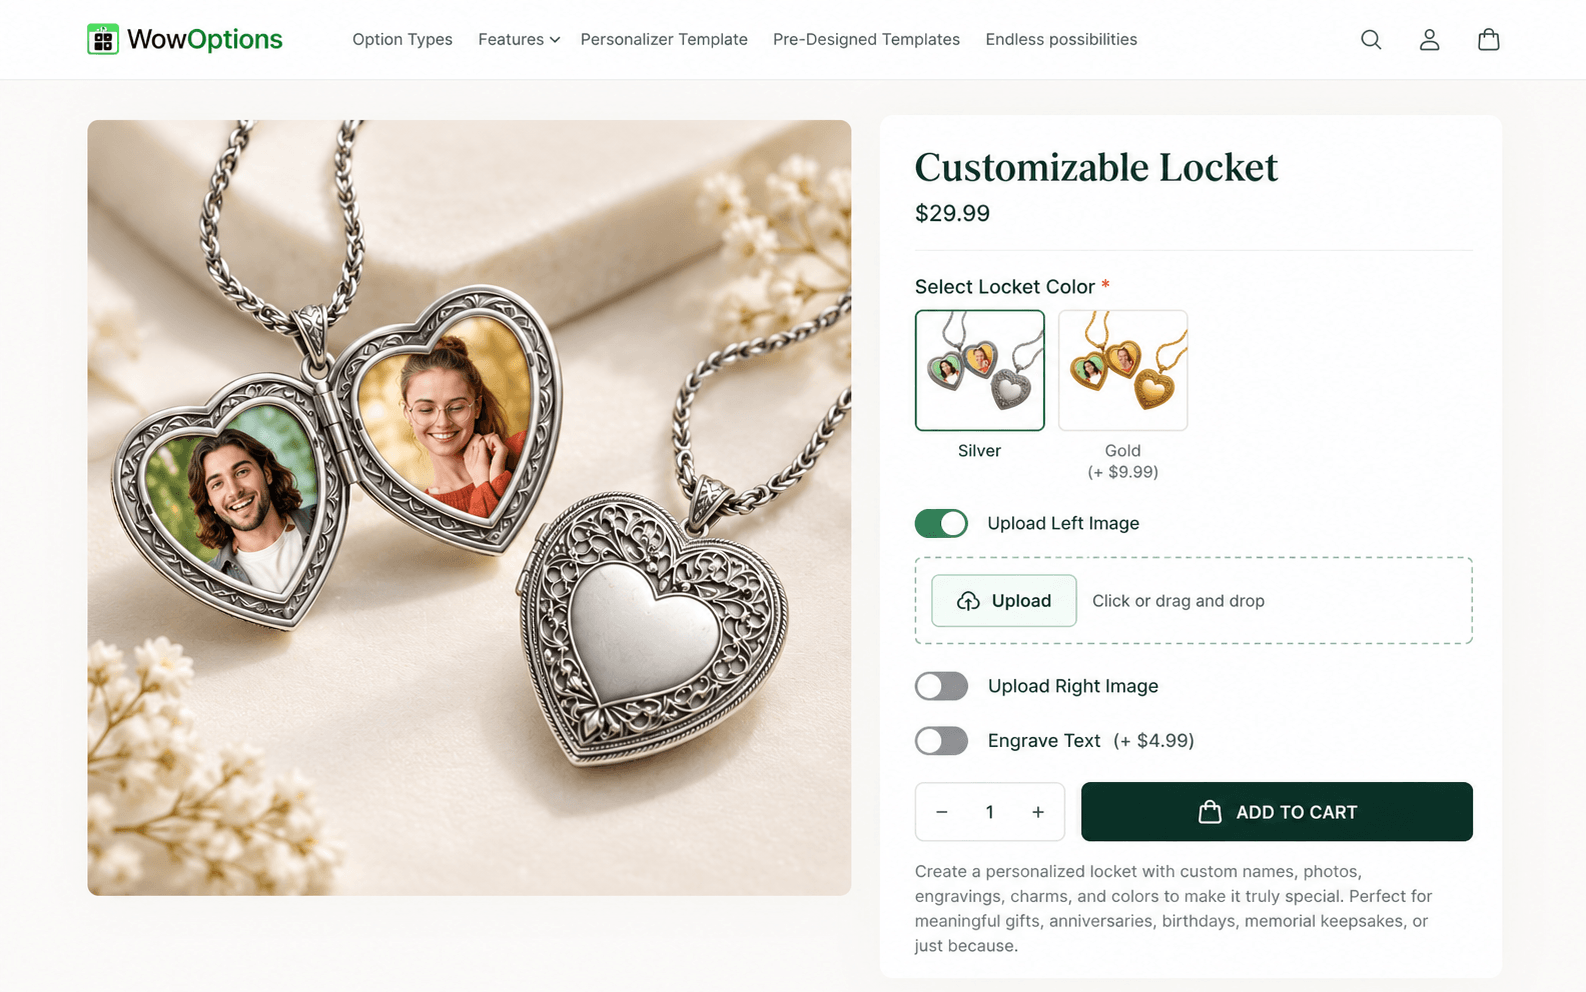
Step 9: Configure the live engraving preview
A live preview can be useful when customers choose text, font, color, placement, or an uploaded image.
WowOptions’ current Advanced plan includes Live Customizer. The supplied product source supports text and image layers, configurable placement, and a print-area concept. For jewelry, treat that visual area as the safe engraving region for the mockup.
Keep the preview honest. A storefront mockup can help the customer understand layout, but it should not be presented as a micron-accurate engraving proof. Real metal finish, engraving depth, reflections, and production tolerances will differ from a screen preview.
Step 10: Test fulfillment, not just the storefront
Place a test order that includes:
- the longest allowed text;
- punctuation or a date format;
- front and back engraving;
- a selected font;
- a paid upgrade;
- a mobile order.
If you support photo jewelry, place a separate test order with an upload.
Then verify that the order information is understandable to the person operating the engraving or production workflow.
A production team should not have to guess whether “12.06.24” means June 12 or December 6. If date format matters, label the field accordingly.
Example setup: personalized bar necklace
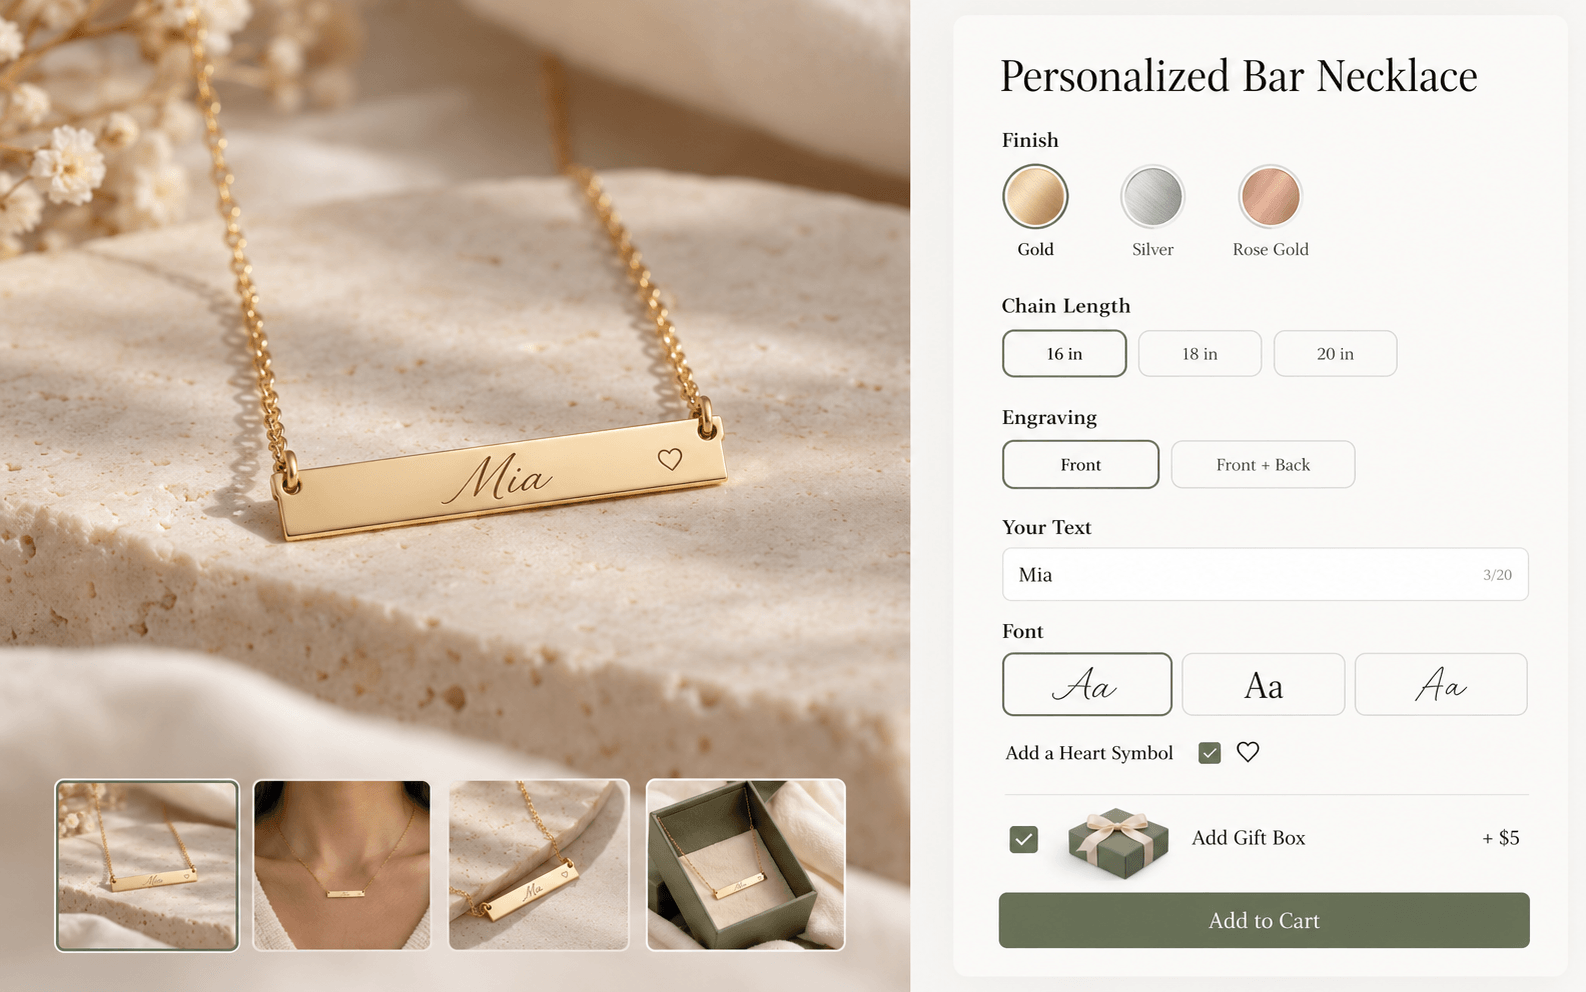
| Field | Control | Example |
|---|---|---|
| Finish | Shopify variant | Gold / Silver / Rose Gold |
| Chain length | Shopify variant | 16 / 18 / 20 in |
| Engraving | Radio | Front / Front + Back |
| Front text | Text input | “Mia” |
| Font | Font picker or buttons | Serif / Script / Sans |
| Small symbol | Image swatch | Heart / Star / None |
| Back text | Conditional text input | Appears only for Front + Back |
| Gift box | Checkbox | Optional paid add-on |
| Preview | Live Customizer | Shows text placement on pendant |
This is enough to create a useful product without asking the customer to make dozens of unnecessary decisions.
How to handle personalization that varies by jewelry design
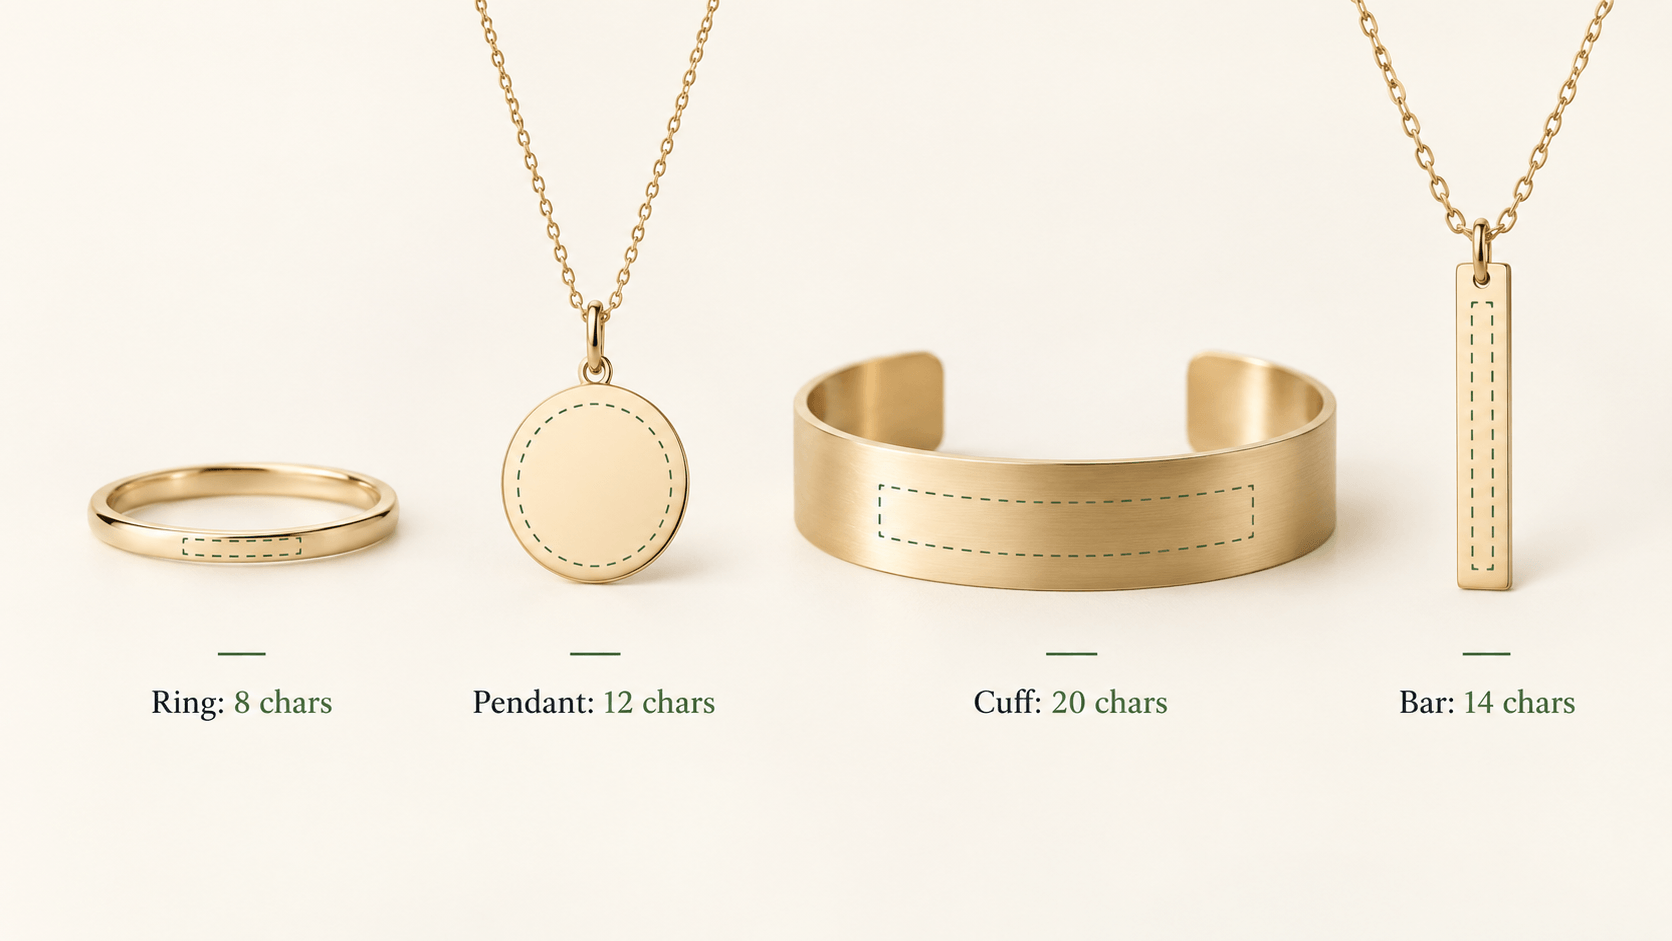
Do not assume one character limit fits every product.
A thin ring band, round pendant, wide cuff, and vertical bar necklace all have different engraving areas. Create separate option sets when the physical limits differ.
Reusable option sets are useful for products that genuinely share the same rules, such as a family of pendants made from the same blank. Reuse should reduce maintenance, not erase meaningful production differences.
When Shopify alone is enough
Shopify variants can be enough if the customer only chooses from predetermined products, such as:
- ring size;
- metal finish;
- chain length;
- a fixed charm design.
You need an options or personalization layer when the customer enters unique text, uploads a photo, chooses paid engraving, or needs conditional fields and a visual preview.
Shopify themes can collect custom line item properties through theme code, including monogram text and files. That developer route can work for simple cases, but it does not by itself provide the same no-code option management or visual personalizer. See Shopify’s product template documentation.
Where WowOptions fits
WowOptions is best suited to jewelry stores that want one app to handle custom fields and the visual personalization layer.
The current public listing positions it around 25+ option types, file uploads, swatches, paid add-ons, conditional logic, and live product personalization. Its Advanced plan is currently $12.99/month at the time checked.
That combination is useful for engraving workflows because the same product page can collect the text, control the font or symbol choices, add a price for extra engraving, hide irrelevant fields, and show a visual preview.
If your store requires manufacturing-grade 3D rendering, automated CAD, or a specialized engraving production system, treat WowOptions as the storefront input layer rather than a replacement for those production tools.
Common personalized-jewelry mistakes
Allowing too much text
Set limits from the physical piece, not from the app.
Offering fonts you have not production-tested
Every font changes spacing and legibility.
Using a generic “Notes” field for important engraving data
Give each required value its own clear field.
Making back engraving visible when it is not selected
Use conditional logic.
Treating the preview as a final manufacturing proof
Use it to communicate layout, then keep your normal production quality checks.
Forgetting mobile legibility
Jewelry previews are small by nature. Test whether the customer can still read and edit the engraving on a phone.
Frequently asked questions
Can Shopify collect engraving text without an app?
Should metal finish be a variant or an option?
Can I charge extra for back engraving?
Do I need live preview for personalized jewelry?
Can WowOptions preview engraving text?
Final takeaway
Personalized jewelry sells best when the product page respects the limits of the physical piece.
Keep inventory choices in variants. Collect engraving data in dedicated fields. Show only the options that apply, make extra charges obvious, and set text limits from real production tests. Then verify the order handoff before customers begin submitting names, dates, and photos you cannot easily correct later.
If you want those controls in one Shopify app, WowOptions combines custom product options with conditional logic, uploads, paid add-ons, swatches, and a live personalizer for engraving and other made-to-order jewelry workflows.