

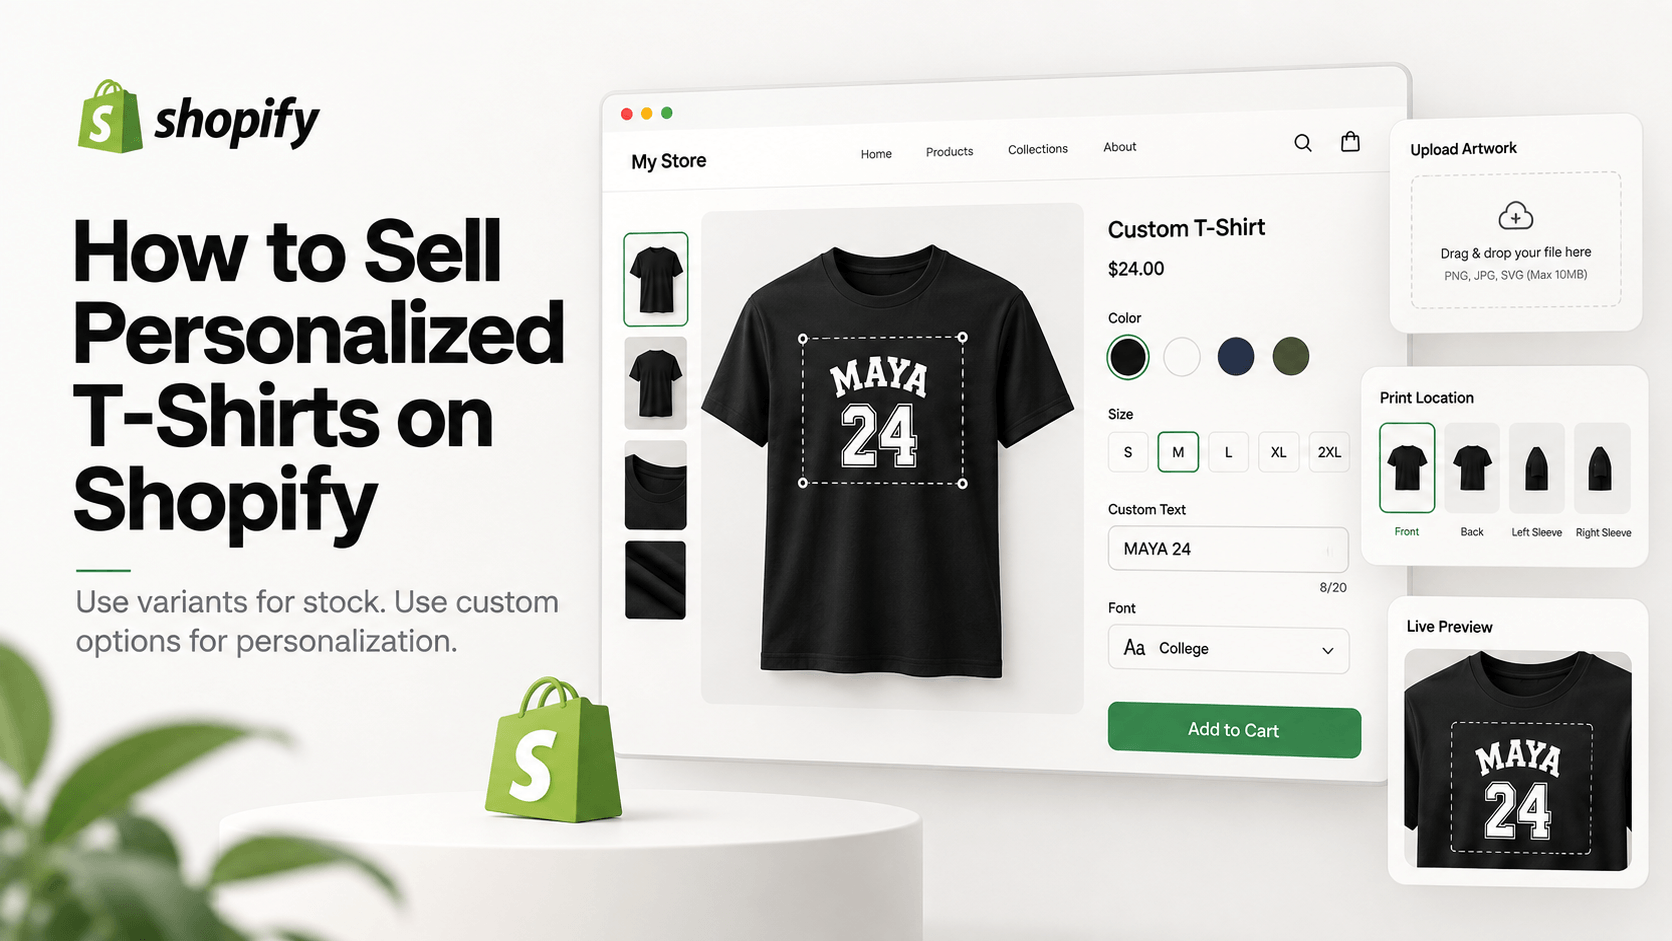
Selling personalized T-shirts on Shopify is less about adding a text box and more about creating an order your customer can understand and your production team can actually print. The shopper may need to choose a shirt size and color, enter a name, upload artwork, select a font, choose a print location, and pay extra for certain customizations. Those choices do not all belong in the same Shopify feature.
A clean setup separates inventory choices from personalization choices.
Quick answer
To sell personalized T-shirts on Shopify, use Shopify variants for inventory-tracked choices such as shirt size and garment color, then use a product-options app for custom text, artwork uploads, font selection, print location, add-on pricing, conditional logic, and live preview. Define your print area and artwork rules before you build the product page, then place a real test order and confirm that the personalization details reach Shopify admin clearly.
This guide uses WowOptions for the personalization workflow. Its current Shopify App Store listing includes 25+ option types, file uploads, swatches, conditional logic, paid add-ons, and a Live Customizer on the Advanced plan.
What you need to decide before setting up the T-shirt
The storefront cannot solve production decisions that have not been made yet.
Before creating the product, write down:
- available shirt sizes;
- available garment colors;
- print method, such as DTG, DTF, screen print, embroidery, or heat transfer;
- personalization types you will accept;
- maximum printable area;
- accepted artwork file formats;
- minimum image quality your workflow requires;
- text character limits;
- available fonts and print colors;
- whether front, back, sleeve, or multiple placements cost extra;
- which personalization combinations you cannot produce.
A customer-facing option should map to something your production process can deliver reliably.
Use Shopify variants for stock, custom options for personalization
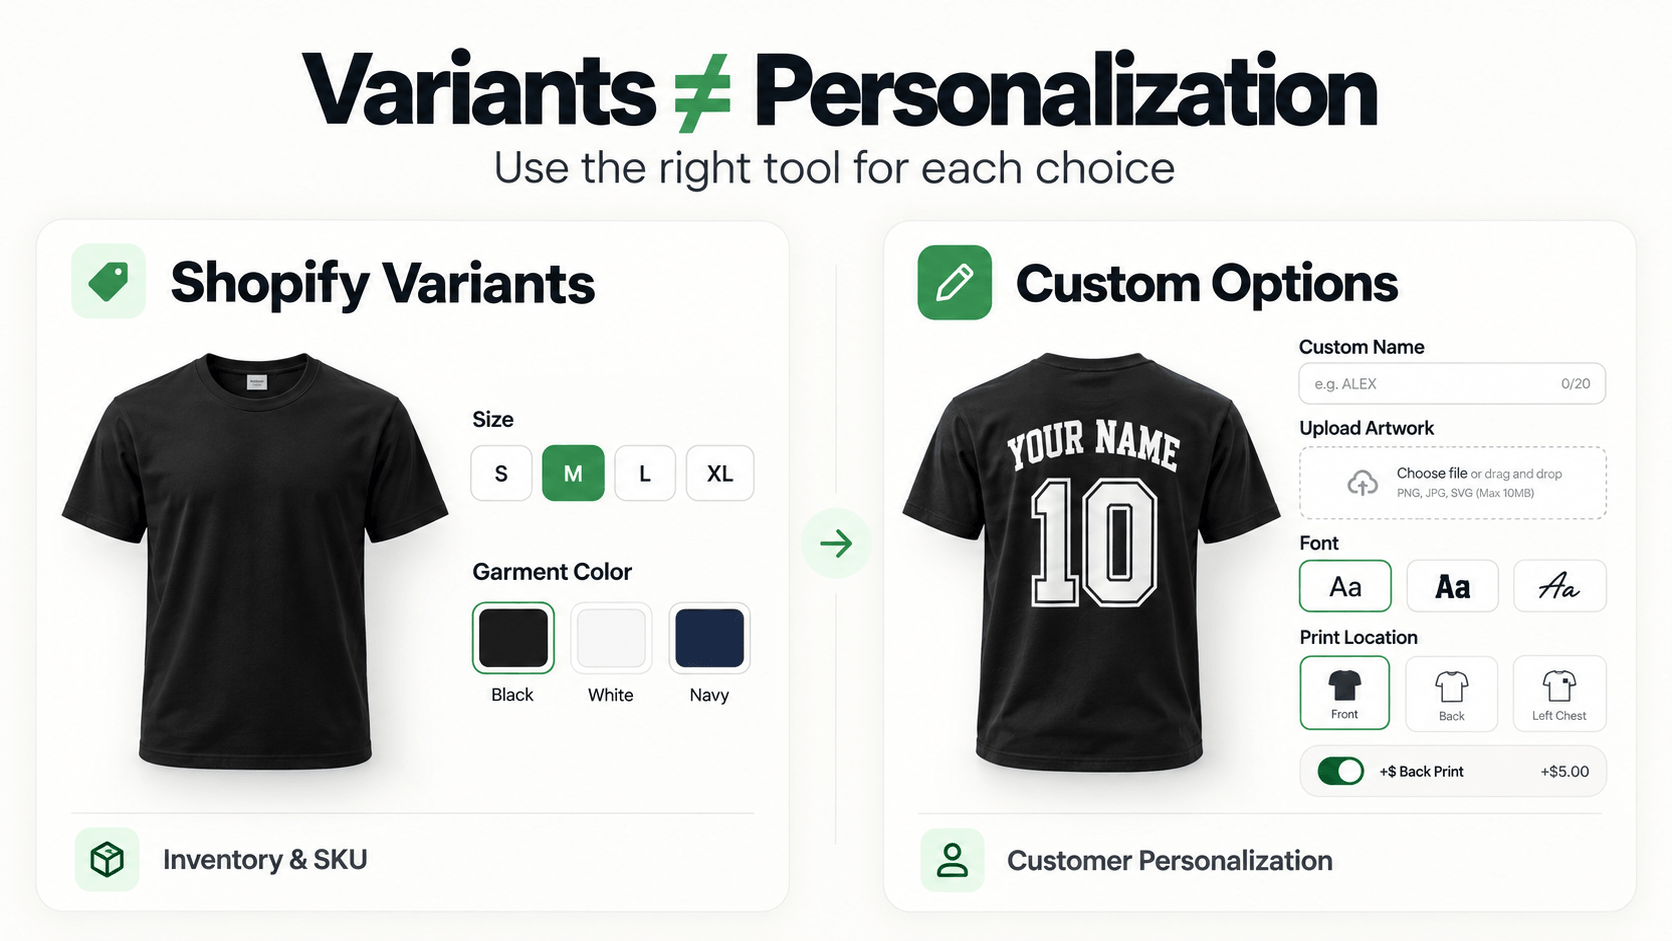
Shopify currently supports up to three product option dimensions and up to 2,048 variants per product. For a standard T-shirt, that is usually enough for inventory-driven choices such as Size and Garment Color. See Shopify’s variant guidance.
A sensible split looks like this:
| Choice | Recommended setup | Why |
|---|---|---|
| Shirt size | Shopify variant | Usually tied to SKU and inventory |
| Garment color | Shopify variant | Often tied to SKU and stock |
| Custom name | Product option | Customer-entered order data |
| Upload artwork | Product option | Unique to each order |
| Font | Product option | Personalization choice |
| Text color | Swatch / product option | Personalization choice |
| Print location | Buttons or radio | Can change price and production |
| Add back print | Conditional paid option | Only relevant when selected |
| Live design preview | Product personalizer | Helps shopper understand appearance |
Do not create a separate Shopify variant for every possible customer name or uploaded design. Those are order-specific inputs, not inventory variants.
Choose a T-shirt personalization model
A product page is easier to build when you start with one clear offer.
Model 1: Name or phrase shirt
The shopper enters text and chooses a font and color.
Good for:
- team shirts;
- birthday shirts;
- family reunion shirts;
- bridal party shirts;
- name or number tees.
Model 2: Customer artwork shirt
The shopper uploads an image or logo and may add supporting text.
Good for:
- photo tees;
- company or event shirts;
- customer-created artwork;
- memorial shirts.
Model 3: Template-based design
You provide the design, while the shopper changes a few controlled elements such as a name, date, number, or color.
This is often the easiest model to fulfill because you control most of the artwork.
Step-by-step guide: sell personalized T-shirts with WowOptions
Step 1: Create the base T-shirt product
Create your shirt in Shopify and add the inventory choices that belong in variants.
For example:
- Size: S, M, L, XL, 2XL;
- Color: Black, White, Navy, Sand.
Upload clean product photos for each garment color where possible. If the customer is going to preview personalization, the base product image should be simple enough that the preview remains easy to understand.
Step 2: Create a T-shirt personalization option set
Install and activate WowOptions, then create an option set for the shirt.
Give it a practical internal name, such as Personalized T-Shirt, Text + Upload.
Assign the option set to the relevant T-shirt product or to a collection if several products use the same personalization rules.
Reusable option sets are useful when the same text limits, font list, and upload requirements apply across multiple garments.
Step 3: Ask the shopper what kind of personalization they want
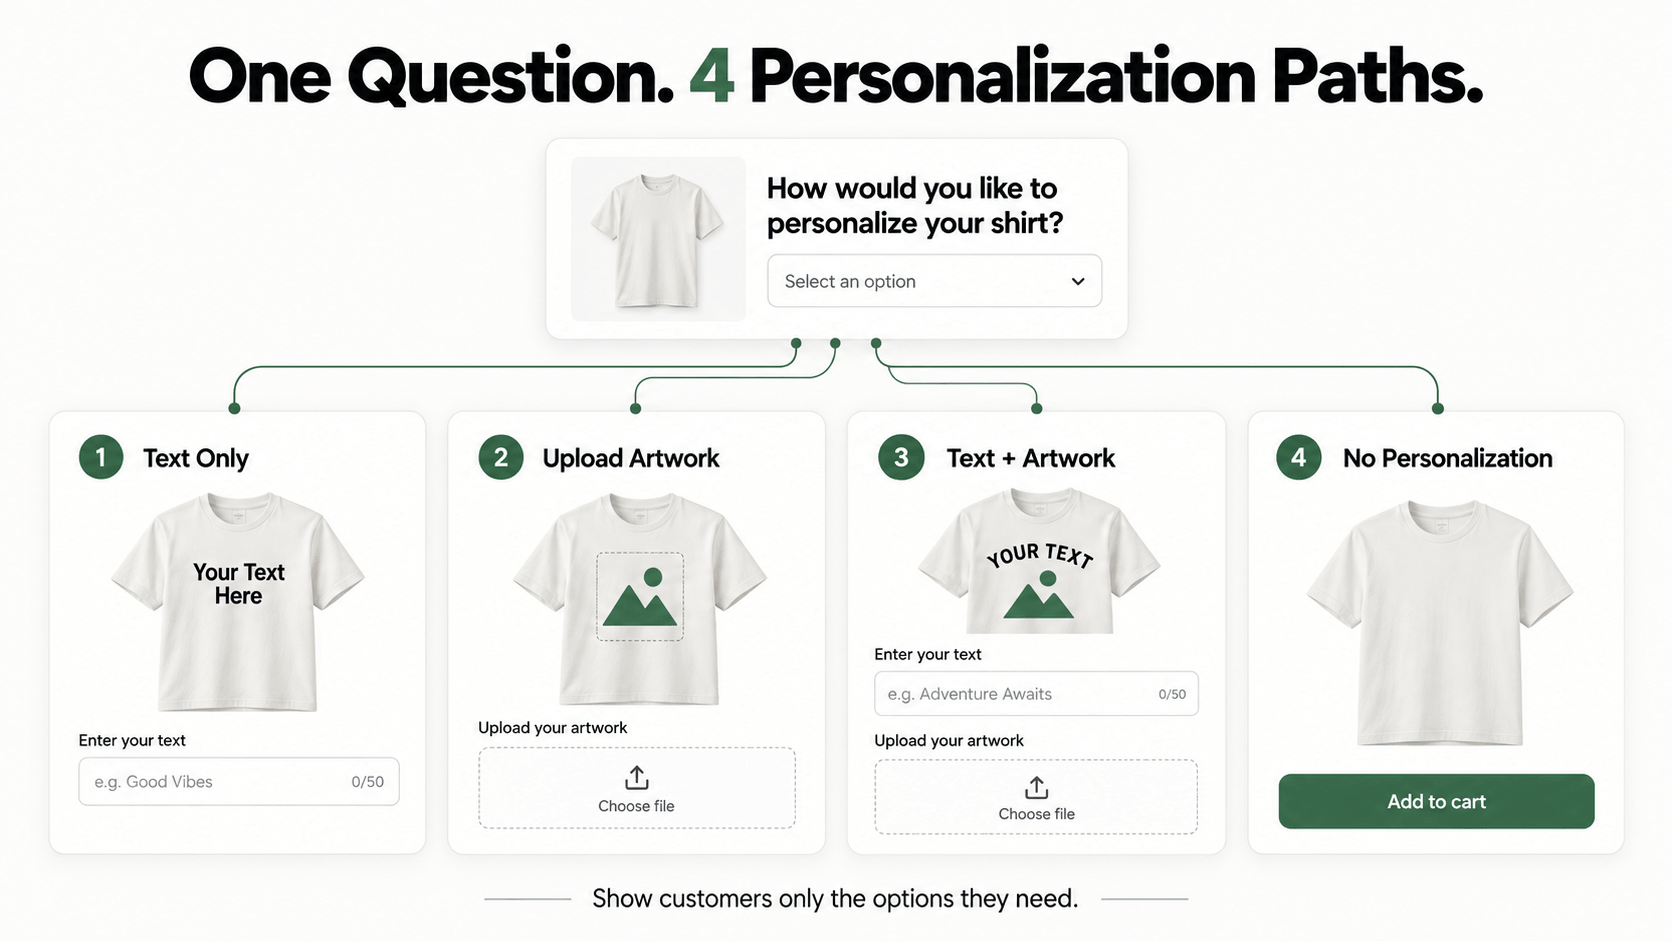
Instead of showing every possible input immediately, start with one choice:
How would you like to personalize your shirt?
- Add text only
- Upload my design
- Add text + upload
- No personalization
Buttons or radio controls work well because the choices are mutually exclusive and easy to scan.
Then use conditional logic to reveal the fields needed for the selected route.
For example, if the shopper chooses Text only, show the text, font, color, and placement controls. If they choose Upload my design, show the file upload and artwork instructions instead.
Step 4: Add custom text with a real production limit
Add a text input for the personalized name, phrase, or number.
Do not choose a character limit because it looks tidy in the app. Choose it based on the actual print area and font size you can produce.
A useful label might be:
Text for front print, maximum 18 characters
Add short help text if spaces, punctuation, emojis, or special characters are restricted.
If your production team needs text exactly as typed, state whether capitalization will be preserved.
Step 5: Add font and color choices
A font picker, buttons, or image swatches can make font choices easier to understand. Limit the list to fonts you are willing to produce.
The same principle applies to text color. A small set of reliable colors is usually better than offering an unlimited color picker when your print process only supports a fixed palette.
If customers can select any color but the printer cannot match it closely, the product page creates an expectation you cannot fulfill.
Step 6: Add artwork upload rules
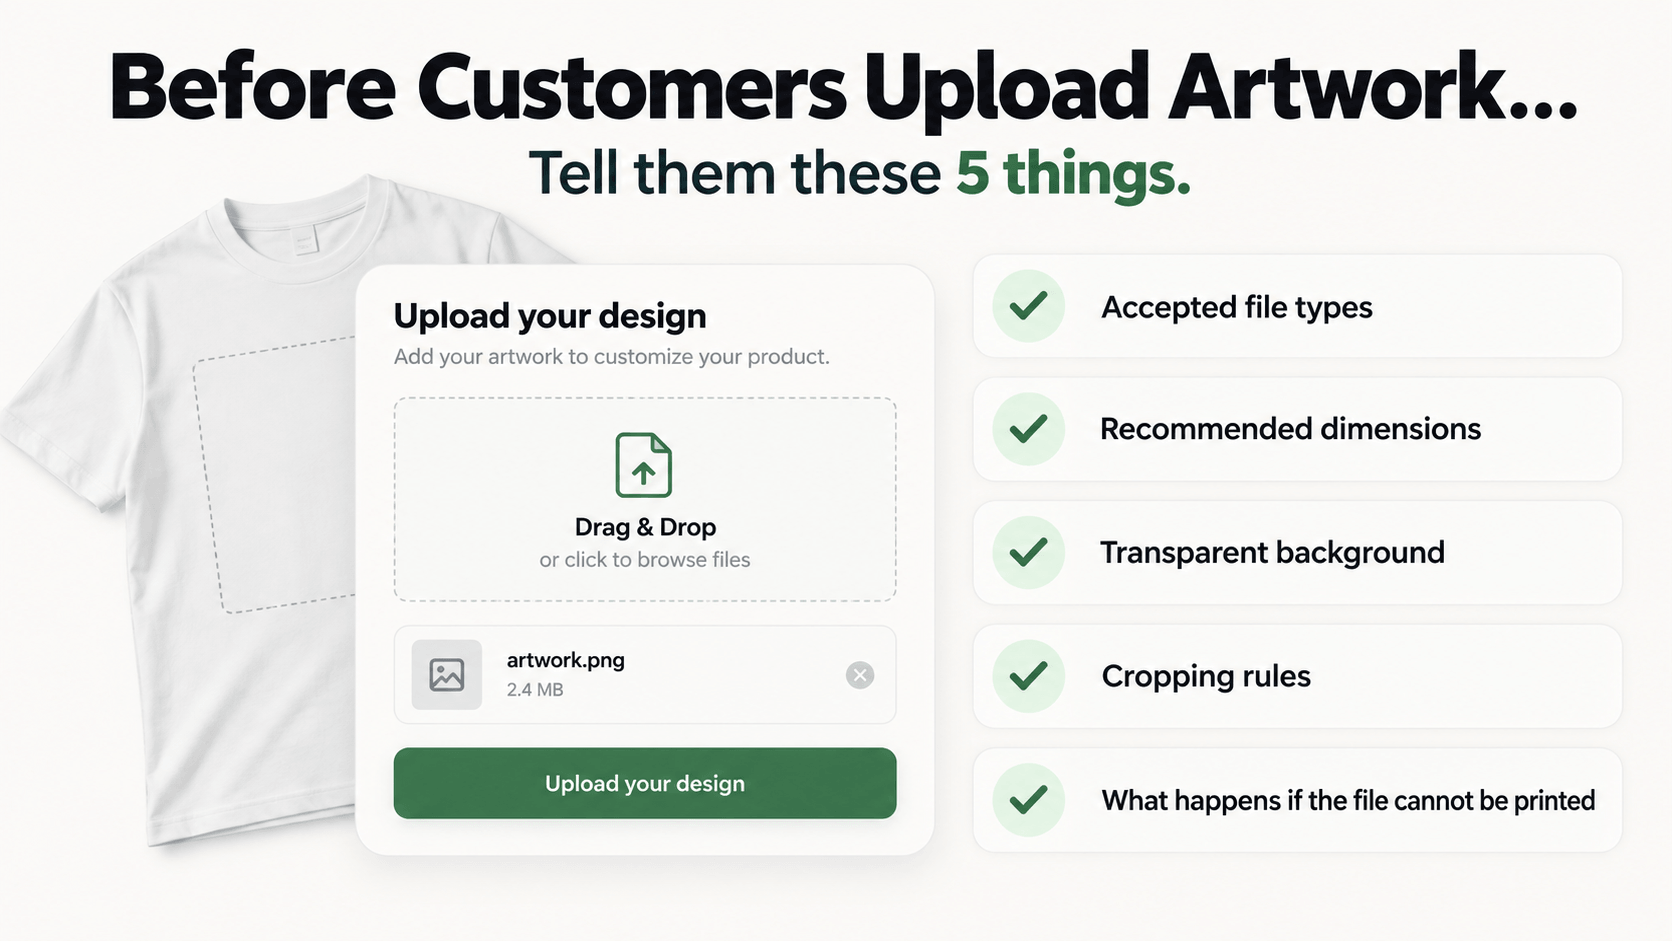
Use a file upload field when shoppers can submit their own design.
Near the uploader, explain what your production team needs. For example:
- preferred file types;
- whether transparent backgrounds are preferred;
- minimum recommended dimensions;
- whether screenshots are acceptable;
- whether you will crop the artwork;
- whether a designer will contact the customer if the file cannot be printed.
WowOptions’ current Pro plan lists file uploads up to 15 files at 10 MB each, while the current Advanced plan lists up to 25 files at 20 MB each. Most T-shirt products only need one or two uploads, but the current plan limits are useful if you sell multi-location or multi-image designs.
Step 7: Add print-location choices
Common choices include:
- left chest;
- center front;
- full front;
- back;
- sleeve.
Use buttons, radio controls, or image swatches so shoppers can distinguish the locations quickly.
If a back print costs extra, show the additional price directly beside that option. You can also hide the back-text field until Add back print is selected.
This makes the product page shorter and prevents an order from containing back-print text when the shopper never paid for a back print.
Step 8: Configure the live product preview
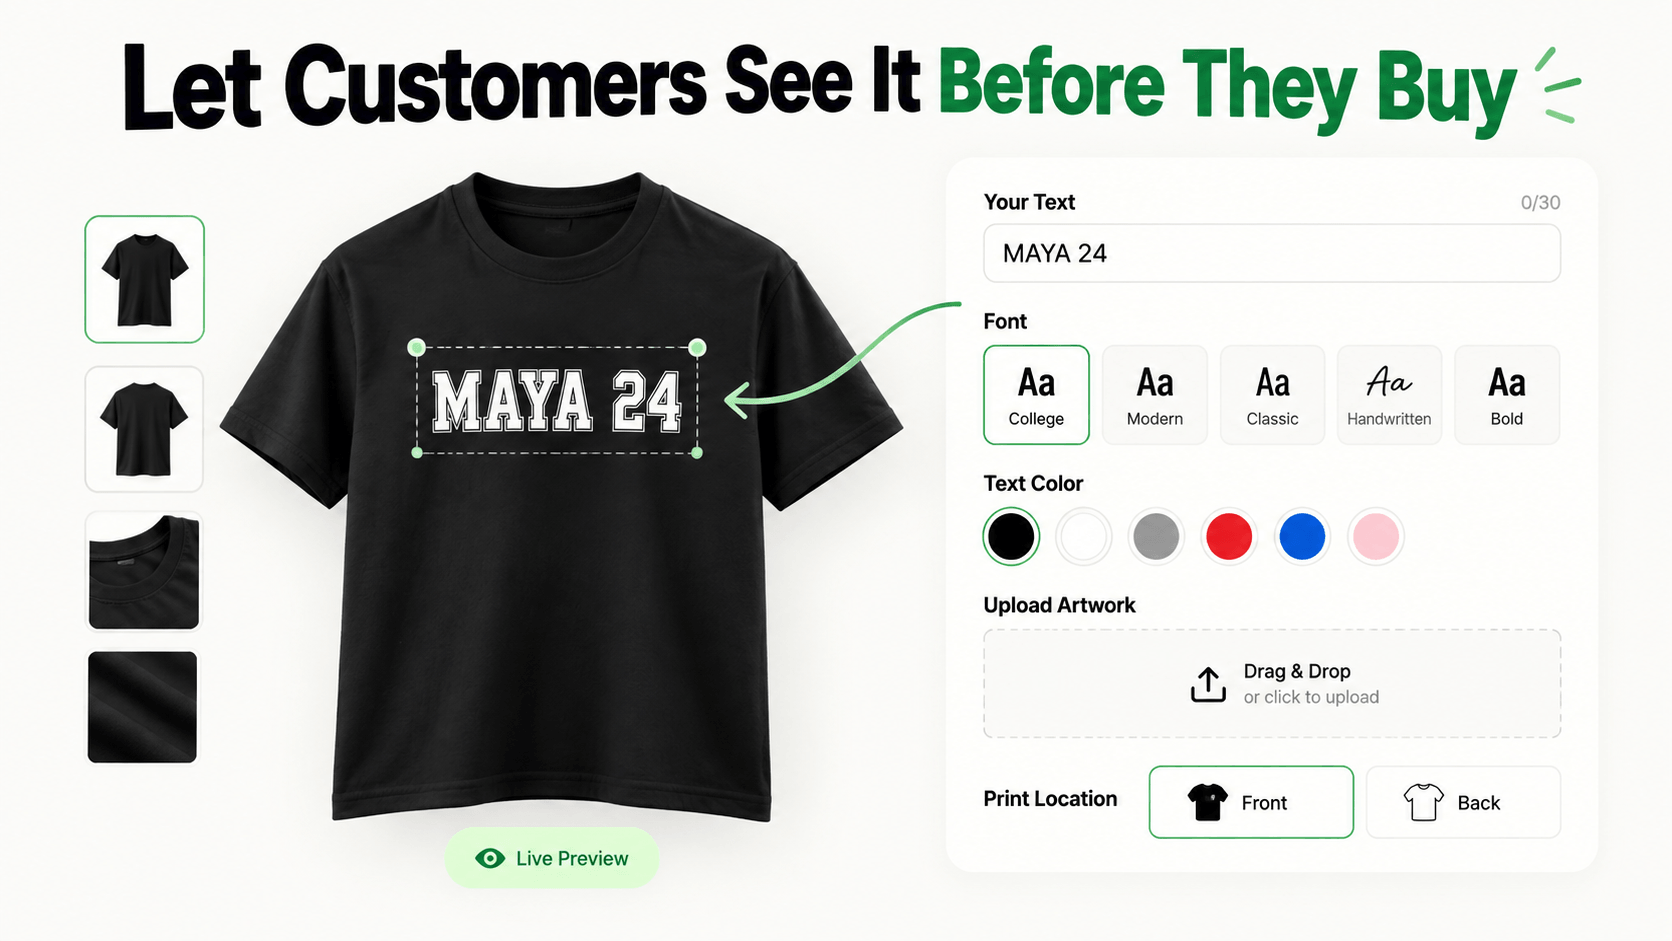
A live preview is particularly useful for personalized apparel because the customer is making visual decisions about text, images, placement, color, and scale.
In WowOptions, the current Live Customizer can connect supported text and image-based fields to a visual preview. The supplied product source also shows controls for positioning and customer editing such as move, resize, and rotate, along with print-area settings. Use those controls only where your production process allows the same freedom.
For example, if your printer supports one fixed 10 x 12 inch chest area, define that area rather than letting a shopper drag artwork across the entire shirt image.
A good preview answers “roughly how will this look?” It should not be described as a color-accurate manufacturing proof.
Step 9: Add paid personalization where the production cost changes
Possible paid upgrades include:
- back printing;
- sleeve printing;
- premium print size;
- embroidery instead of print;
- rush production;
- an extra uploaded image;
- premium garment upgrade.
Only charge for choices that have a clear production or product difference. The customer should be able to understand why the price changed.
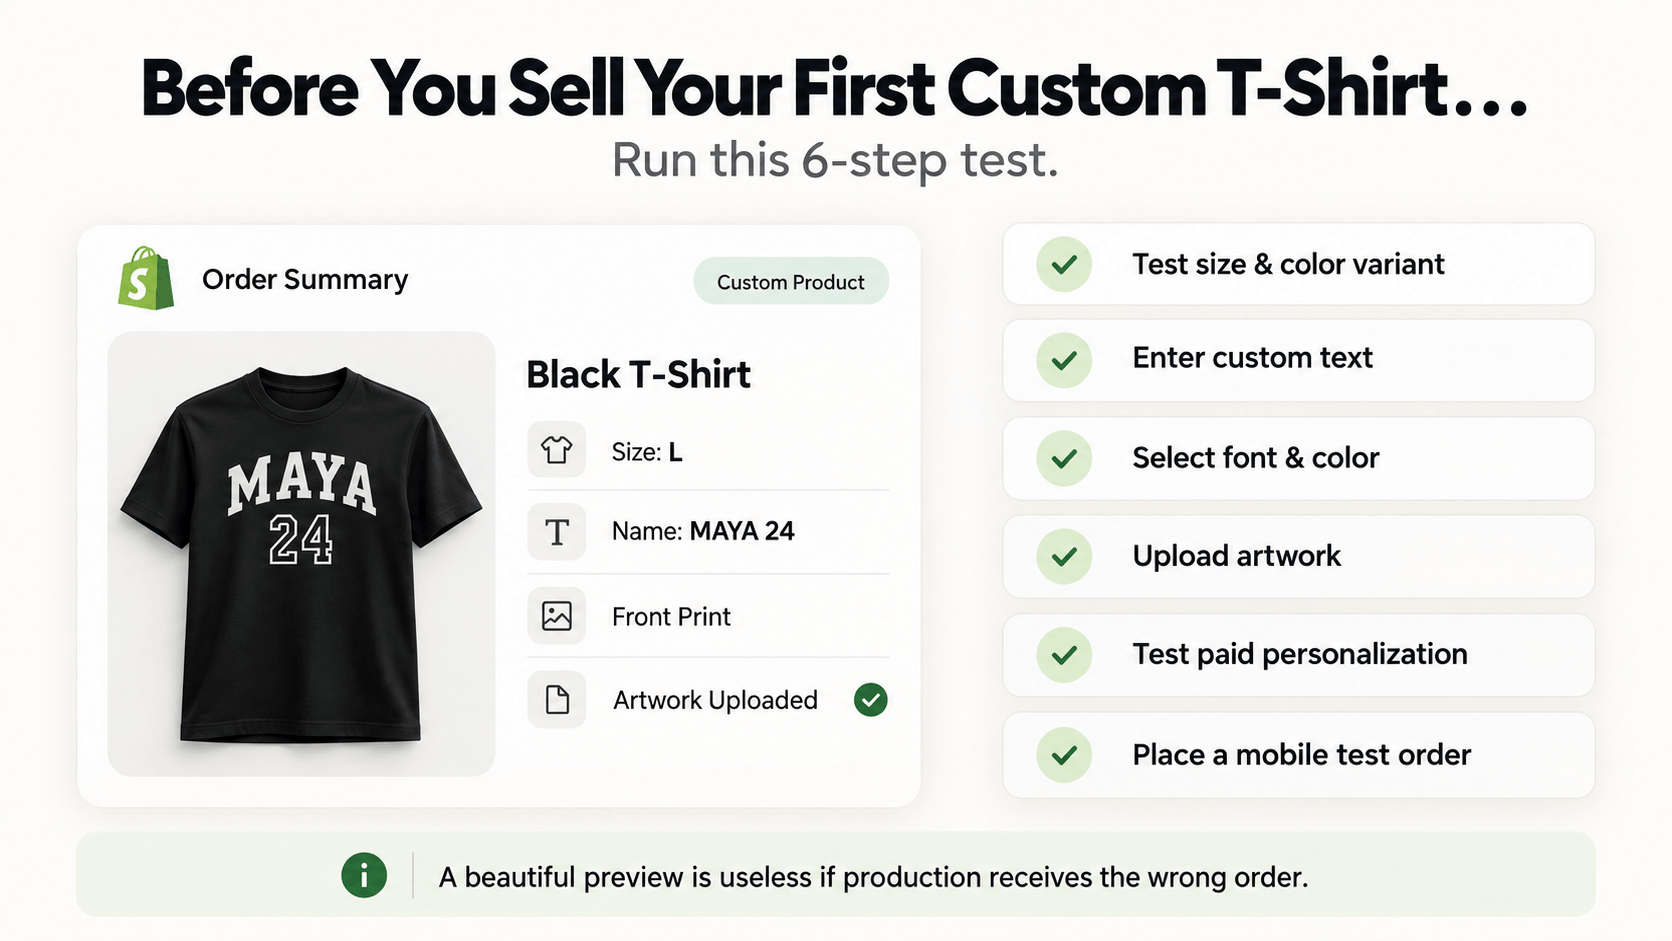
Step 10: Test the order handoff
Place at least one test order with:
- a standard variant combination;
- custom text;
- a selected font and color;
- an uploaded file;
- a paid placement;
- a mobile checkout.
Then verify the Shopify order record and your production handoff.
Ask:
- Is the custom text visible and unambiguous?
- Can the uploaded artwork be accessed?
- Is the selected placement clear?
- Is the paid upgrade represented correctly?
- Can the production team identify the correct shirt size and color?
A storefront that previews beautifully but sends an ambiguous order is not ready for paid traffic.
How to make the T-shirt product page easier to buy
Keep the first screen simple
The shopper should understand the base shirt, price, size/color choices, and personalization route without reading a manual.
Use examples near abstract fields
If a field says Name/Number, show a short example such as MAYA 24. Examples reduce interpretation without adding another paragraph.
Explain artwork requirements beside the uploader
Do not bury them in a general FAQ that the shopper may never read.
Use visual controls for visual decisions
Garment color, print location, and design style are easier to choose with swatches or buttons than long dropdowns.
Hide fields that do not apply
Conditional logic is especially useful for apparel because one product may support text-only, image-only, and multi-location personalization.
Personalized T-shirts: Shopify alone vs a product-options app
Shopify variants are enough if you only sell predetermined size/color/design combinations.
You need a product-options app when customers must provide order-specific information such as:
- names or phrases;
- uploaded artwork;
- font choices;
- design placement;
- optional paid personalization;
- conditional fields;
- live preview.
Shopify themes can also collect custom information with line item properties, including text and file inputs, but that route requires theme-level implementation and does not by itself provide a no-code visual personalization workflow. See Shopify’s product template documentation.
Where WowOptions fits
WowOptions is a strong fit for personalized T-shirt stores that want the option builder and live visual personalization in one app rather than combining a basic form app with a separate visual customizer.
Its current public positioning includes 25+ option types, file uploads, swatches, add-ons, conditional logic, and a Live Customizer. The current Advanced plan is $12.99/month at the time checked.
That does not mean every T-shirt store needs Advanced. If you only collect a short name and do not need live preview or advanced logic, a simpler plan or Shopify’s native features may be enough.
Frequently asked questions
Can I sell personalized T-shirts on Shopify without holding inventory?
Should size and color be Shopify variants?
Can customers upload their own image for a T-shirt?
Do I need a live preview for personalized shirts?
Can WowOptions show the customer’s text on the shirt?
Final takeaway
A personalized T-shirt product page should behave like a clear order form with a visual buying experience, not an open-ended design brief.
Use Shopify variants for what you stock. Use custom options for what the customer creates. Set real print limits, hide irrelevant fields, show added costs before the cart, and test the production handoff from beginning to end.
If you want to manage those choices in one Shopify app, WowOptions combines custom product options, file uploads, paid add-ons, conditional logic, and a live personalizer for stores selling personalized apparel.