

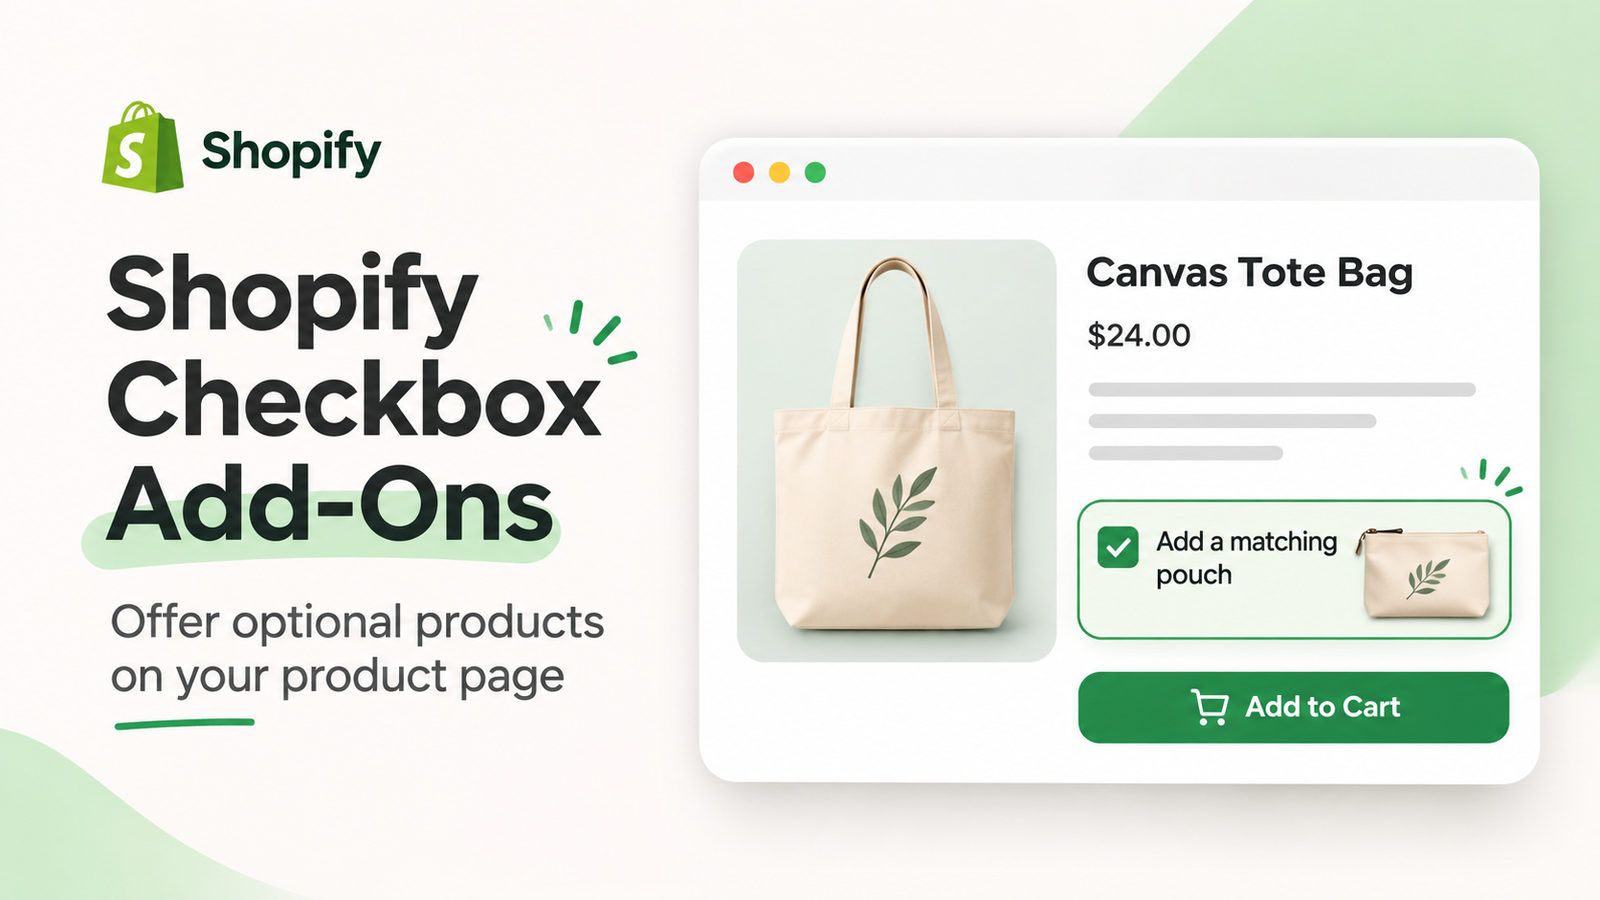
To let a shopper add a separate accessory with a checkbox, use a product-add-on app that connects the main product, accessory variant and price. In WowBundle, the control is Offer → Extras → Checkbox upsells.
The important part is the choice: a customer should be able to buy the main product alone, or select the accessory and see its variant and added price.
This guide focuses on product-page add-ons that sell an actual extra product, such as a pouch alongside a tote. It covers the app setup and a simpler no-app alternative.
First, decide what the checkbox should do
“Product add-on” can mean several different things:
| Customer choice | What you need |
|---|---|
| Add a matching pouch to a tote | A separate product add-on with its own variant and price |
| Enter a name to embroider on the tote | A customization field, with a charge if appropriate |
| Choose the tote's color | A variant of the main product |
| Add discounted socks only with the two-tee offer | A tier-specific add-on |
Here, we are setting up the first choice: selling a separate paid accessory. For engraving text, file uploads or other personalization fields, use a product options app instead. Those fields are not the same as a checkbox that adds a separate product to the order. The custom product options guide covers that route.
For an accessory that belongs only to one quantity choice, review the types of Shopify product bundles before choosing your setup. In WowBundle, the tier's Upsell control and Extras → Checkbox upsells are different settings.
Write down the offer before opening the editor
Choose one main product and one relevant accessory to start. Check:
- Which accessory variants can the shopper select?
- What is the accessory's normal price and offered price?
- Can the shopper decline it without changing the main purchase?
- Should it be offered alongside every quantity choice or only one tier?
Our demo uses a Loop Tote at Tk 1,400 and an optional Transit Pouch, normally Tk 1,500, offered at 20% off for Tk 1,200. One tote plus one pouch therefore costs Tk 2,600 before any checkout charges.
All prices in this walkthrough are the demo's Bangladeshi taka (Tk/BDT). They are examples of the offer's behavior, not sales or revenue results.
Apps to Evaluate for Product-Page Add-Ons
A checkbox add-on sells another product. Some tools use a checkbox; others use a list, a popup or an add-to-cart button. Choose the layout before choosing the app.
| App | Where it fits | What to check |
|---|---|---|
| WowBundle | An accessory alongside a product-page quantity offer | Optional default, variant choice and added price |
| Selleasy | Product-page add-on lists and related-item offers | Whether the customer can skip the extra and the final cart lines |
| Candy Rack | Upsell and cross-sell offers on product pages or in the cart | Chosen placement and how the buyer accepts the offer |
| Bundler | Quantity and bundle offers with related product offers | Add-on display for your exact theme and plan |
The tote-and-pouch walkthrough uses WowBundle because the accessory belongs beside its quantity choices. If you need a typed engraving field, compare product options apps, not these linked-product offers.
Method 1: Use an app for the linked checkbox
Choose an app based on how you want to present the accessory. A product recommendation list, a custom-options form and an add-on beneath quantity tiers can all sell extra products, but they create different buying experiences.
Use WowBundle’s offer-level checkbox for the tote-and-pouch example below. Keep one relevant accessory and its price clear while you build the first offer.
Step 1: Open the offer for your main product
Open WowBundle and choose the offer you want to edit. If you haven't created an offer yet, follow the quantity-offer setup guide, then return here to add the accessory.
In Offer → Applies to, choose the appropriate targeting. For a first accessory offer, Specific products makes it easier to limit the offer to the intended product. In this example, the target is the Loop Tote, not the pouch.
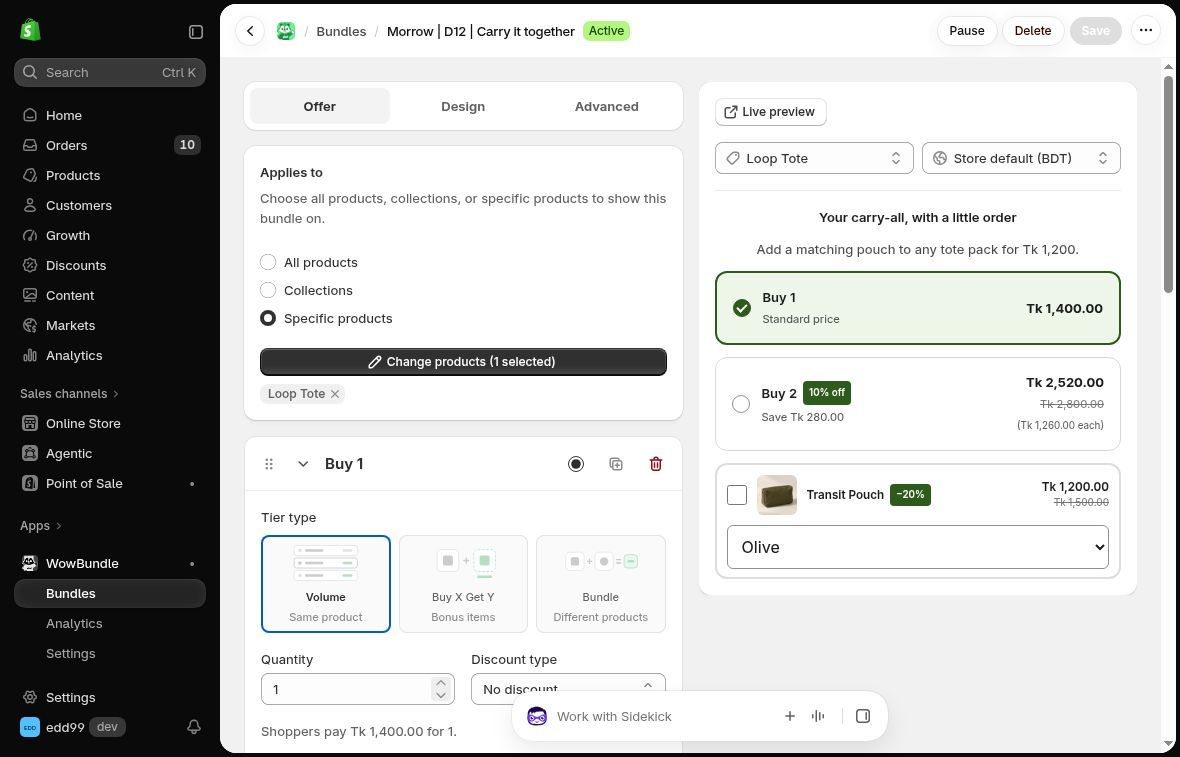
This saved offer targets Loop Tote and shows the optional pouch beneath its quantity choices.
Keep a sensible main-product choice available. Our example has one tote at its regular price and a two-tote quantity offer. The pouch remains an additional choice below those tiers.
Step 2: Check the theme connection
Go to WowBundle → Settings and check Theme setup. The app embed needs to be enabled for the theme you're using. If it is already on, Manage embed lets you reopen the theme settings.
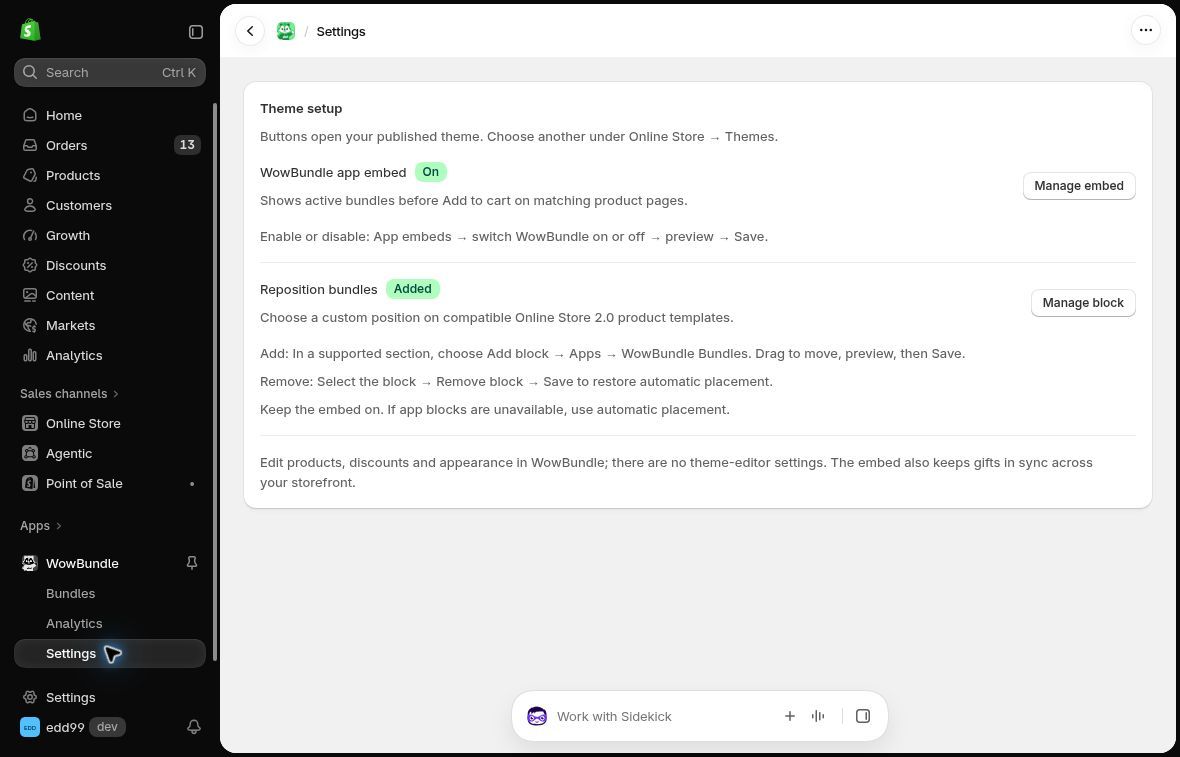
The enabled embed connects the app to the theme. The optional block is a separate placement control.
If you use the WowBundle Bundles app block to choose a position, keep the embed enabled and check the product template assigned to the tote. Don't assume a block added to one template appears on every product.
Shopify also requires app embeds to be enabled again when you switch themes. Its theme app documentation explains embeds and blocks. For the checkbox, choose a position where shoppers can see the accessory and its price while making their purchase decision.
Step 3: Enable Checkbox upsells and choose the accessory
Return to the offer and open Offer → Extras → Checkbox upsells. Enable the option, choose the accessory product and set its discount. Then check the text shoppers see in the preview.
For the demo, the accessory is Transit Pouch with a 20% discount. At a regular price of Tk 1,500, the offered price is Tk 1,200.
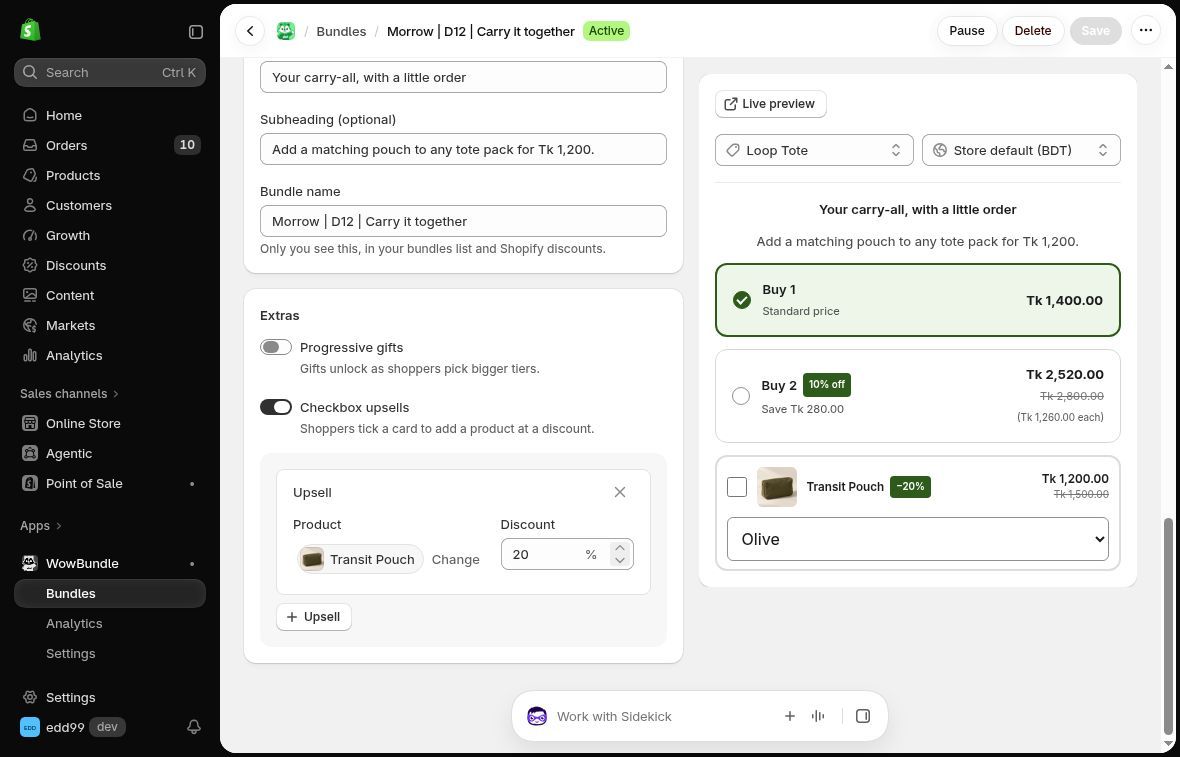
The control selects the accessory product and its discount. The preview shows how the optional choice will appear.
Read the product name and price as a shopper would. The choice should make clear which accessory is being added and what it costs. If your accessory has variants, make sure the choices are understandable and available.
The main-product tier's default selection and the accessory checkbox are separate decisions. Choosing one tote does not select the pouch; the customer chooses that separately.
Step 4: Publish within a controlled test scope
Before testing cart behavior, use Specific products to limit the offer to a designated test product with the intended accessory. Keep the offer out of wider promotions while you check it. This limits exposure; it does not make the product private.
For a new draft offer, Publish makes the offer available on eligible product pages. For an existing active offer, Save applies changes to the live offer. Review the targeting before either action, then test the storefront and cart as described below.
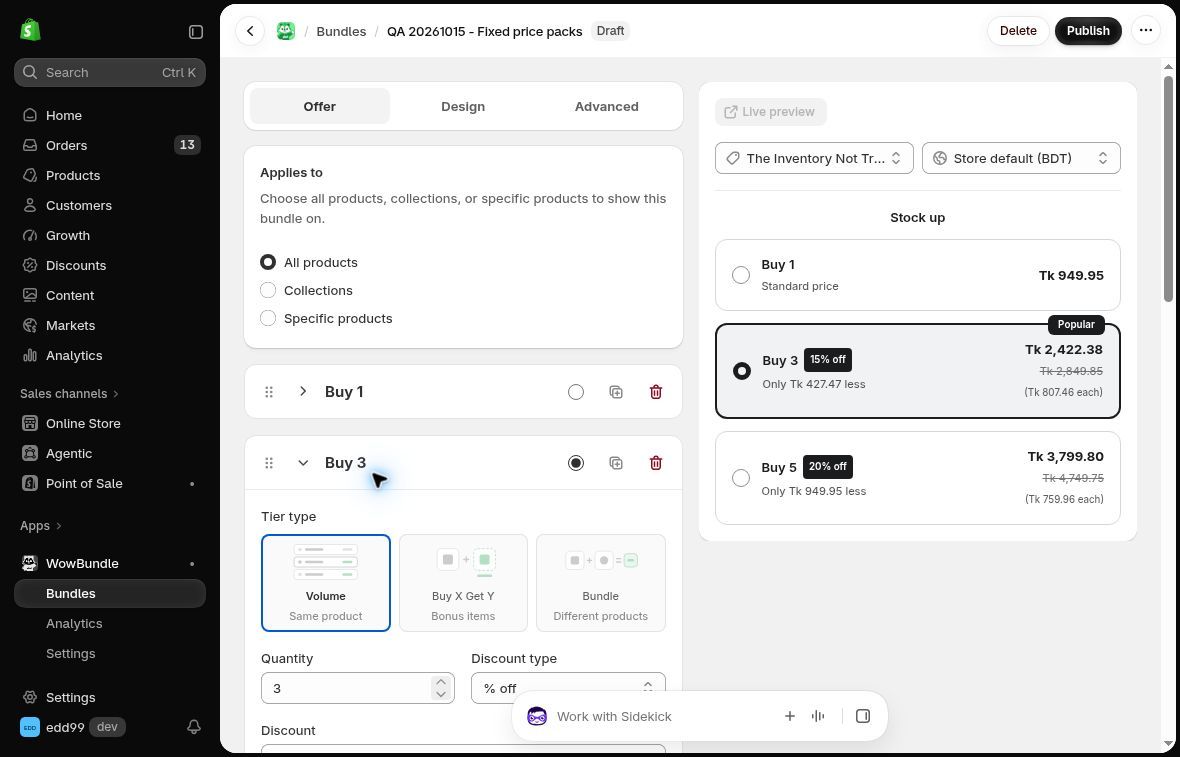
The Publish control appears on a draft offer.
The targeting screenshot above shows an already Active offer, with Pause available.
Step 5: Review the optional choice
The pouch starts unchecked in this example, with its own price and variant selector. Shoppers can leave it out or choose the accessory they want.
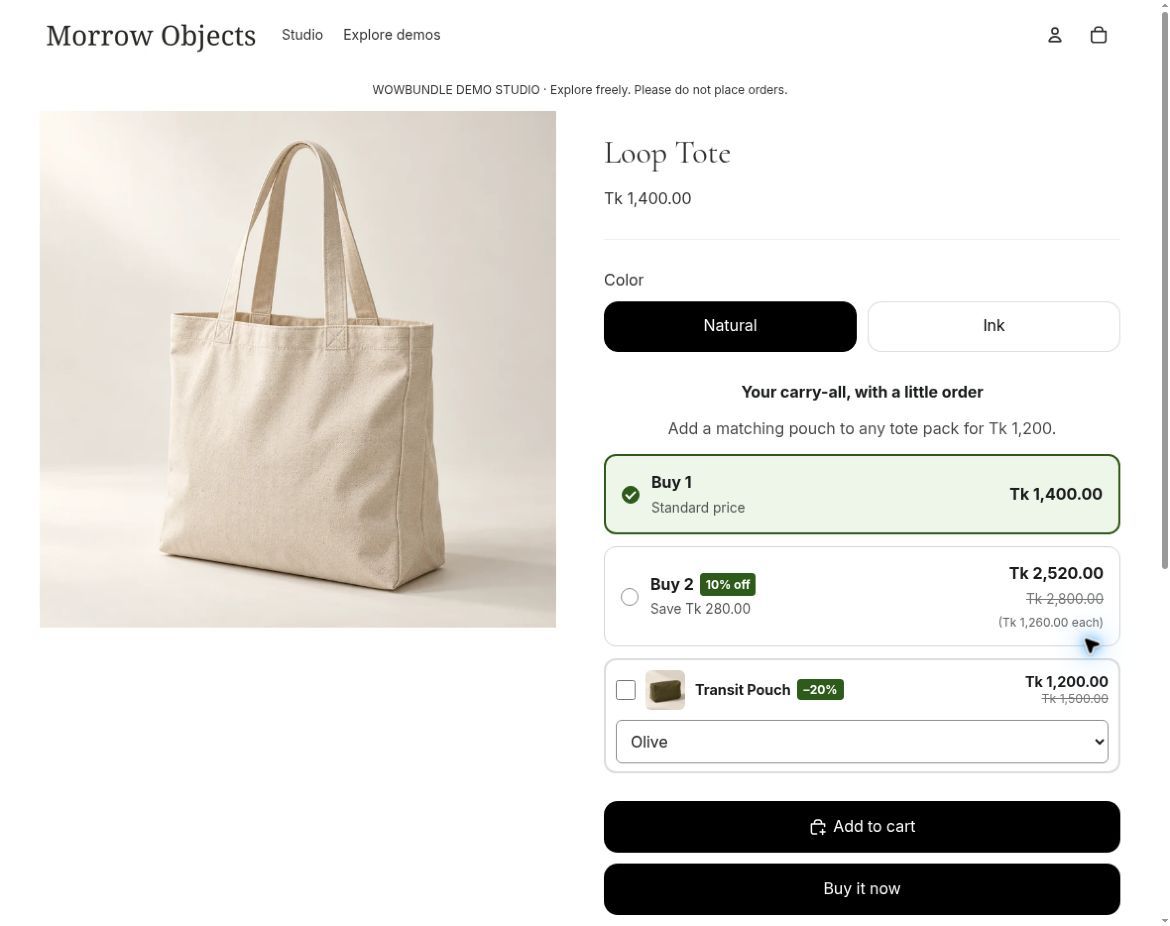
Leaving the checkbox clear lets the customer buy the tote without the pouch.
Test both choices: leave the pouch unchecked and confirm that only the tote is added, then select the pouch and confirm its variant, price and the combined total. After those checks pass, apply the intended production targeting and save before promoting the offer more widely.
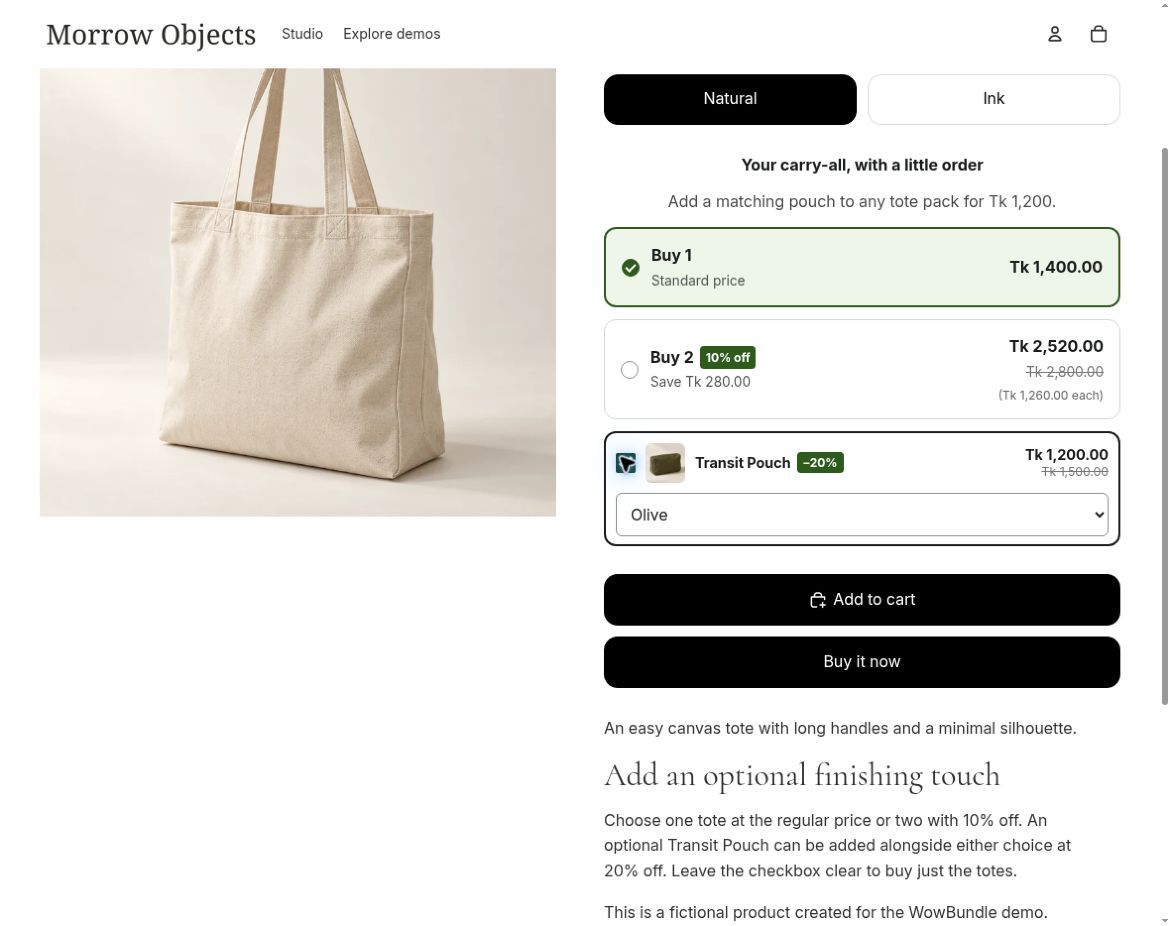
The checked pouch is an optional paid item. Its selected state is separate from proof of the cart contents.
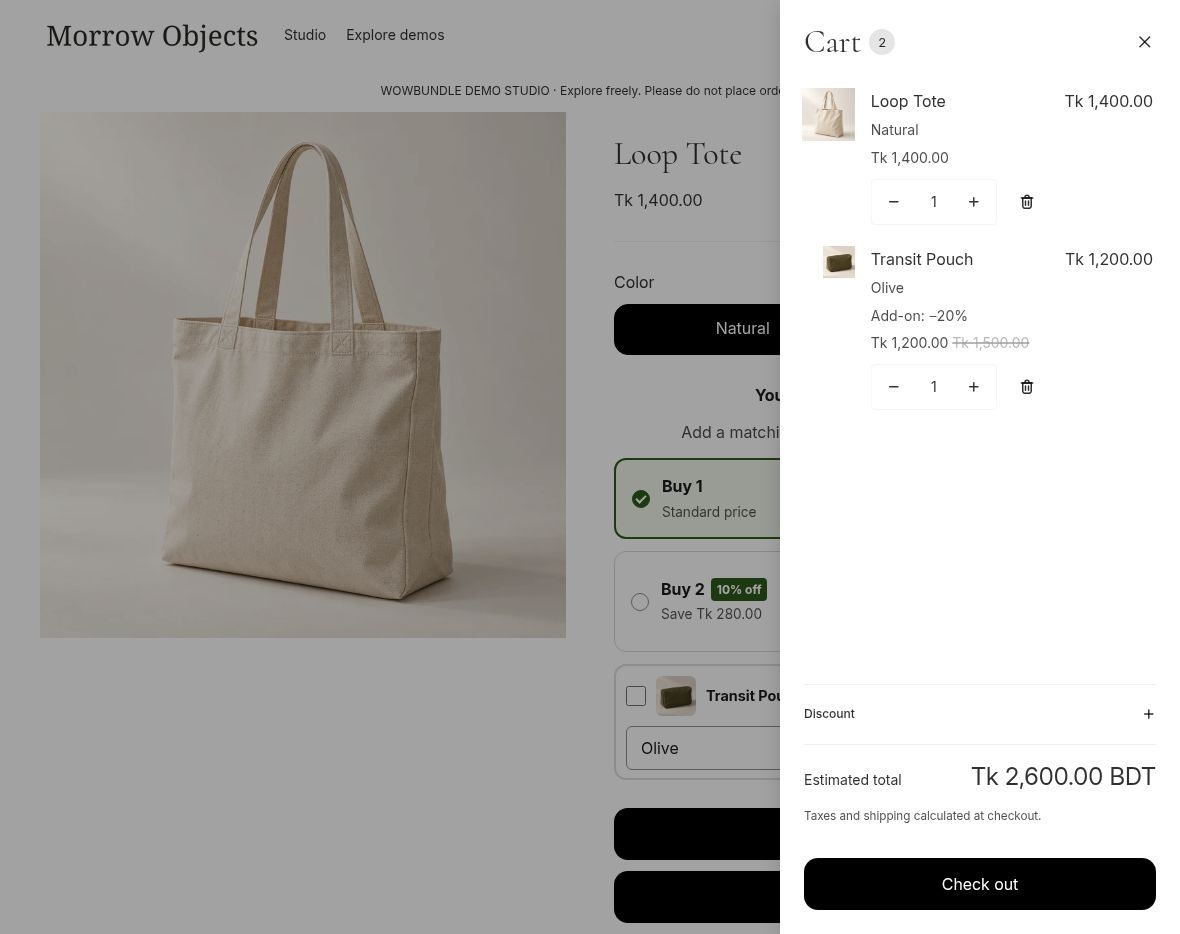
The recorded cart contains both selected items. Its Tk 2,600 BDT estimated merchandise total excludes tax and shipping calculated at checkout.
Method 2: Recommend the accessory without an app
If you don't need a linked checkbox yet, add a clear accessory link to the main product's description. This is a simple no-app way to help shoppers find a matching item.
In Shopify admin, open the main product under Products. Add a sentence such as “Keep small items together with the matching pouch.” Select the words that should be clickable, open Additional controls (the ellipsis) in the description editor, and choose Insert link. Enter the accessory's product URL in Link to, then insert the link. Save the product and open the link on the storefront to check it.
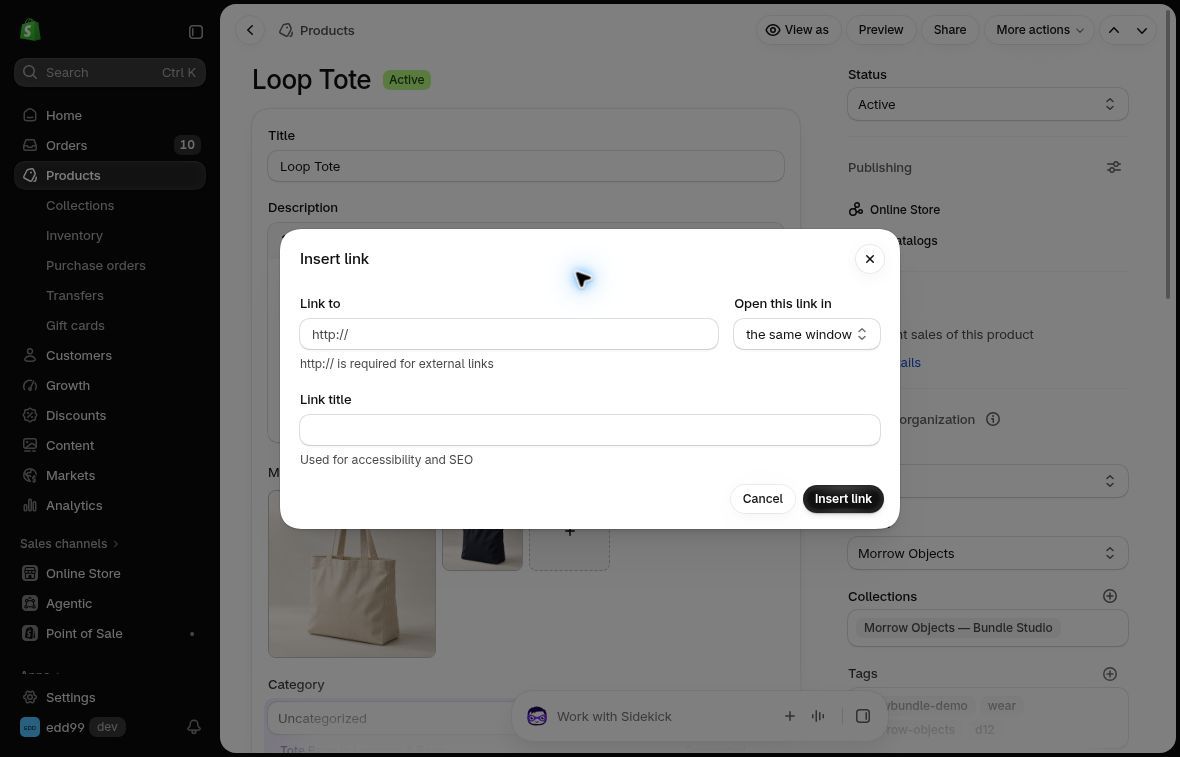
Use the accessory's storefront URL in Link to.
Shopify documents these controls in its rich text editor guide.
The limitation is important: the customer visits the accessory page and adds it separately. The link doesn't create a checkbox, add both products together, apply a special accessory discount or link their removal. If those behaviors are the reason for your offer, use the app method.
Some themes also have recommendation sections, and Shopify's Search & Discovery app can manage complementary products. Search & Discovery is still an app. A recommendation card or quick-add button should not be assumed to provide the same behavior as a linked checkbox offer.
Common questions
Can I make the add-on optional?
Yes. In this WowBundle example, the pouch is a checkbox choice and starts unselected. The customer can buy the tote alone.
Can the accessory have its own variants?
The demo’s pouch has a variant selector, so the shopper can choose an available option for the accessory.
Why isn't the checkbox showing?
Start with the intended offer and product: is the offer active, does it target this product, and is the embed enabled in the current theme? Then check the product template and whether the accessory is published and available. The Shopify bundle launch checklist includes checks for targeting, theme placement and mobile storefront behavior.
Why is the cart total different from the preview?
Compare the selected tier, accessory variant, quantity and discount first. Separate the merchandise subtotal from tax and shipping. If another discount is involved, check its eligibility and combination settings rather than assuming every discount will stack. Use the Shopify bundle launch checklist to compare product-page, cart and checkout prices. The fixed-price vs percentage discount guide can also help check the chosen pricing mode.
Is this the same as a tier-specific upsell?
No. This guide uses Extras → Checkbox upsells at the offer level. If the accessory should be tied to one quantity choice, use the tier-level workflow.
Keep the extra purchase clear
A useful checkbox offer names the accessory, shows its price and respects the shopper’s choice. Start with one relevant product and keep the base purchase easy to understand.
Explore WowBundle on the Shopify App Store for quantity offers and optional product add-ons, then keep the main-product purchase as straightforward as it was before you added the extra.